- 1. Install Active Directory Certificate Services (ADCS)
- 2. Configure Active Directory Certificate Services
- 3. Configure Active Directory Certificate Enrollment Settings
- 4. Configure Active Directory Server Authentication Enrollment Settings
- 5. Server KDC Enrollment
- 6. Agent Service Installation
- 7. Optional: Disabling password-based authentication
- 8. Credential Provider Installation
1. Install Active Directory Certificate Services (ADCS)
1.1. ADCS installation Steps
- Login as an Enterprise Administrator
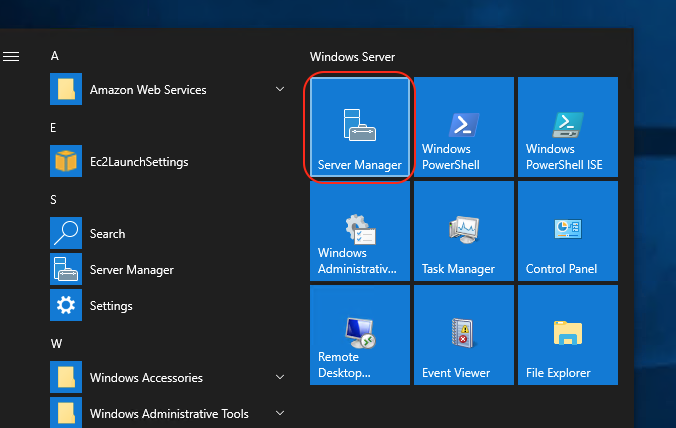
- Open the Server Manager on the Active Directory instance to be used
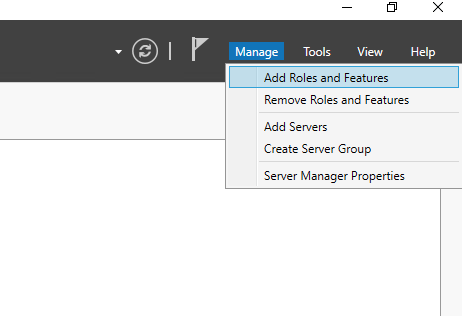
- On the right hand side, click on
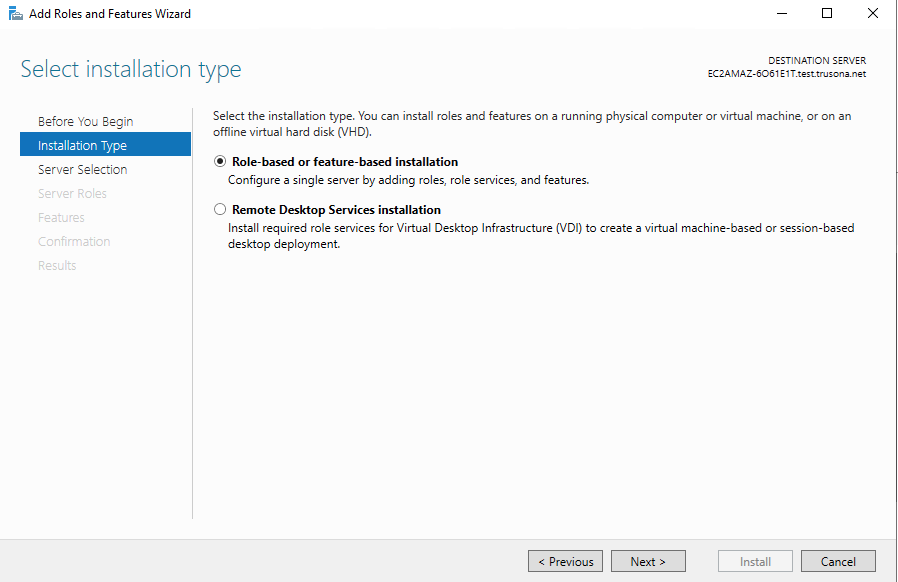
Manageand selectAdd Roles and Features - Next, for installation type, select
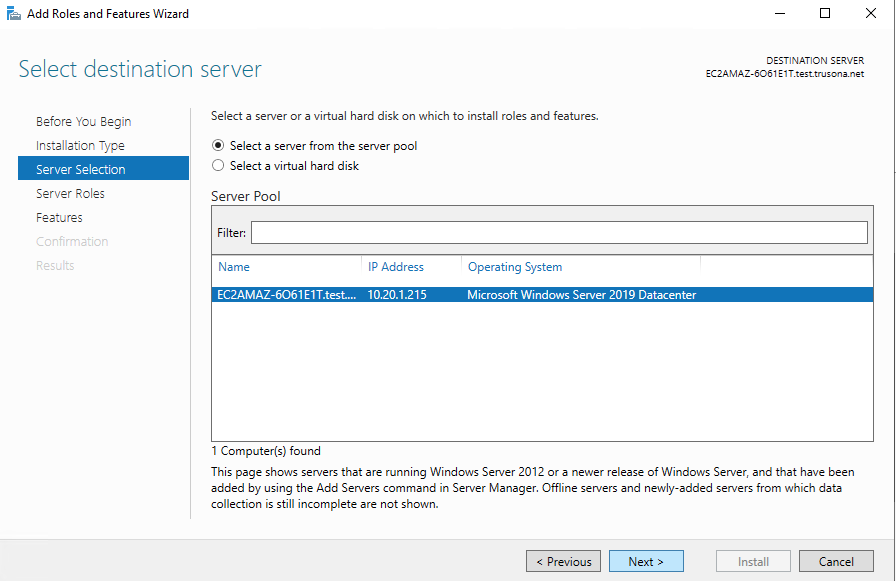
Role-based or feature-based installation - Select the target server from the provided selection
- Check off
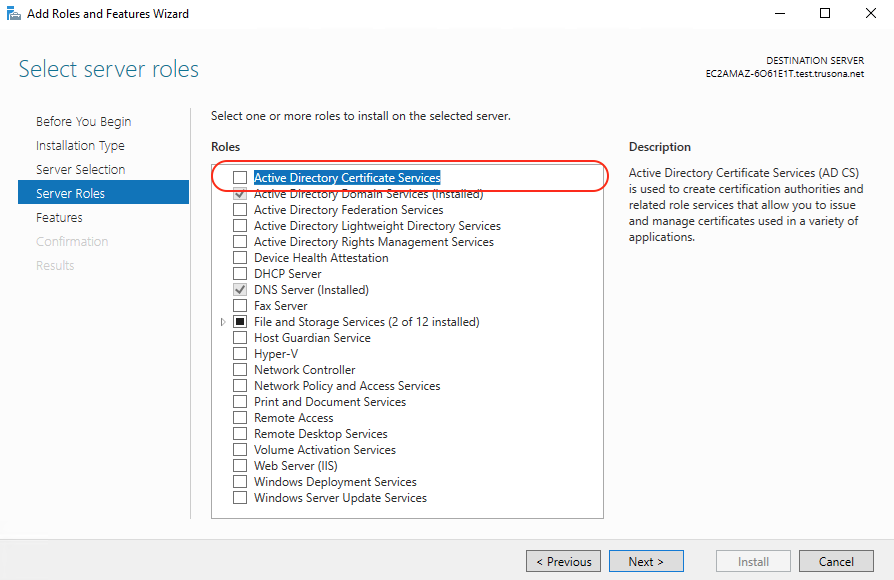
Active Directory Certificate Servicesfrom the list of availableServer Roles - Click on
Add Featureson the screen that pops up - Accept the pre-selected values on the
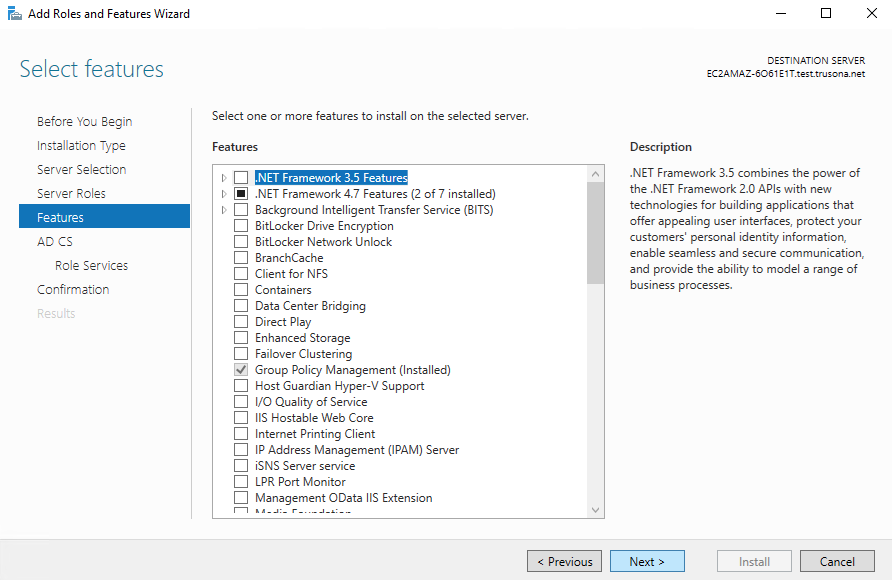
featureslist - Click on
Next - In the list of
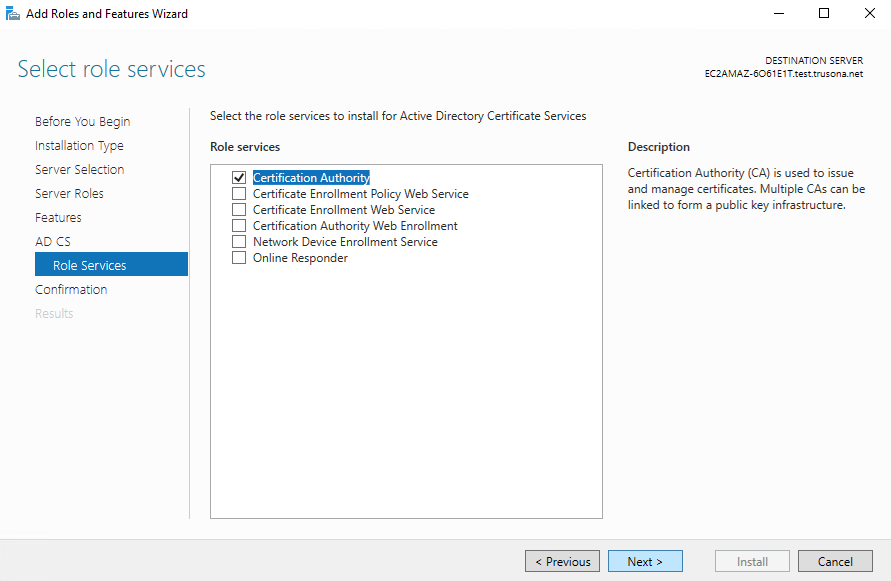
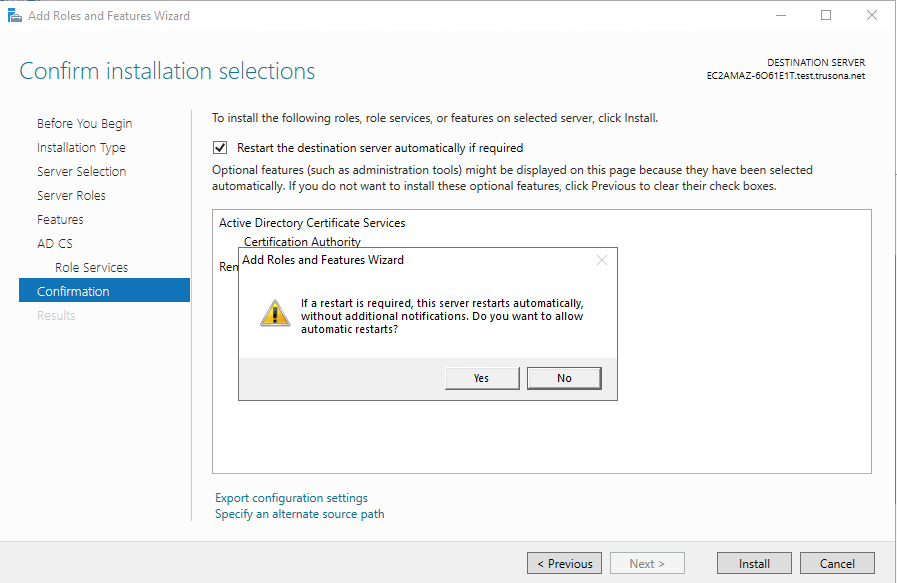
Role Services, check offCertification Authorityand click onNext - Check off the option to restart the destination server automatically if required
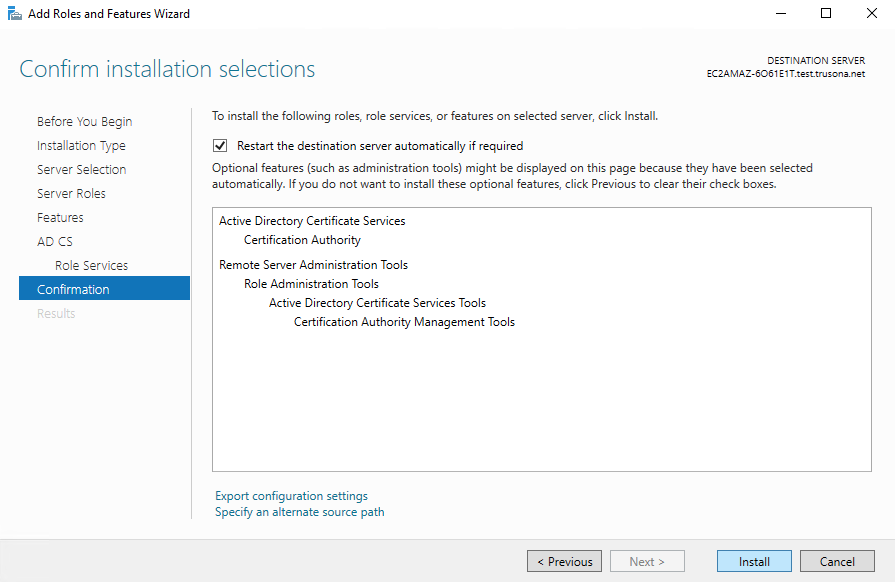
- Finally, review previously made selections then click on
Install - Installation should complete successfully in a short while. When done click on
Close
1.2. ADCS installation walk through
Open the Server Manager on the Active Directory instance to be used.
On the right hand side, click on Manage and select Add Roles and Features:
Next, for installation type, select Role-based or feature-based installation:
Select the target server from the provided selection:
Check off Active Directory Certificate Services from the list of available Server Roles:
Click on Add Features on the screen that pops up:

Accept the pre-selected values on the features list:
Click on Next
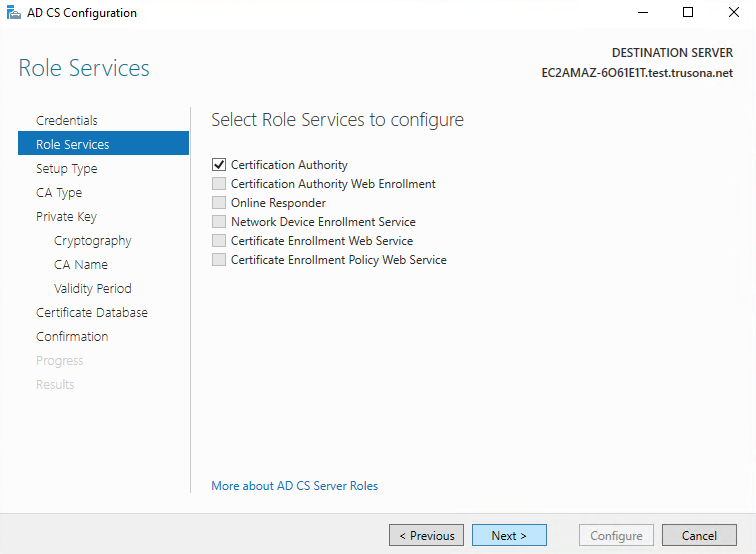
In the list of Role Services, check off Certification Authority and click on Next
Check off the option to restart the destination server automatically if required:
Finally, review previously made selections then click on Install
Installation should complete successfully in a short while. When done click on Close

2. Configure Active Directory Certificate Services
2.1. ADCS configuration steps
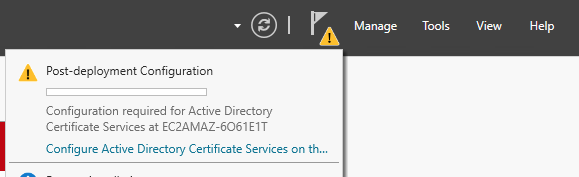
- Inside the Server Manager, click on
Manageon the top right menu, and selectConfigure Active Directory Certificate Services... - Provide appropriate credentials as recommended in the details, then click on
Next - Select
Certification Authority, then click onNext - Select
Enterprise CA, then click onNext - Select
Root CA, then click onNext - For a new installation, select
create a new private key, then click onNext. If this is not a new installation, provide a existing private key - Keep the default pre-selected values on this screen, then click on
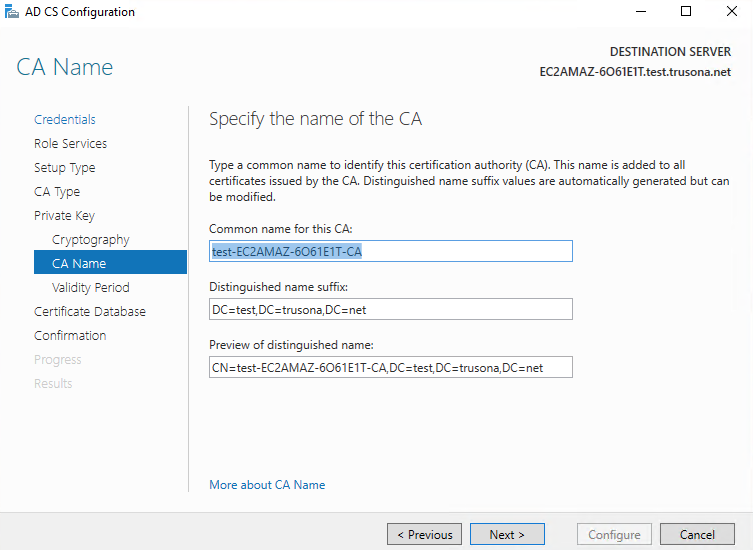
Next - Make the appropriate changes on this screen by providing correct values for all three fields, then click on
Next - Specify an appropriate validity period, then click on
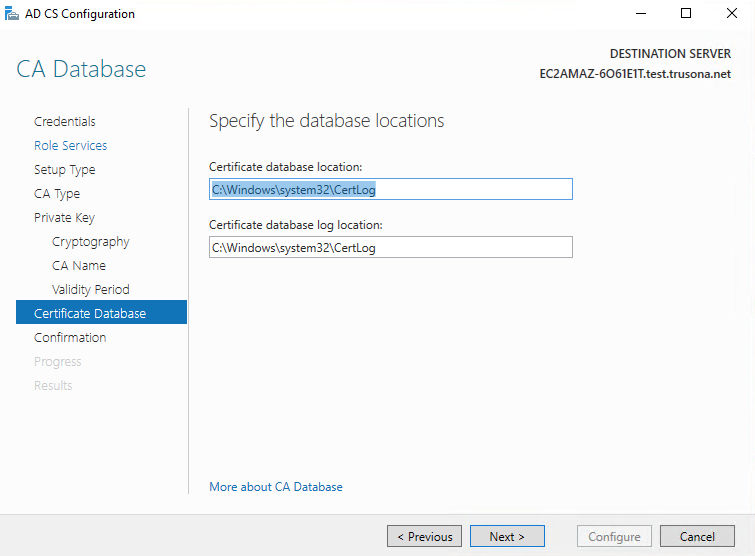
Next - Keep the default values, then click on
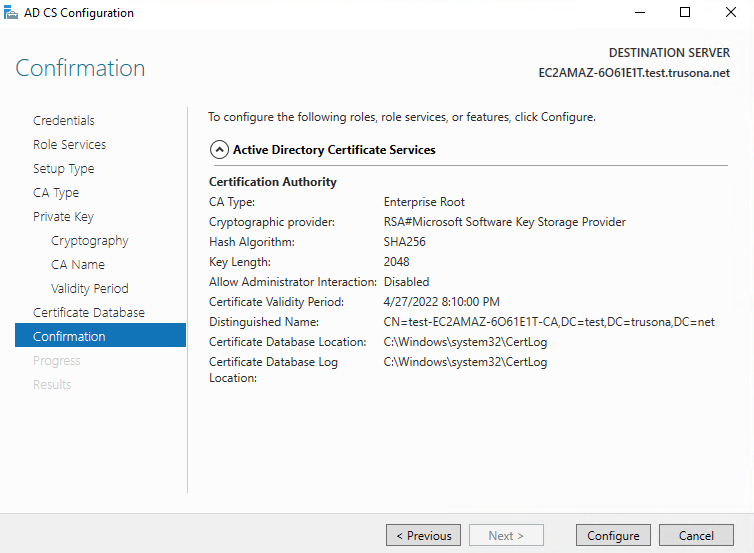
Next - Confirm the previously select values. If you want, you may go back and make changes as necessary, then click on
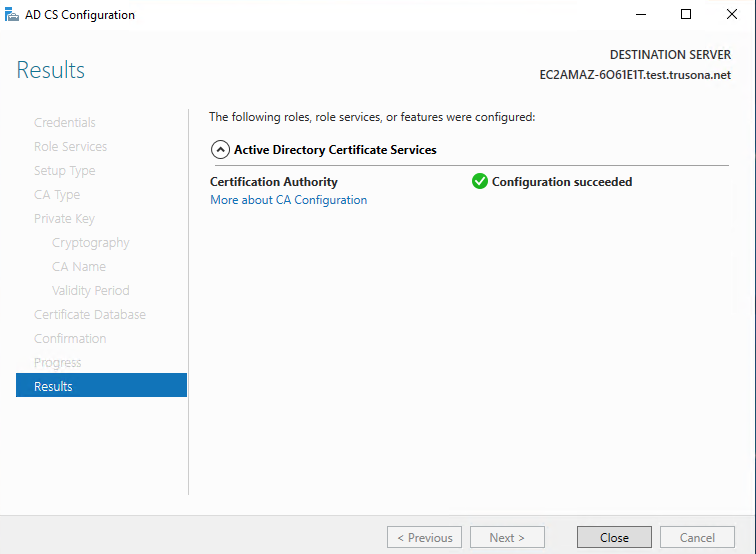
Configure - Configuration should complete in a short while. After it is done, click on
Close
2.2. ADCS configuration walk through
Inside the Server Manager, click on Manage on the top right menu, and select Configure Active Directory Certificate Services...
Provide appropriate credentials as recommended in the details, then click on Next

Select Certification Authority, then click on Next
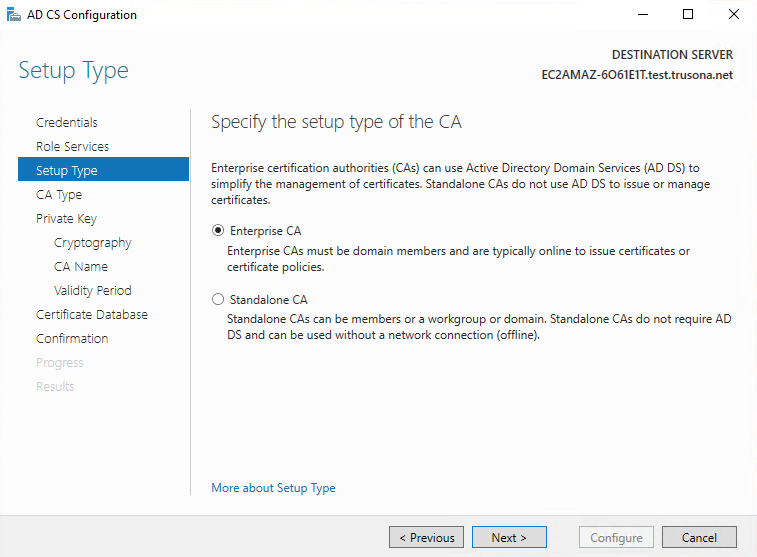
Select Enterprise CA, then click on Next
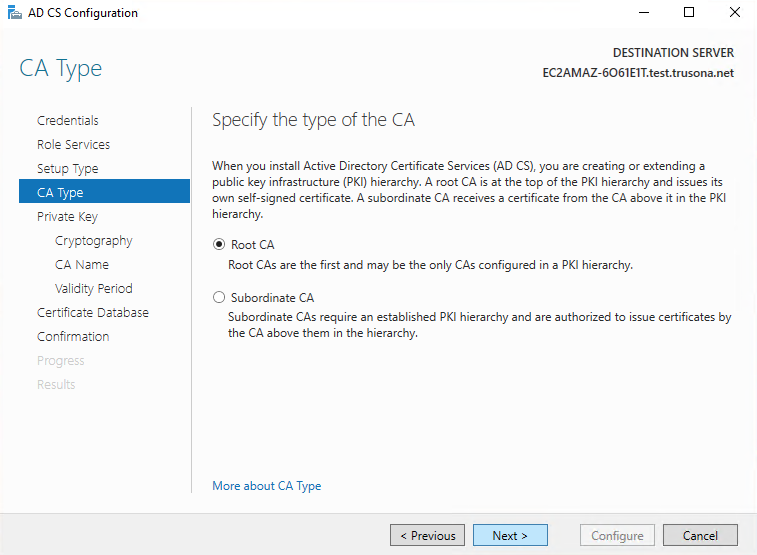
Select Root CA, then click on Next
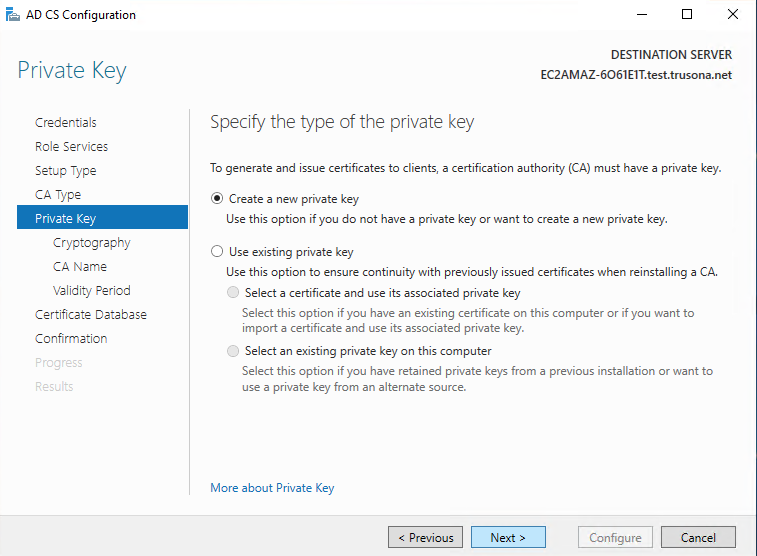
For a new installation, select create a new private key, then click on Next. If this is not a new installation, provide a existing private key:
Keep the default pre-selected values on this screen, then click on Next
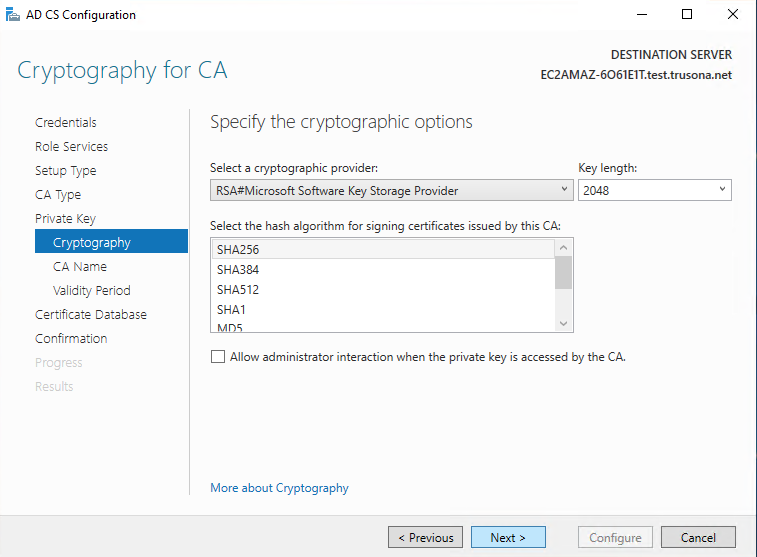
Make the appropriate changes on this screen by providing correct values for all three fields, then click on Next
Specify an appropriate validity period, then click on Next

Keep the default values, then click on Next
Confirm the previously select values. If you want, you may go back and make changes as necessary, then click on Configure
Configuration should complete in a short while. After it is done, click on Close
3. Configure Active Directory Certificate Enrollment Settings
3.1. ADCS enrollment steps
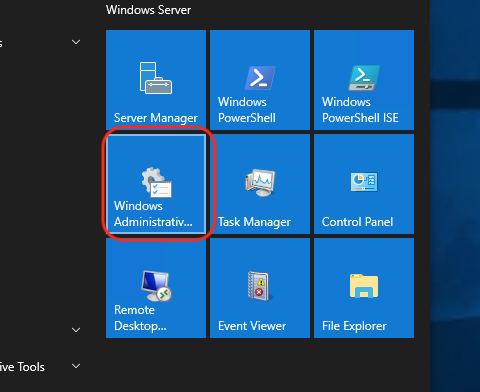
- From the Start Menu, click on
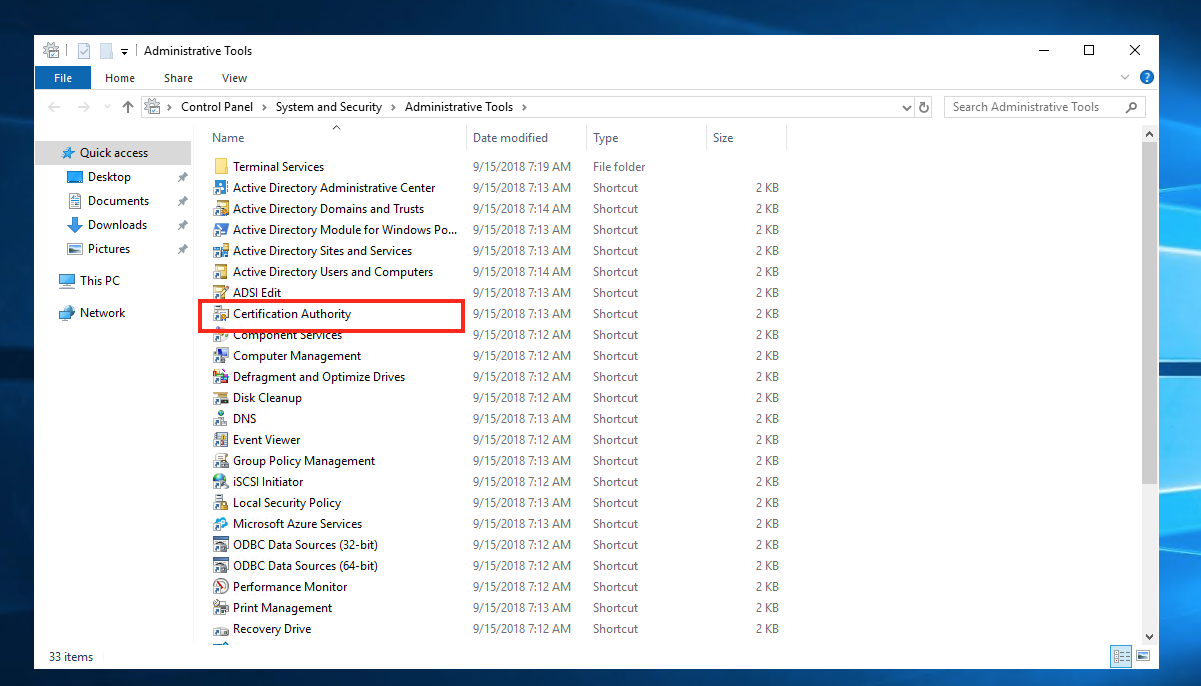
Windows Administrative Tools - Click on
Certification Authority - Right click on
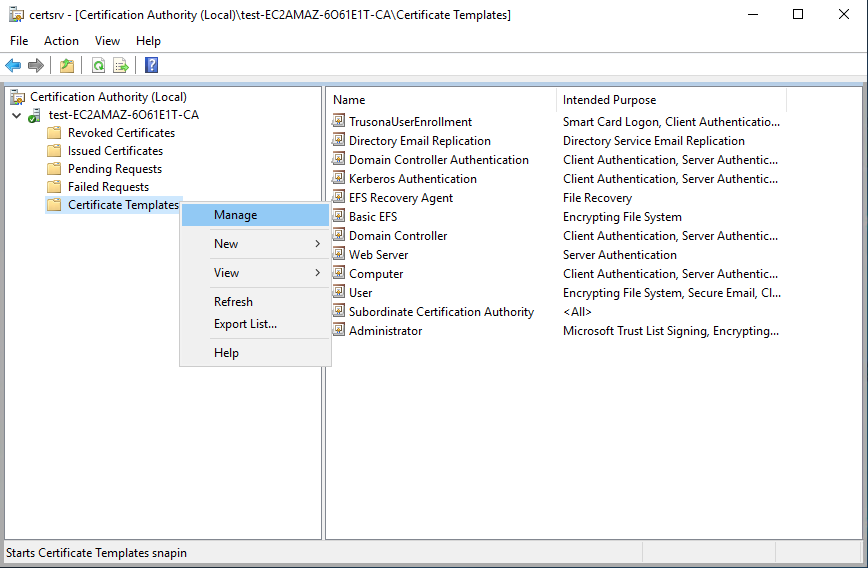
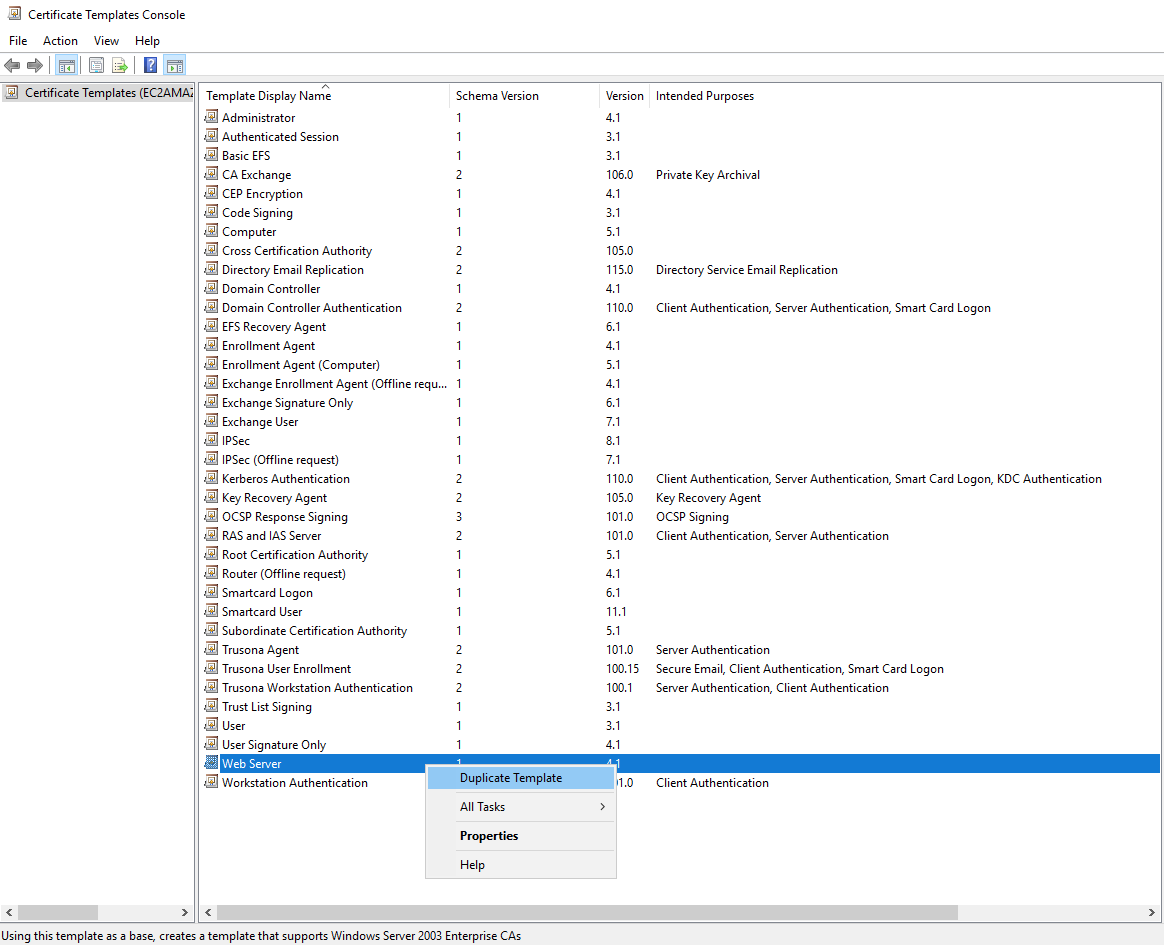
Certificate Templateand click onManage - Right click on
Smartcard Userand click onDuplicate Template - By default, the initial tab will be
Compatibility. Do not make any changes on this tab. - On the
Generaltab, specify the template display name as exactly TrusonaUserEnrollment - On the
Request Handlingtab, at thepurposedrop drown, selectSignature and smartcard logon - On the
Cryptographytab, specify a minimum key size of2048. - Additionally, select the
Requests must use one of the following providersradio button and check offMicrosoft Base Smart Card Crypto Provider - On the
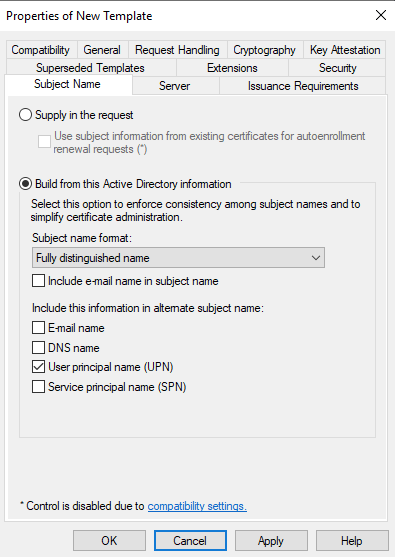
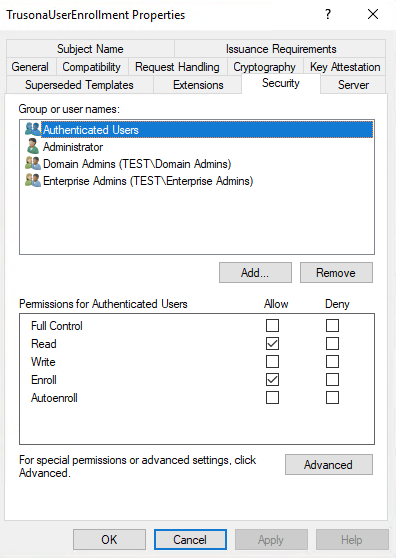
Subject Nametab, uncheck boxes all except forUser principal name (UPN) - On the Security tab, select
Authenticated Usersin the upper section, then check offReadandEnrollpermissions in the lower section - Click on
Applyand thenOK - Right click on Certificate Templates one more time.
- Go to
Newand click onCertificate Template to Issue - In the list of templates, select the
TrusonaUserEnrollmenttemplate that was just created and click onOK
3.2. ADCS enrollment walk through
From the Start Menu, click on Windows Administrative Tools
Click on Certification Authority
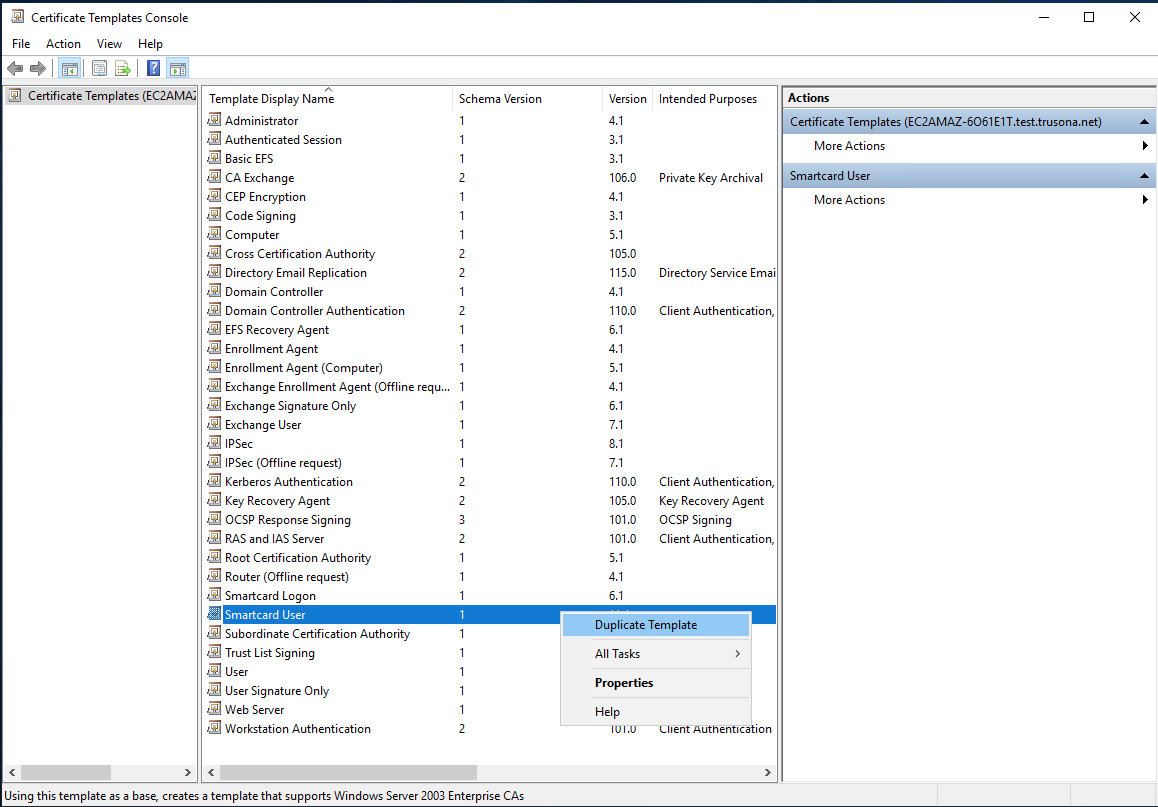
Right click on Certificate Template and click on Manage
Right click on Smartcard User and click on Duplicate Template
By default, the initial tab will be Compatibility. Do not make any changes on this tab.
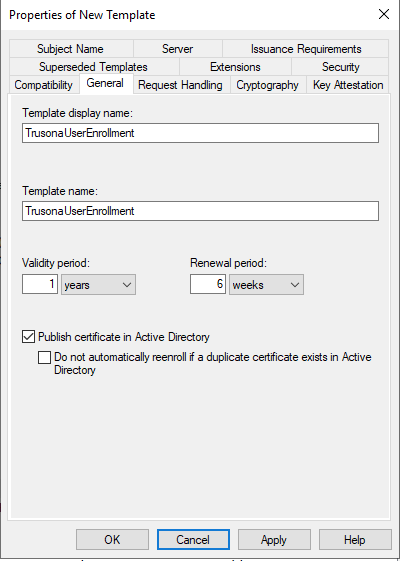
On the General tab, specify the template display name as exactly TrusonaUserEnrollment
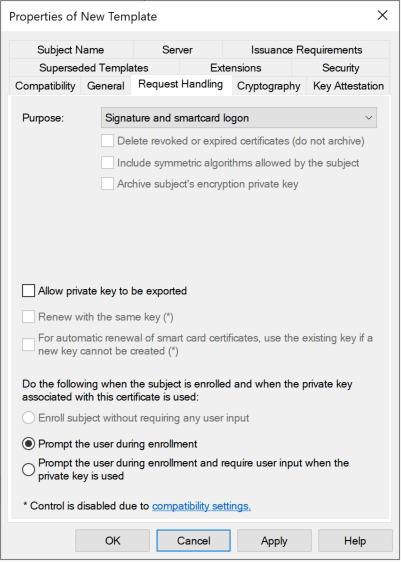
On the Request Handling tab, at the purpose drop drown, select Signature and smartcard logon
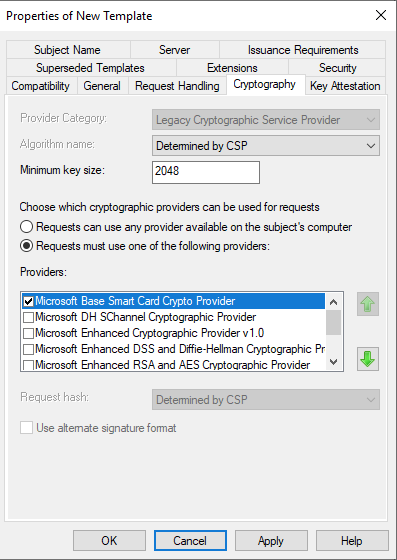
On the Cryptography tab, specify a minimum key size of 2048.
Additionally, select the Requests must use one of the following providers radio button and check off
Microsoft Base Smart Card Crypto Provider
On the Subject Name tab, uncheck boxes all except for User principal name (UPN)
On the Security tab, select Authenticated Users in the upper section, then check off Read and Enroll permissions in the lower section
Click on Apply and then OK
Right click on Certificate Templates one more time.
Go to New and click on Certificate Template to Issue
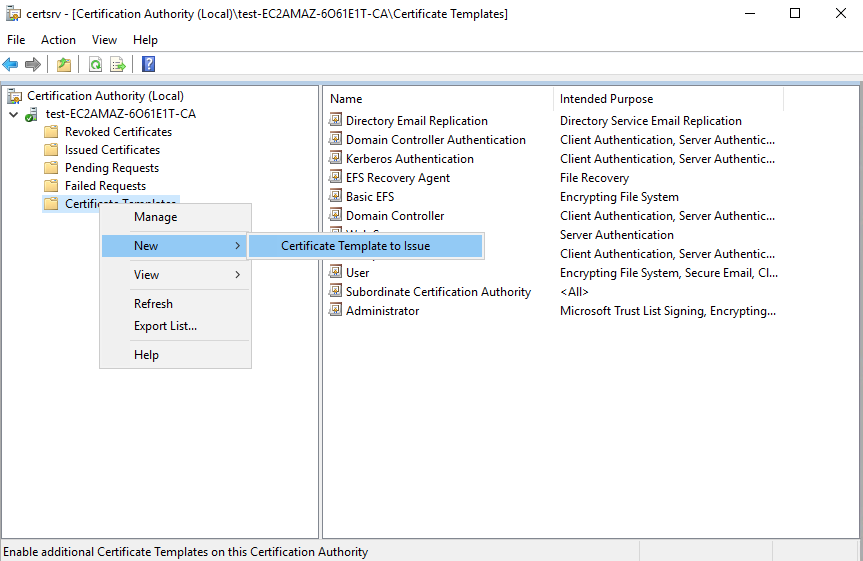
In the list of templates, select the TrusonaUserEnrollment template that was just created and click on OK

4. Configure Active Directory Server Authentication Enrollment Settings
4.1. AD authentication enrollment steps
- From the Start Menu, click on
Windows Administrative Tools - Double-click on
Certification Authority - Right click on
Certificate Templatesand click onManage - On the list of templates, right click on
Web Serverand click onDuplicate Template - The initial tab will be the
Compatibilitytab. Do not make any changes there. - On the
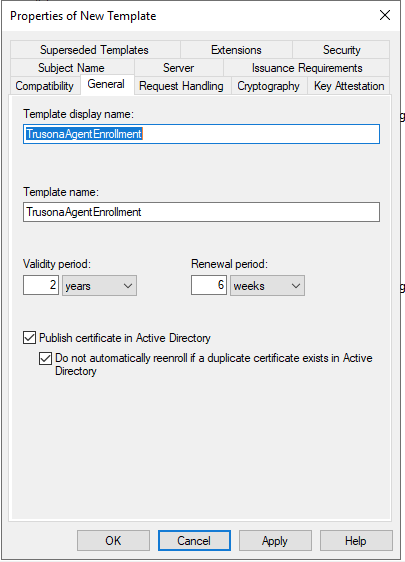
Generaltab, set the Template display name to be exactlyTrusonaAgentEnrollment - Make sure to check the box next to
Publish certificate in Active Directoryand check the box next toDo not automatically reenroll if a duplicate certificate exists in Active Directory - On the
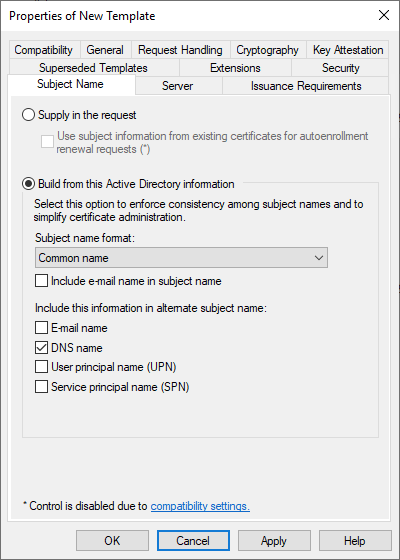
Subject Nametab, select the second radio button and from theSubject name formatdropdown, selectCommon name. - Also, uncheck all boxes except for
DNS name - On the Security tab, click on
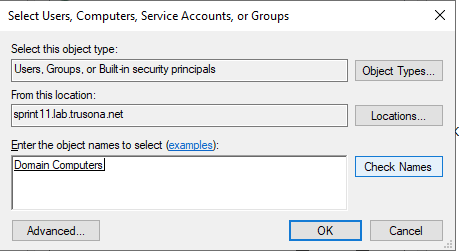
Add...and type inDomain Computersand then click onOK - In the list
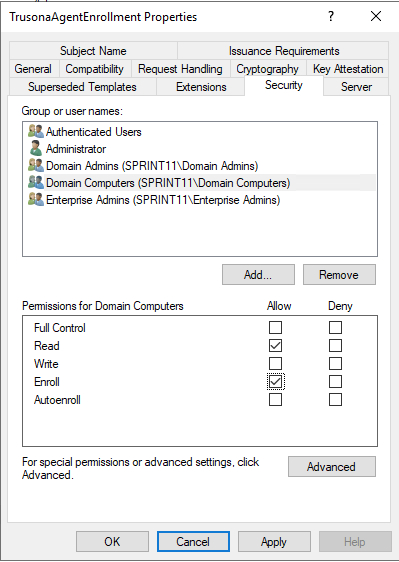
Group or user names, highlight each row and confirm that they haveReadandEnrollpermissions. If they do not, enable both. - When completed, click on
OK - Right click on
Certificate Templates, navigate toNewand then toCertificate Template to Issue - Select
TrusonaAgentEnrollmentand click onOK
4.2. AD authentication enrollment walk through
From the Start Menu, click on Windows Administrative Tools
Double-click on Certification Authority
Right click on Certificate Templates and click on Manage
On the list of templates, right click on Web Server and click on Duplicate Template
The initial tab will be the Compatibility tab. Do not make any changes there.
On the General tab, set the Template display name to be exactly TrusonaAgentEnrollment
Make sure to check the box next to Publish certificate in Active Directory and check the box next to Do not automatically reenroll if a duplicate certificate exists in Active Directory
On the Subject Name tab, select the second radio button and from the Subject name format dropdown, select Common name.
Also, uncheck all boxes except for DNS name. Make sure that the box Include e-mail name in subject name is also unchecked.
On the Security tab, click on Add... and type in Domain Computers and then click on OK
In the list Group or user names, highlight each row and confirm that they have Read and Enroll permissions. If they do not, enable both.
When completed, click on OK
Right click on Certificate Templates, navigate to New and then to Certificate Template to Issue
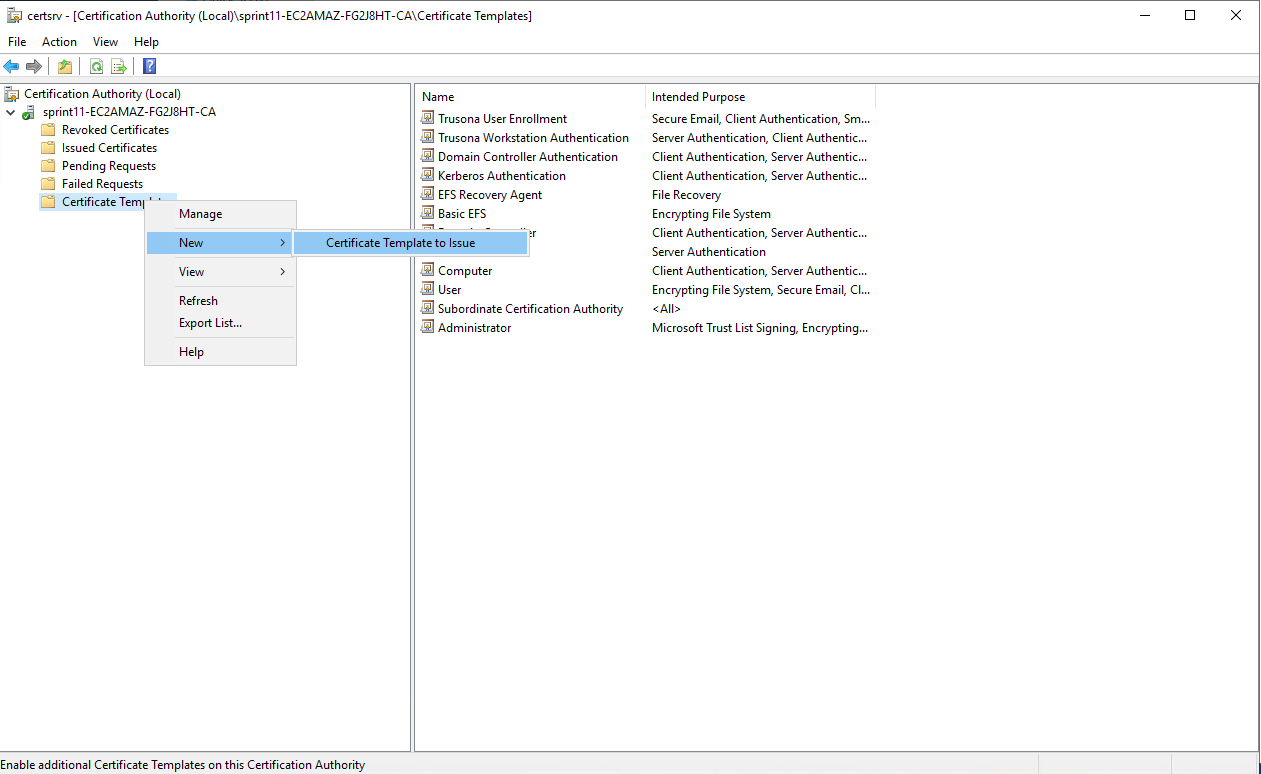
Select TrusonaAgentEnrollment and click on OK
5. Server KDC Enrollment
5.1. Server KDC enrollment steps
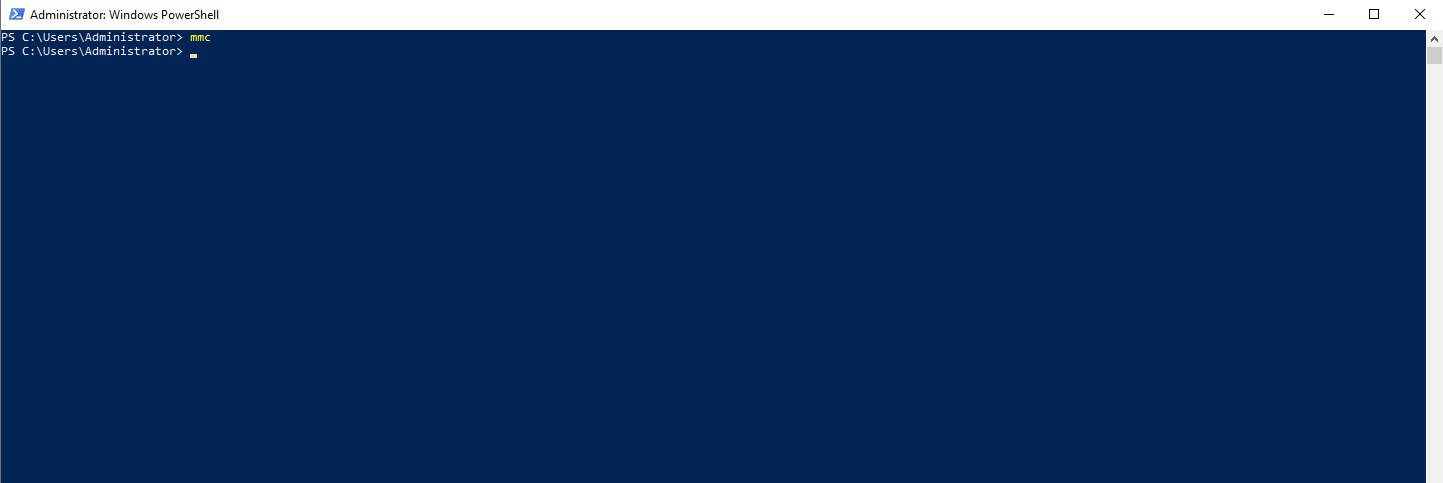
- From a PowerShell administrative prompt, start the Microsoft Management Console:
- From the
Filemenu, click onAdd/Remove Snap-in... - Select
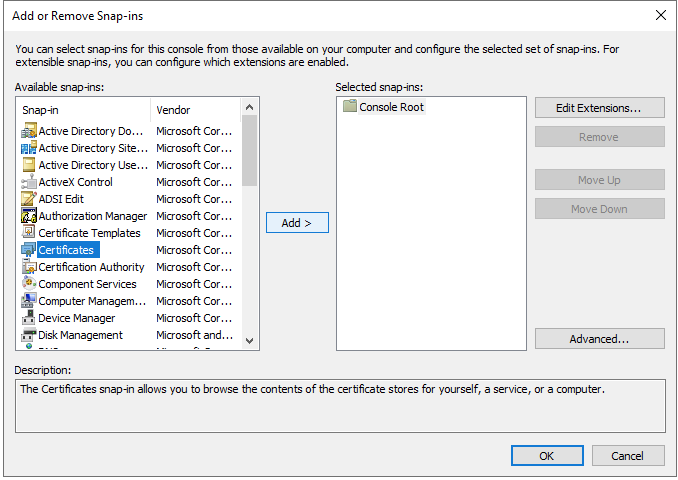
Certificatesand click onAdd - On the next selection prompt, choose
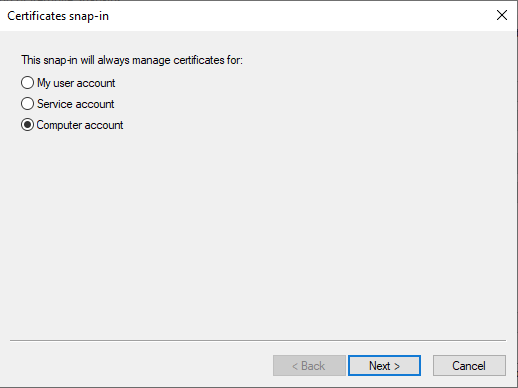
Computer accountand click onnext - On the next prompt, choose
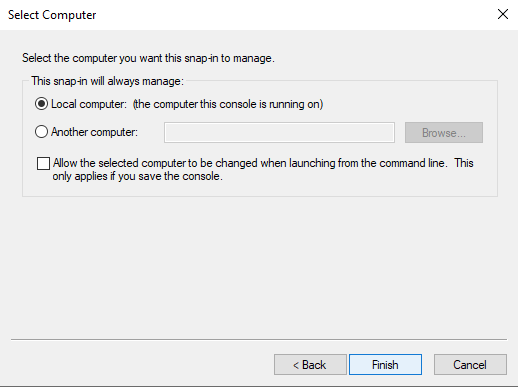
Local computerand click onFinish- We are making the assumption that the computer running the Trusona Agent is the local computer:
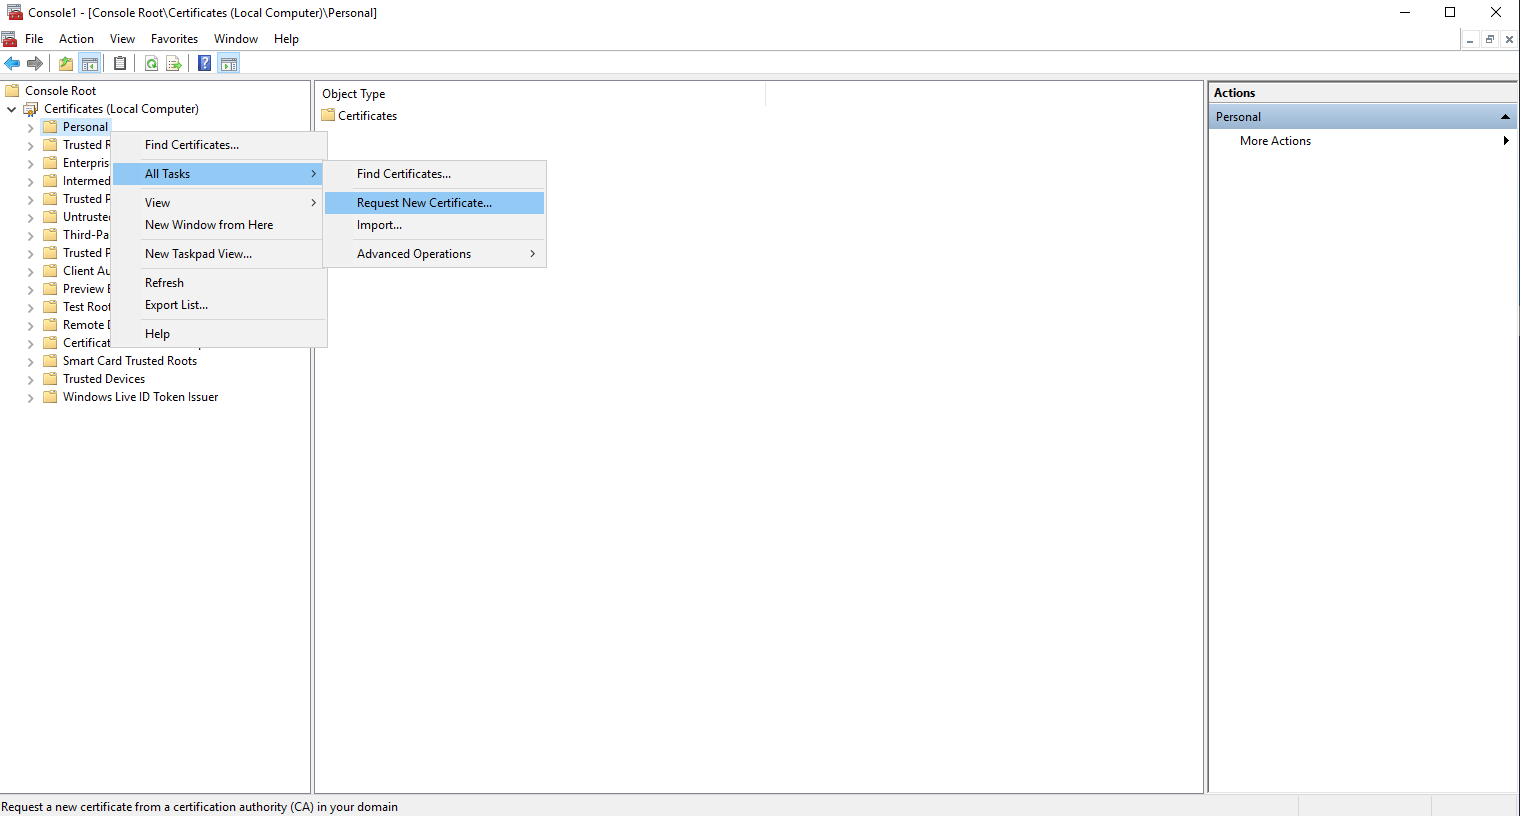
- Expand on
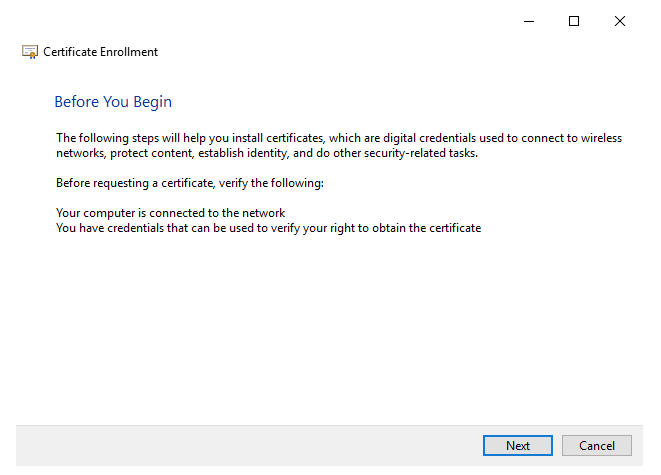
Certificatesand right click onPersonaland followAll Tasks->Request New Certificate... - When loaded, click on
Next - Select
Active Directory Enrollment Policy - Click on
Enrollafter selecting the check boxes for:- Domain Controller
- Domain Controller Authentication; and
- Kerberos Authentication
- Wait a couple of seconds and you should have successful enrollment
5.2. Server KDC enrollment walk through
From a PowerShell administrative prompt, start the Microsoft Management Console:
From the File menu, click on Add/Remove Snap-in...
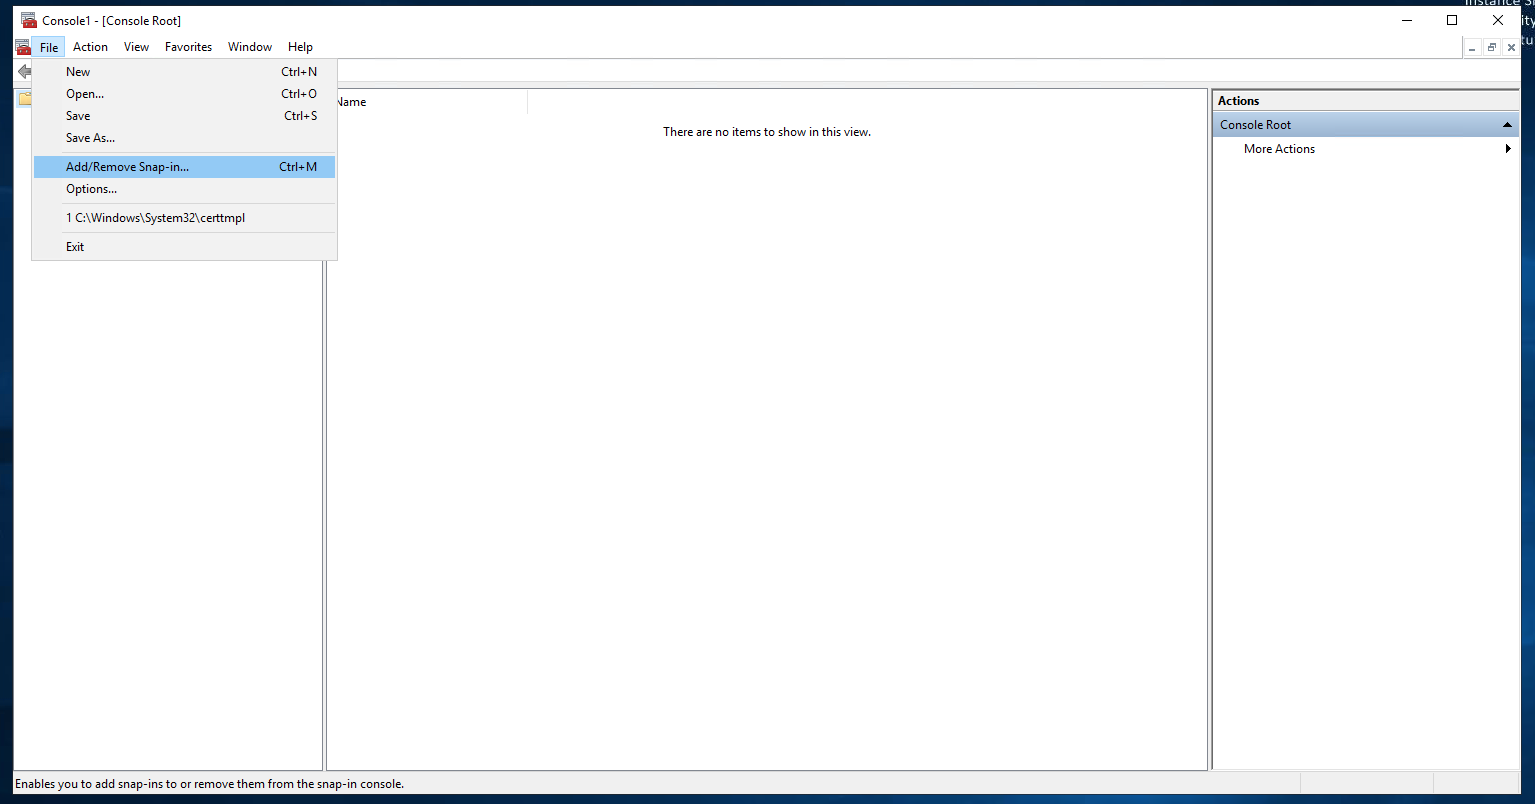
Select Certificates and click on Add
On the next selection prompt, choose Computer account and click on next
On the next prompt, choose Local computer and click on Finish
We are making the assumption that the computer running the Trusona Agent is the local computer:
Expand on Certificates and right click on Personal and follow All Tasks -> Request New Certificate...
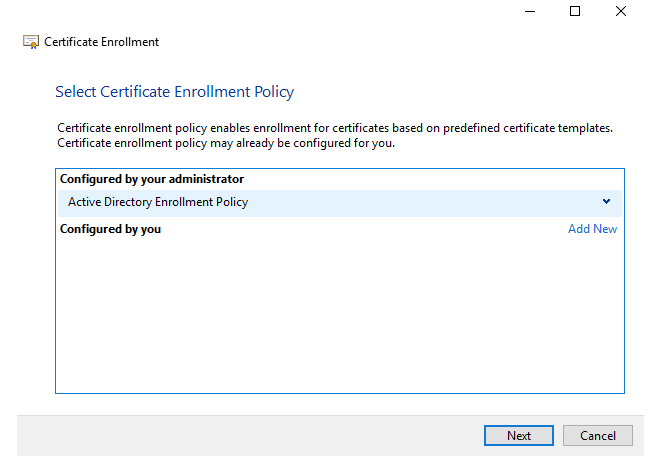
When loaded, click on Next
Select Active Directory Enrollment Policy
Click on Enroll after selecting the check boxes for:
- Kerberos Authentication
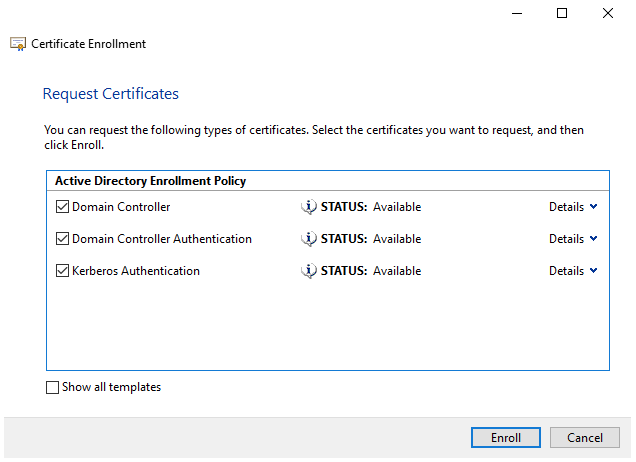
Wait a couple of seconds and you should have successful enrollment

6. Agent Service Installation
6.1. Agent install steps
- Before beginning, make sure you are logged in with local administrative rights.
- To begin, double-click on the provided installer. You should see this initial screen, and be able to click on
Next. - Enter the
Tokenas copied from the Trusona Dashboard into theSDK Tokenfield. - Enter the
Secretas copied from the Trusona Dashboard into theSDK Secretfield. - Enter the
Integration IDas copied from the Trusona Dashboard into theIntegration IDfield. -
Certificate Thumbprintfield is optional. - Click on
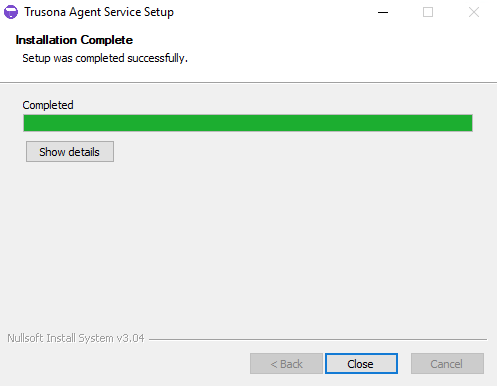
Install - After a short while, it will complete the installation and you should be able to click on
Closewhich will exit you from the installer. - After installation, please open firewall port
34182for TCP IN
6.2. Agent install walk through
First, access your Trusona Dashboard.
Create both SDK Server Credentials and a Windows Integration.
Note the SDK Token, SDK Secret and Integration ID.
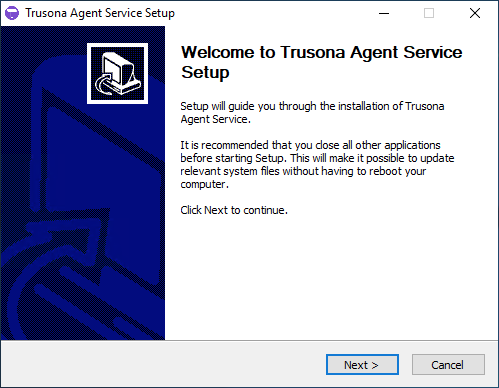
Secondly, right-click on the provided installer and click on Run as administrator. You should see this initial screen, and be able to click on Next
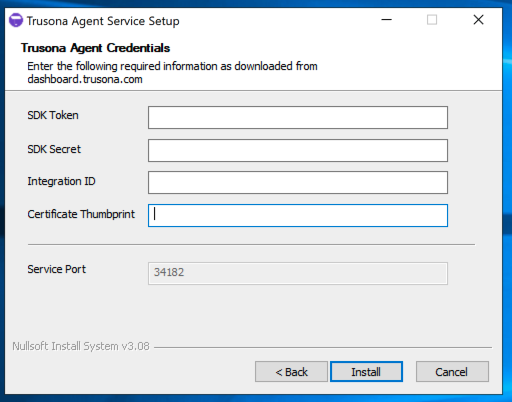
Enter the SDK Token that was copied from the Trusona Dashboard.
Enter the SDK Secret that was copied from the Trusona Dashboard.
Enter the Integration ID that was copied from the Trusona Dashboard.
Certificate Thumbprint field is optional, and should only be filled in if you are providing your own SSL certificate to the agent.
Click on Install
After a short while, it will complete the installation and you should be able to click on Close which will exit you from the installer.
6.3. Agent Status Validation
Once the agent is installed, you can visit the URL https://FQDN_Agent_Hostname:34182/configuration to confirm it loads.
Replace
FQDN_Agent_Hostnamewith the correct FQDN of the agent’s host.
7. Optional: Disabling password-based authentication
After the user has installed the Trusona mobile app and completed setup, it is possible to disable the password option for future authentications. This step is optional.
- After a user goes through the Trusona Windows Setup, open the Server Manager and go to
Active Directory Users and Computersunder the Tools menu. - Browse to the specific user, right click on their icon and go to
Properties. - Click on the
Accounttab. - Scroll in the
Account optionslist and enable theSmart card is required for interactive logoncheckbox. - Click on
Applyand then onOK - Going forward, that user will be required to use Trusona to complete an interactive logon on their Trusona-enabled workstation.
7.1. Disabling passwords walk through
After a user goes through the Trusona Windows Setup, open the Server Manager and go to Active Directory Users and Computers under the Tools menu.
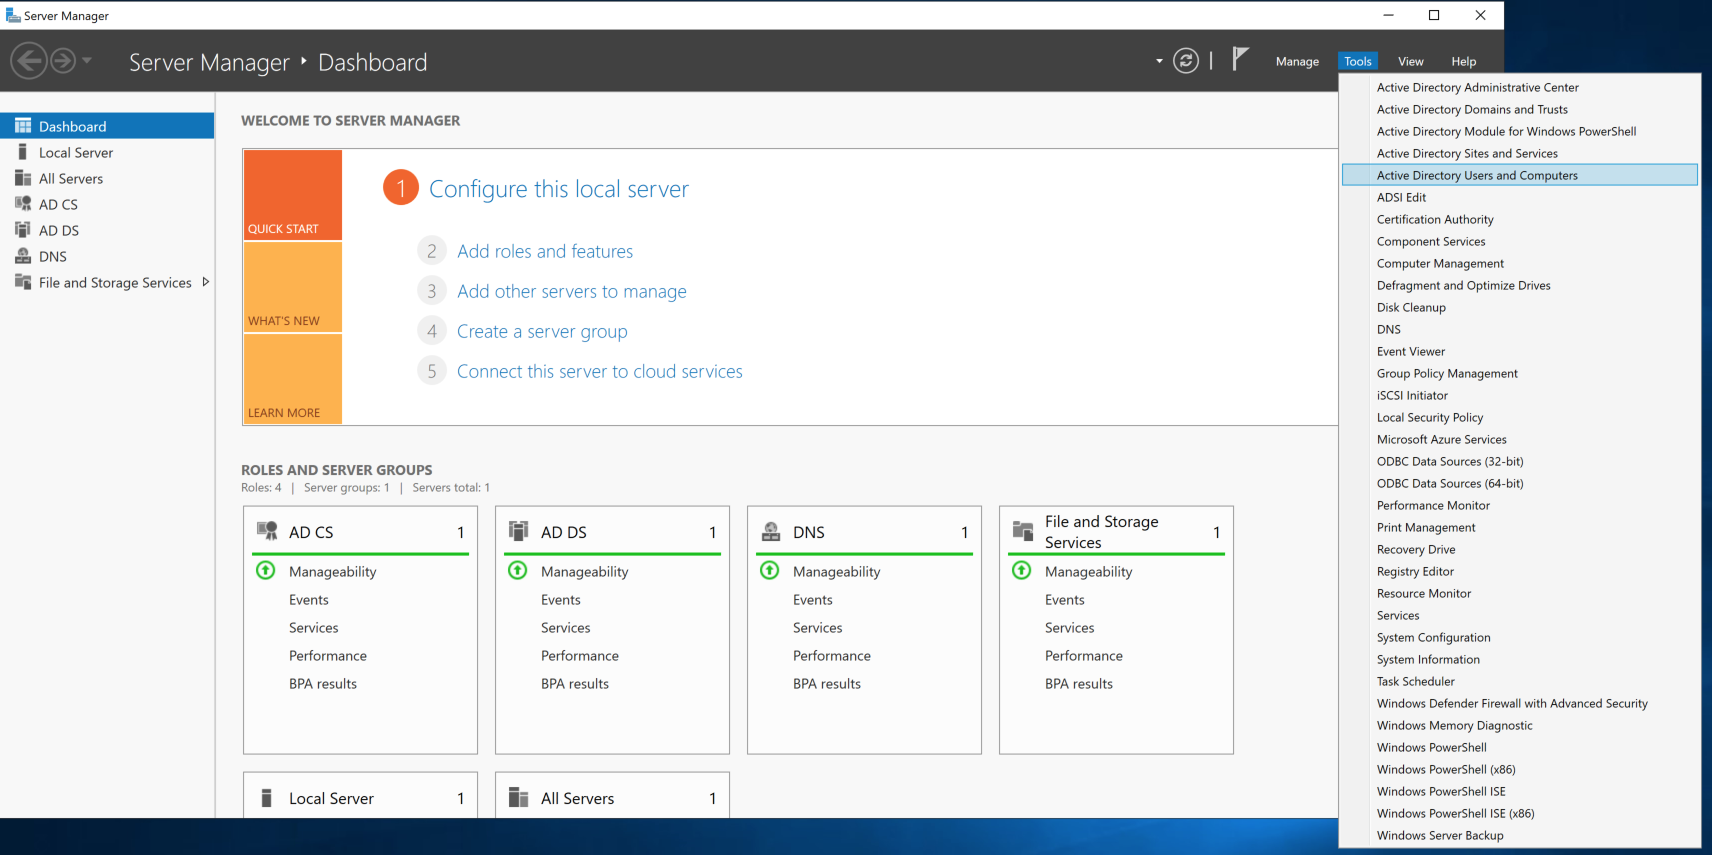
Browse to the specific user, right click on their icon and go to Properties
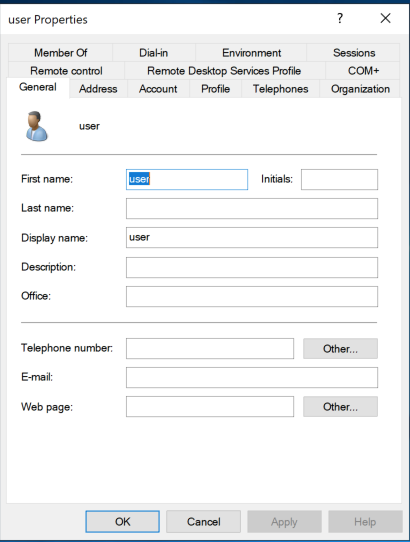
Click on the Account tab.
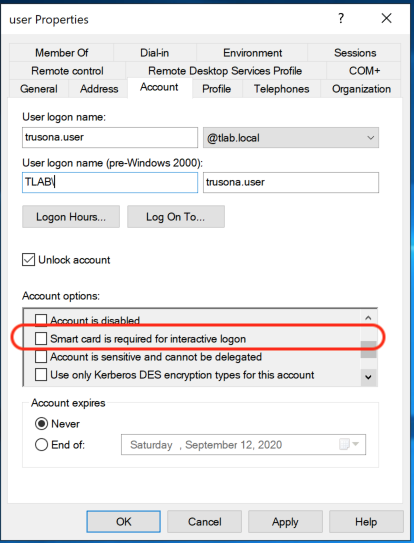
Scroll in the Account options list and enable the Smart card is required for interactive logon checkbox.
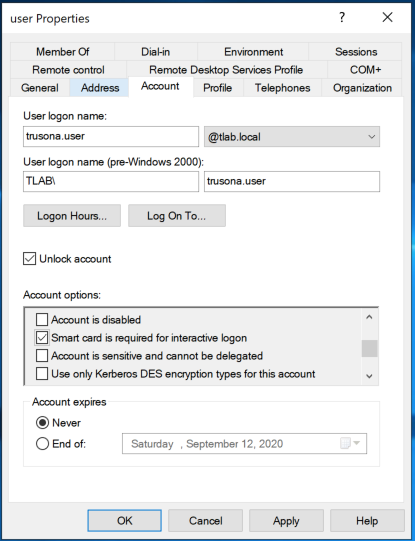
Click on Apply and then on OK
Going forward, that user will be required to use Trusona to complete an interactive logon on their Trusona-enabled workstation. They will not be able to use their password to login while this option is enabled.
8. Credential Provider Installation
8.1. Manual Installation
- Before beginning, make sure this computer has a TPM and that you are logged in with local administrative rights
- On the client workstation, run the Trusona Credential Provider Installer
- When prompted, specify the Fully Qualified Hostname of the server hosting the Agent, and click on
Install - After installation, please open firewall port 34182 for TCP OUT
8.2. CLI Installation
On an elevated command prompt, type the following command to complete a silent command-line installation:
Example showing passwordless sign-in installation.
msiexec.exe /q /i Z:\path\to\trusona-credential-provider-x.y.z.msi ENDPOINT=FQDN_agent_hostname MFAMODE=no
Be sure to specify the correct path the MSI file.
Be sure to specify the correct FQDN of the hostname where the Trusona Agent is installed.
Set
MFAMODE=noto require only Trusona at sign-in.
8.3. Automated Install using Active Directory Group Policy
The Trusona Credential Provider may be installed and configured using Active Directory Group Policy.
8.3.1. Prerequisite: Create the policy central store for your domain
You may wish to create a central policy store if you have multiple domain controllers. For more information, visit How to create and manage the Central Store for Group Policy Administrative Templates in Windows
- Create a new group policy object which will be used to configure the Trusona Credential Provider
8.3.2. Prerequisite: Install and configure the Wait For Network Policy
- Copy
%WINDIR%\PolicyDefinitions\en-us\Logon.admlto the corresponding location within your central policy store, if not using the default. - Copy
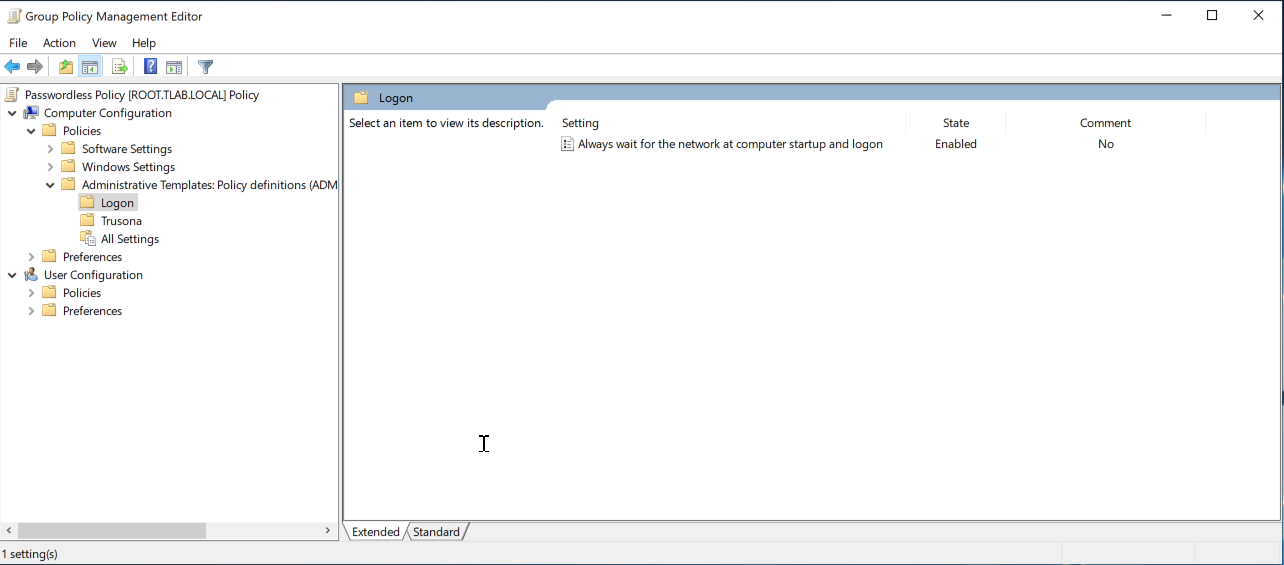
%WINDIR%\PolicyDefinitions\Logon.admxto the corresponding location within your central policy store, if not using the default. - Within the previously created policy object, expand
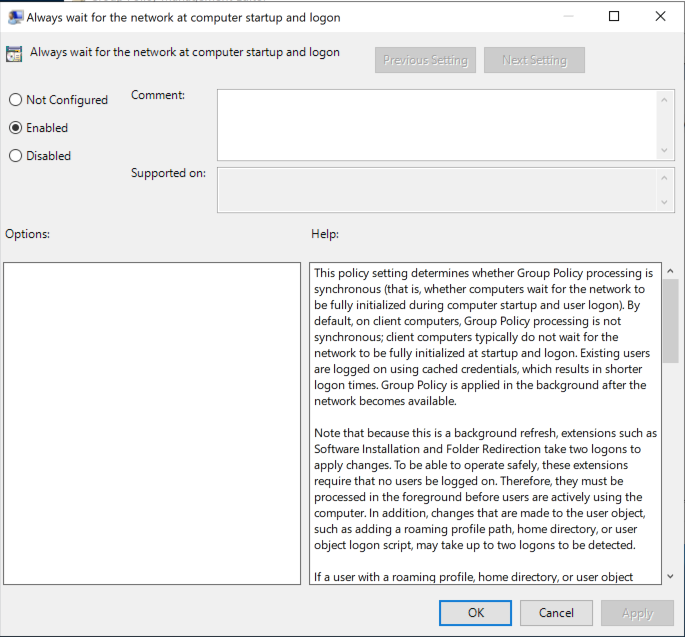
Computer Configuration→Policies→Administrative Templates→Logonand open the setting itemAlways wait for the network at computer startup and logon - Mark the item as
Enabledand click OK.
8.3.3. Install and configure the Trusona Group Policy Template
Trusona will provide to you an ADMX template that can be used to remotely configure the Credential Provider.
- Copy
TrusonaAgentPolicy.admlto your GPO policiesen-usdirectory. If you are using a central policy store, this directory is\\<HOST>\SYSVOL\policies\PolicyDefinitions\en-us, otherwise it is%WINDIR%\PolicyDefinitions\en-us - Copy
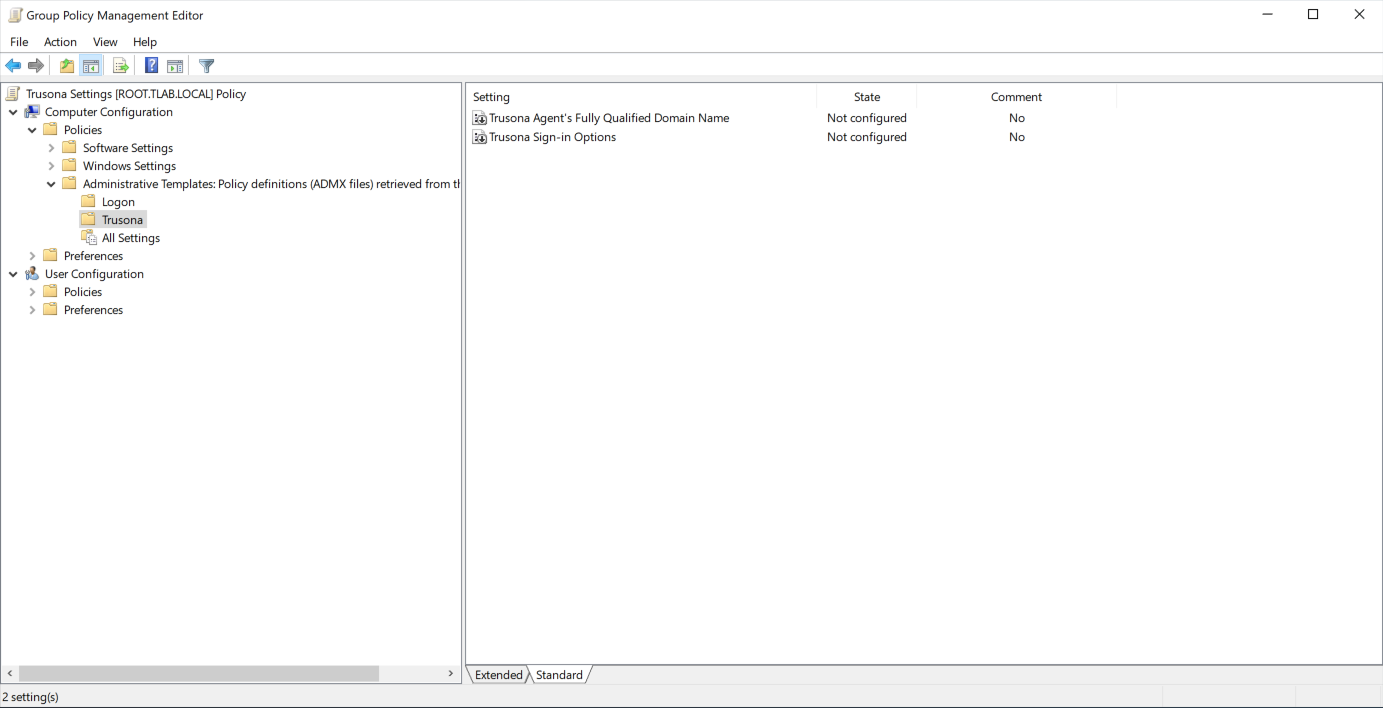
TrusonaAgentPolicy.admxto your GPO policies directory. If you are using a central policy store, this directory is\\<HOST>\SYSVOL\policies\PolicyDefinitions, otherwise it is%WINDIR%\PolicyDefinitions - Within the previously created policy object, expand
Computer Configuration→Policies→Administrative Templates→Trusonaand open the setting itemTrusona Agent's Fully Qualified Domain Name - Mark the item as
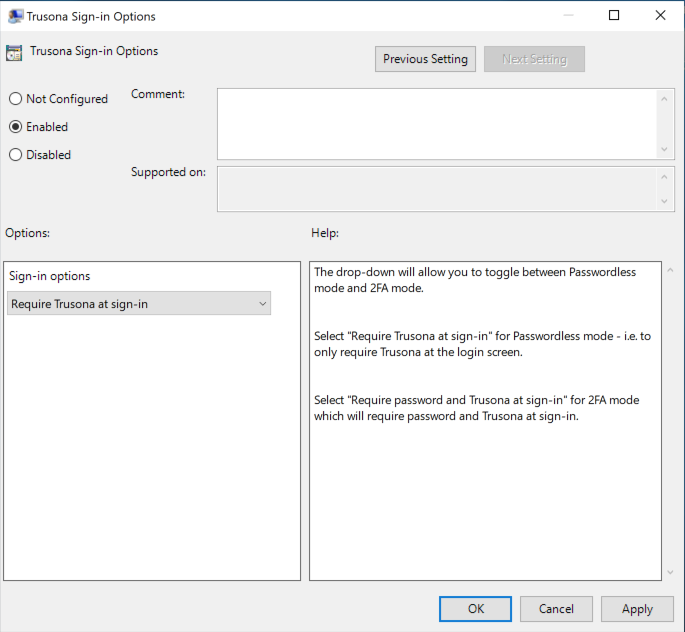
Enabledprovide the FQDN of the server hosting the agent. - Select Sign-in options
Require Trusona at sign-inand click OK.
8.3.4. Deploying the Trusona Credential Provider
Once the Credential Provider configuration has been deployed, you can easily distribute the package to your computers silently.
- Copy the Trusona Credential Provider Installer to an accessible network location
- Expand
Computer Configuration→Policies→Software Settings - Right-click
Software installationand chooseNew→Package - Select the Trusona Credential Provider Installer MSI from the network location in Step 1
- When prompted, choose
Assign
8.3.5. Assign the GPO
- Using the Group Policy Management tool, assign the Trusona Group Policy Object to an OU containing the workstations you wish to target for passwordless users.