1. Prerequisites
Before proceeding, ensure that you have the following steps completed:
- Access to the Keeper Admin Console. Ensure you are logged in as an administrator, and not in the Web Vault.
- Have admin access to the Trusona Dashboard. If your company does not have an account, visit the Trusona Dashboard to create one. Otherwise, consult with the owner of your company’s Trusona Dashboard account in order to create the integration.
2. Configuring SAML in the Trusona Dashboard
2.1. Create the Keeper Integration
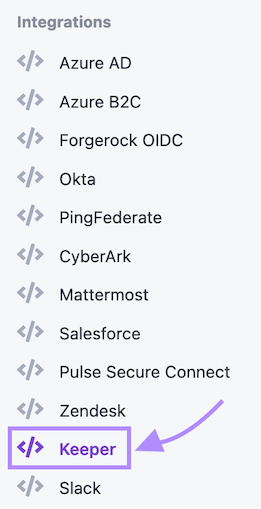
- Navigate to the Trusona Dashboard and log into your account.
- From your Trusona account dashboard, select ‘Keeper’ on the left-hand navigation.
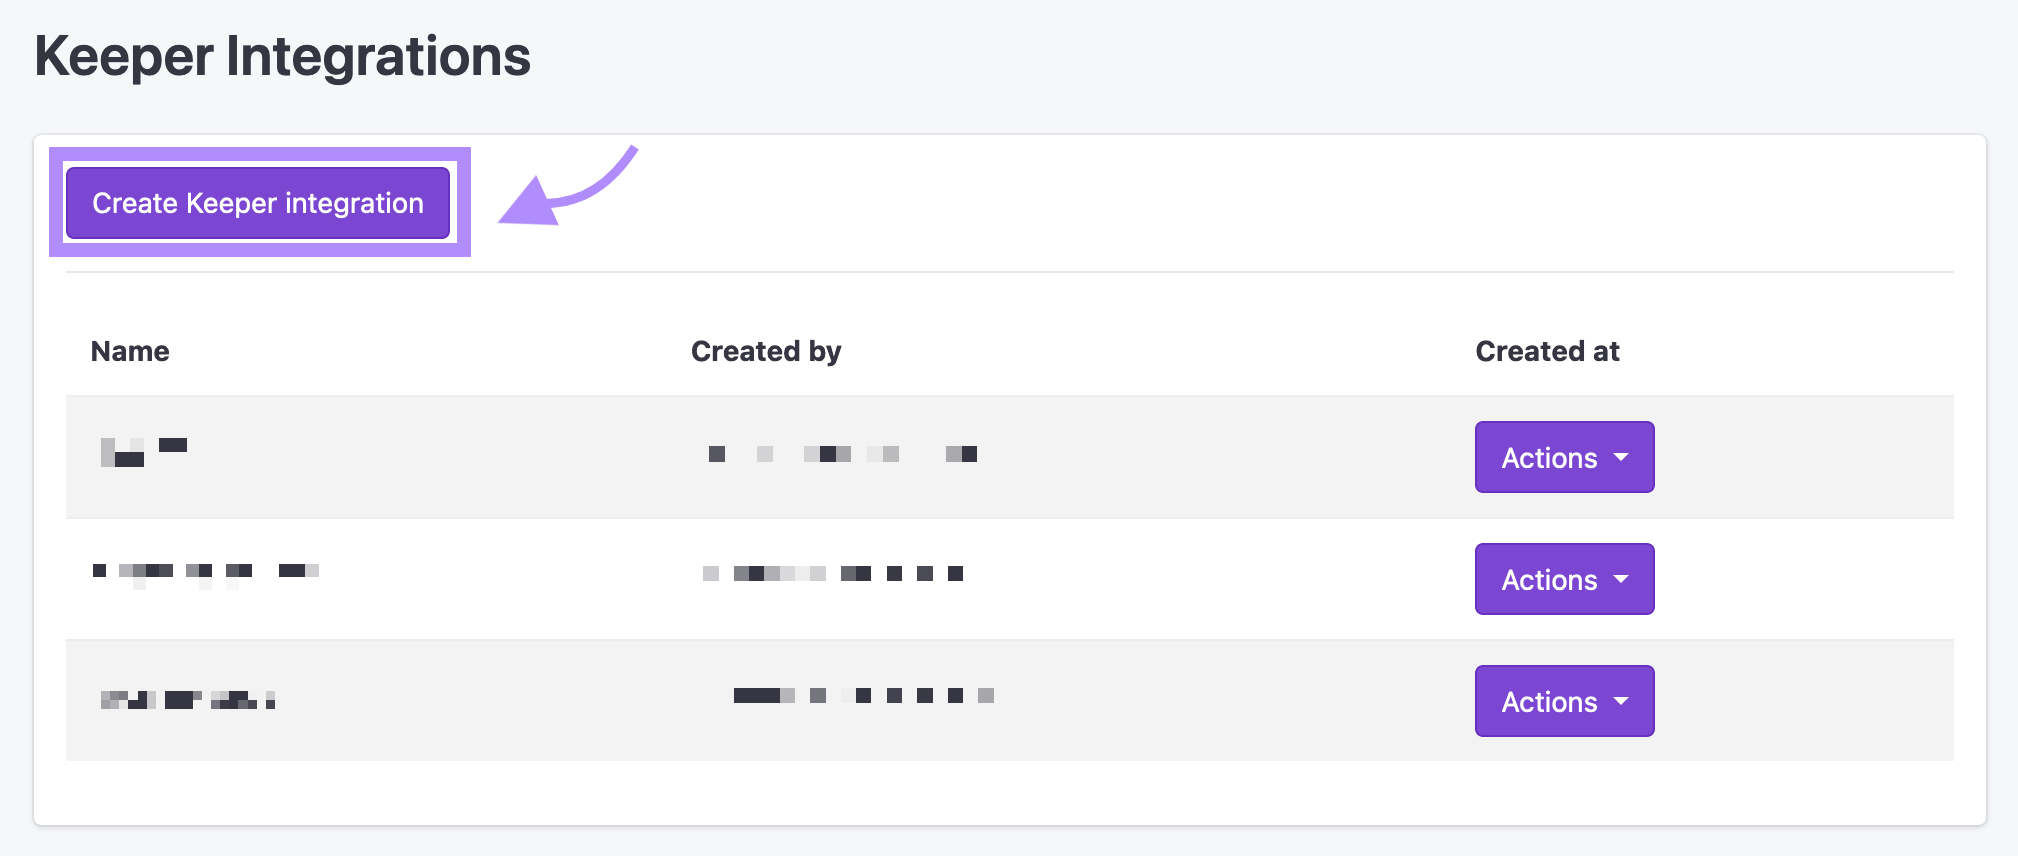
- On the Keeper Integrations page, click on ‘Create Keeper integration’.
- Enter the following information:
- Name: Name of your integration
- Select ‘Save’. You will be redirected back to the Keeper Integrations page.
2.2. Download the Trusona Metadata File
- On the details page for your Keeper integration, click the ‘Download XML’ button under the Metadata XML section and save the
metadata.xmlfile. We will need this file later on in the integration process so keep it in a safe place. - Click ‘Back’ at the bottom.
3. Configuring SAML in Keeper
3.1. Setting up the Node
- Login to the Keeper Admin Console.
- Once logged in, click on the ‘Admin’ menu and create a new node.
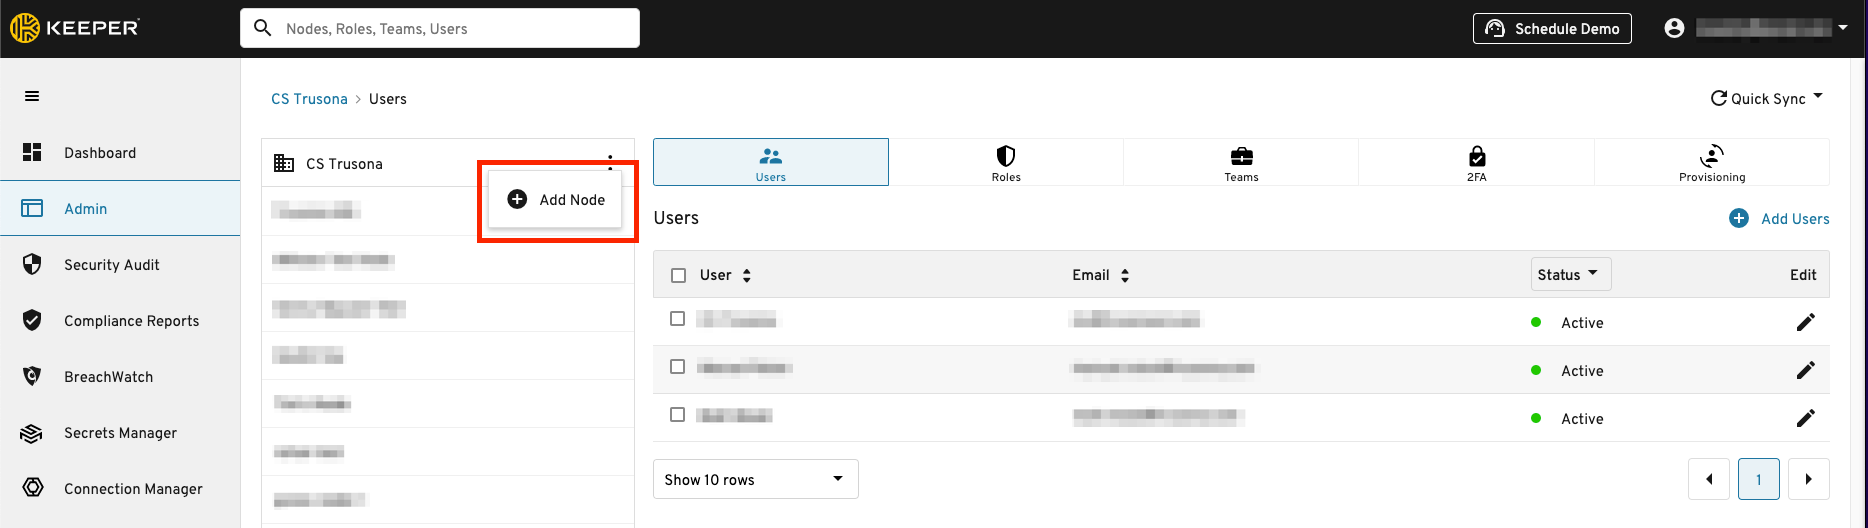
- Add the node, then visit ‘Provisioning’ and click Add Method.

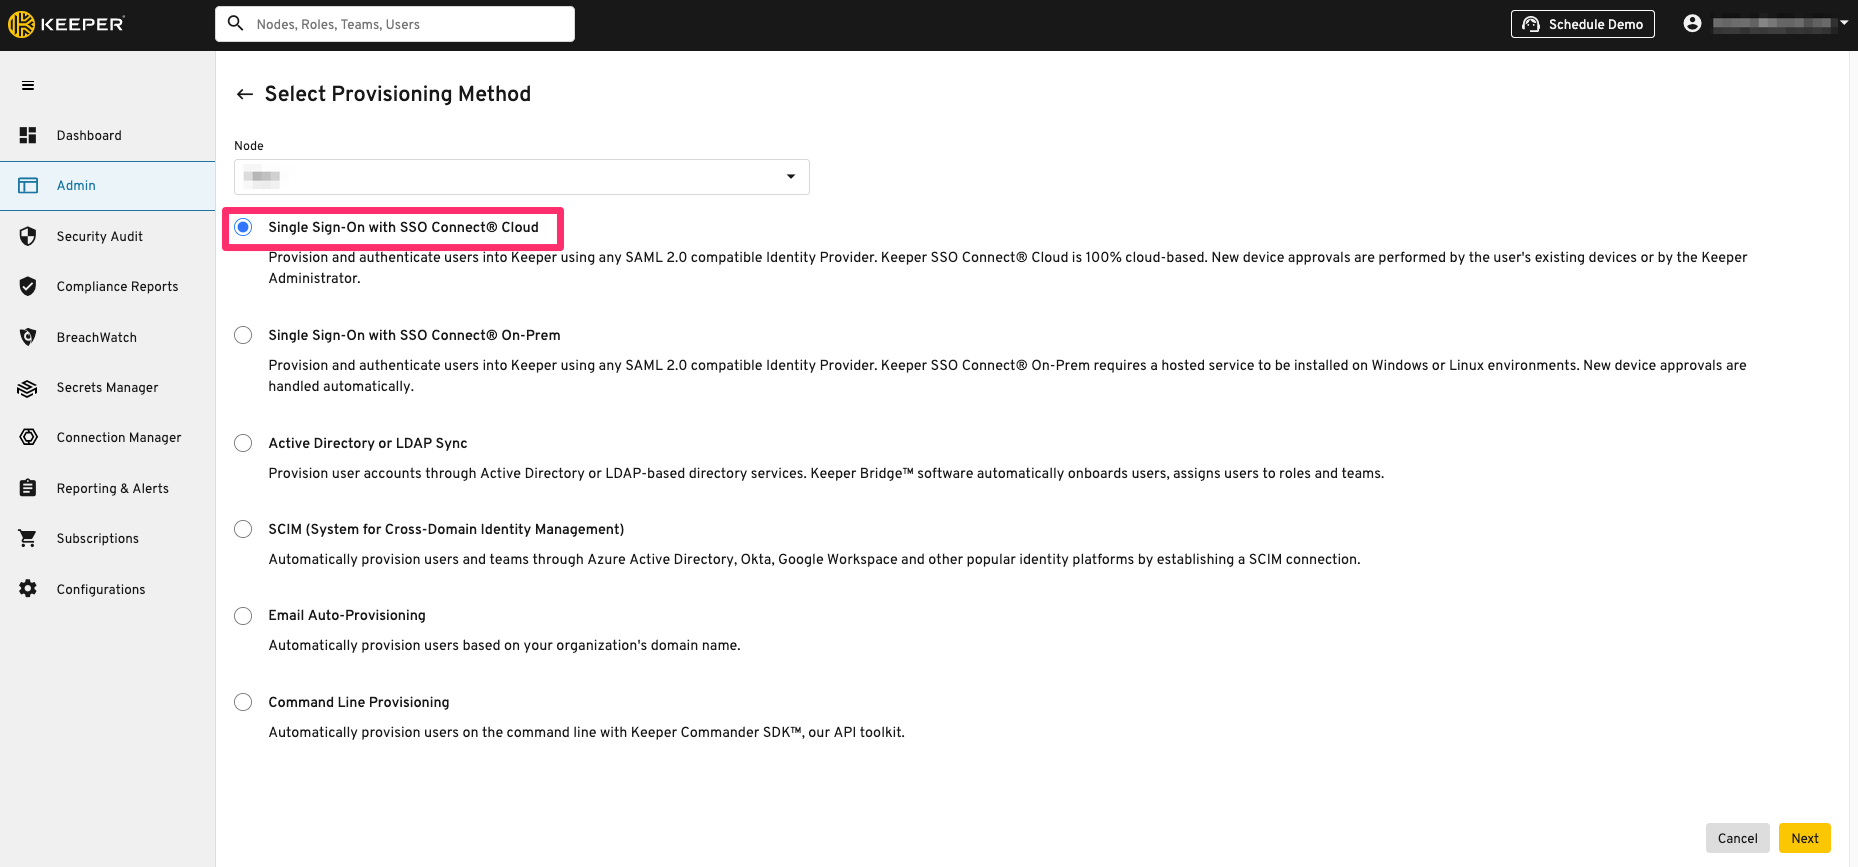
- Select ‘Single Sign-On with SSO Connect Cloud’ then click ‘Next’ in the bottom right corner.
-
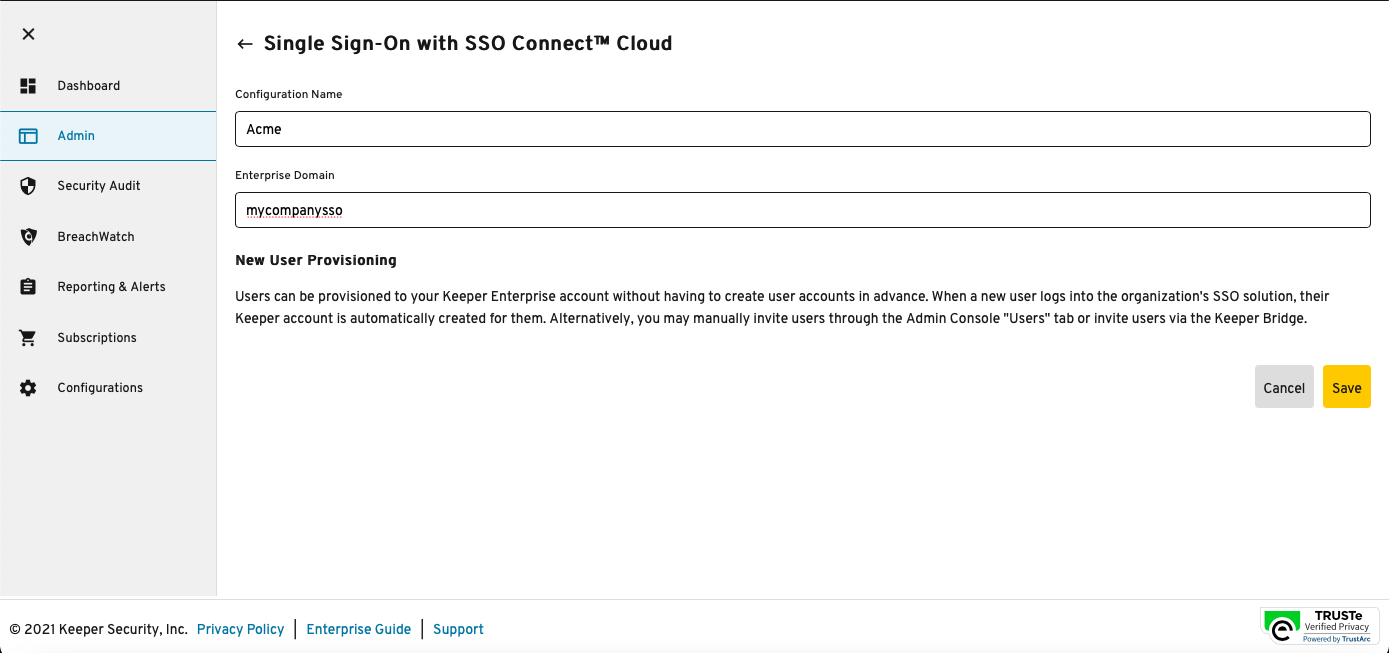
Configuration Name: This is for internal Keeper use only. Users will not see this.
-
Enterprise Domain: This is the outward facing name. Users may use this when creating an account. Prefer the use of unique identifiers. (i.e. test, Example, company1)
-
Just-In-Time Provisioning: Optional: Clicking the checkbox will allow users to create accounts in the node by typing in the Enterprise Domain name when signing up.
- Under the dropdown for ‘IDP Type’ select ‘Generic’.
- In the SAML Metadata field, select ‘Browse Files’ and upload the metadata.xml file saved from the Trusona Dashboard.

- Under ‘Identity Provider Attribute Mappings’ enter the following values exactly as they are shown below:
- First Name: given_name
- Last Name: name
- Email: http://schemas.xmlsoap.org/ws/2005/05/identity/claims/emailaddress

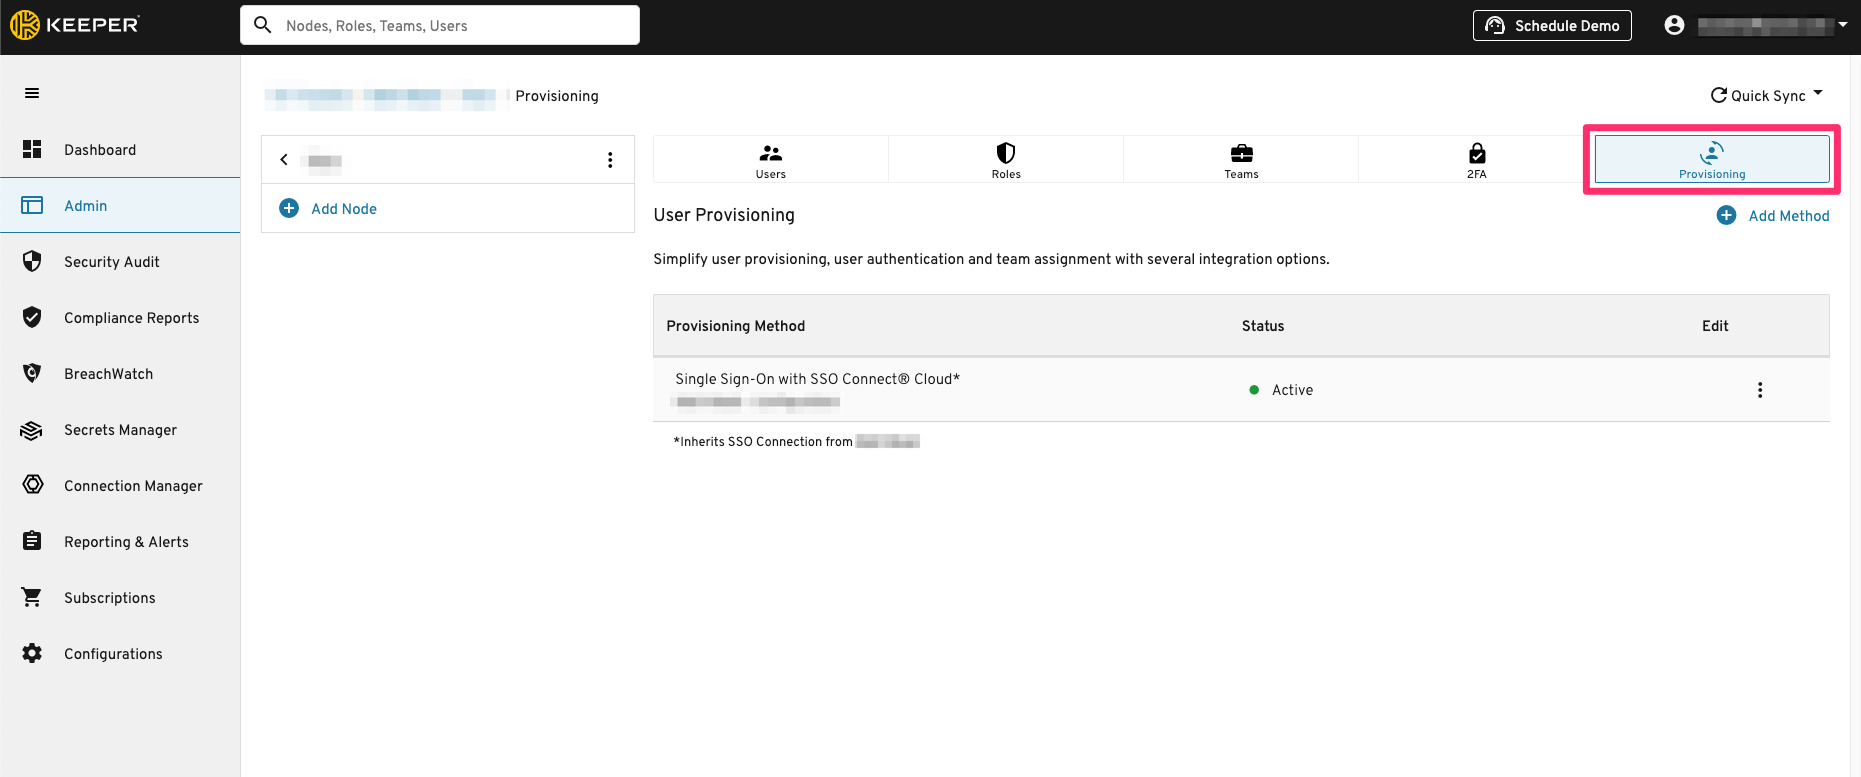
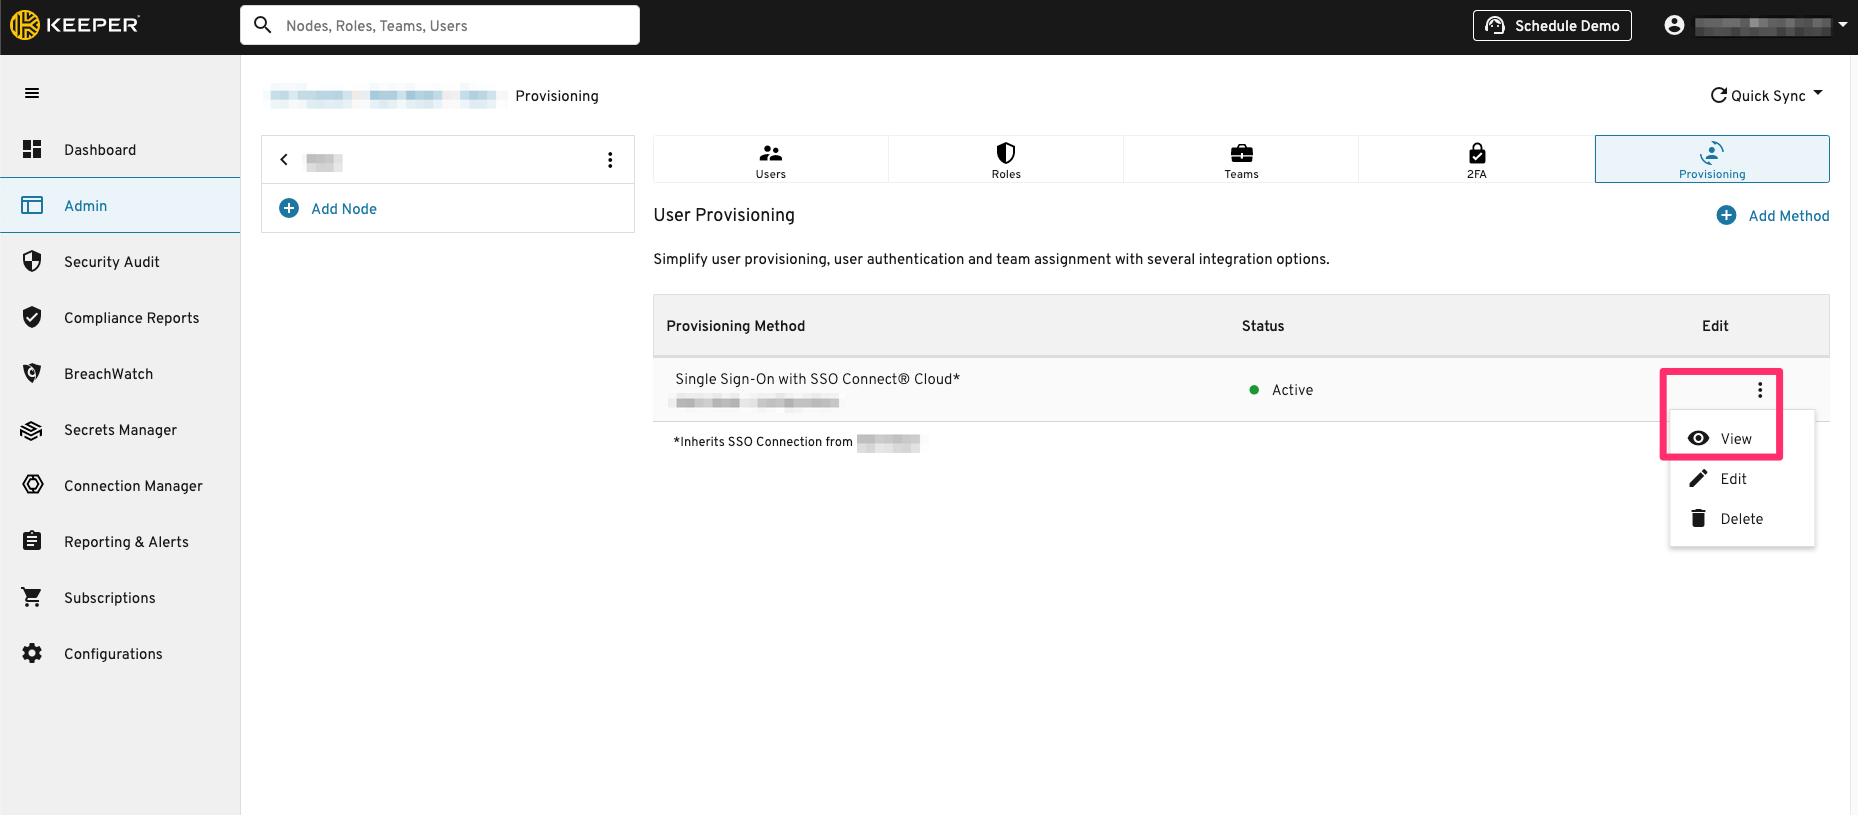
- Scroll to the top of the page, click the back arrow button to the left of ‘Single Sign-On with SSO Connect Cloud’.

- The browser will now show the ‘Provisioning’ tab on the main Keeper page as seen in the picture below:
3.2. Copying SAML Information from Keeper
- From the main page, click on the three dots under ‘Edit’ and then ‘View’.
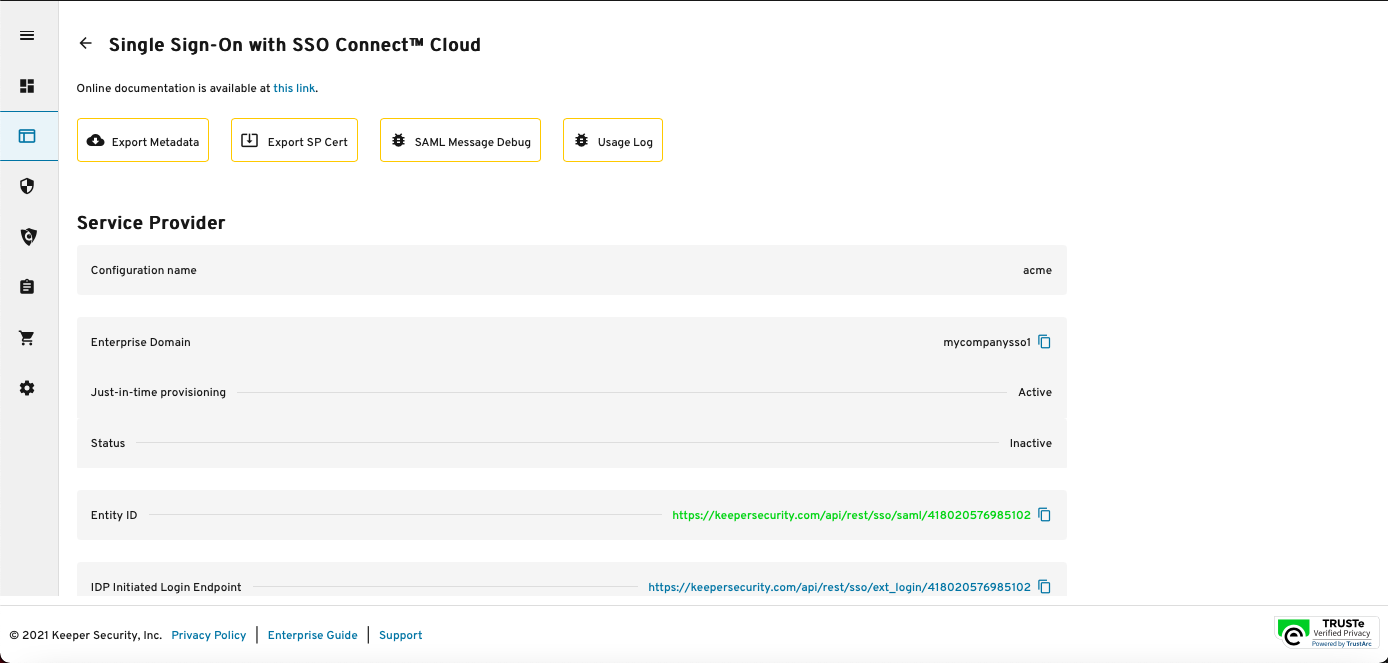
- Take note of the following URLs below ‘Service Provider’ and copy them to a text document, we will need this later on in the integration process:
- IDP Initiated Login Endpoint
- Assertion Consumer Service (ACS) Endpoint
- Single Logout Service (SLO) Endpoint
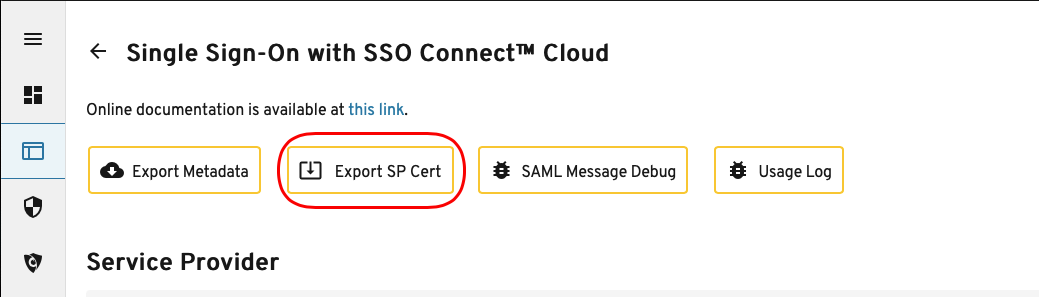
3.3. Downloading the Keeper SP Certificate
- Select the ‘Export SP Cert’ button at the top of the page to download the certificate.
3.4. Syncing Keeper
- Click on the back arrow to the left on ‘Single Sign-On with SSO Connect Cloud’.
- From the Admin page, click on the ‘Quick Sync’ button in the top right corner and select ‘Full Sync’.
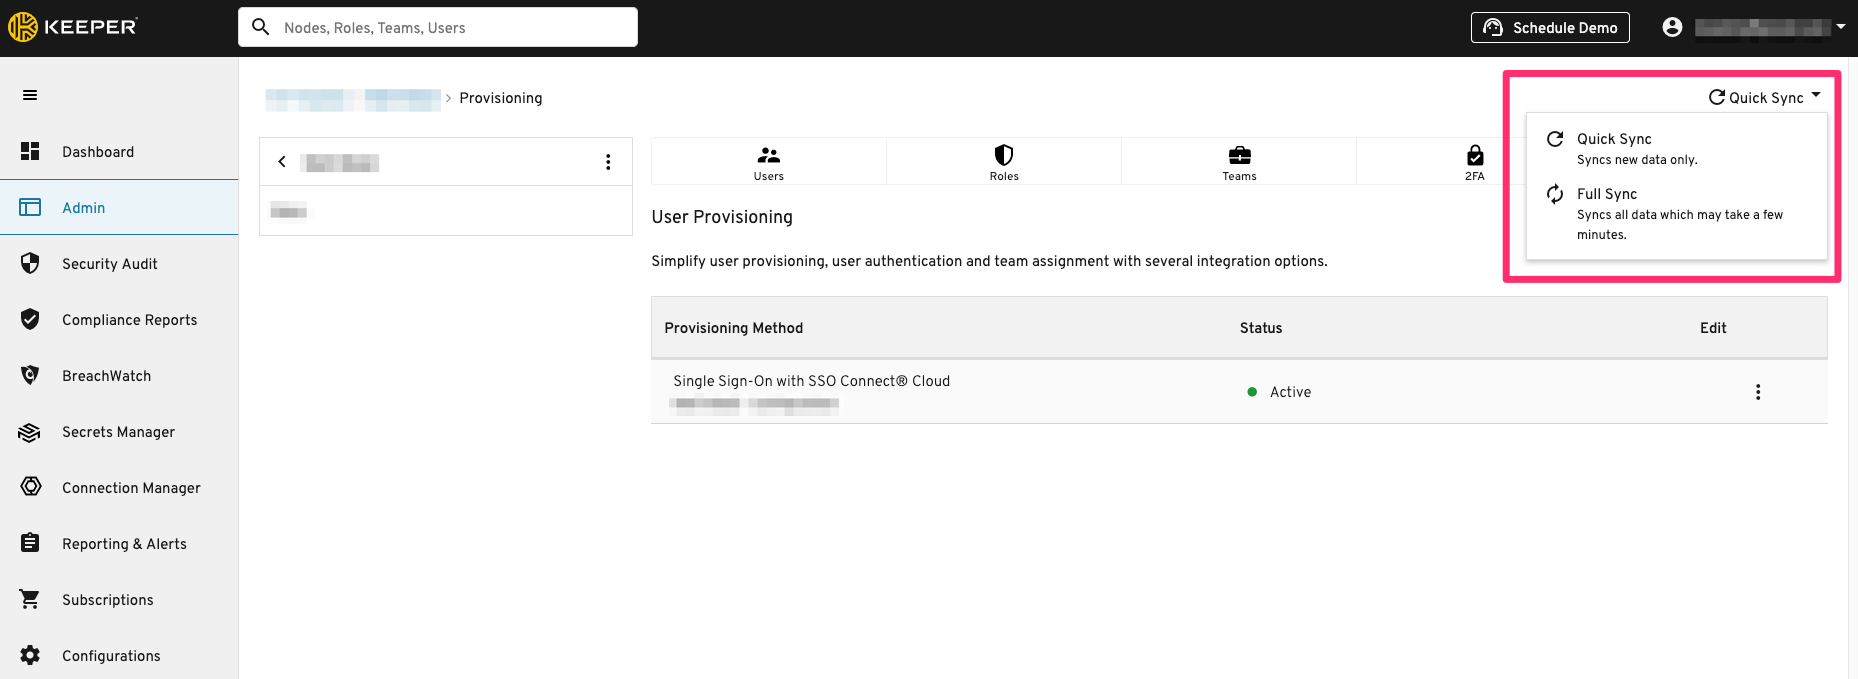
Please refer to Keeper’s documentation for troubleshooting.
4. Configuring the Trusona Dashboard
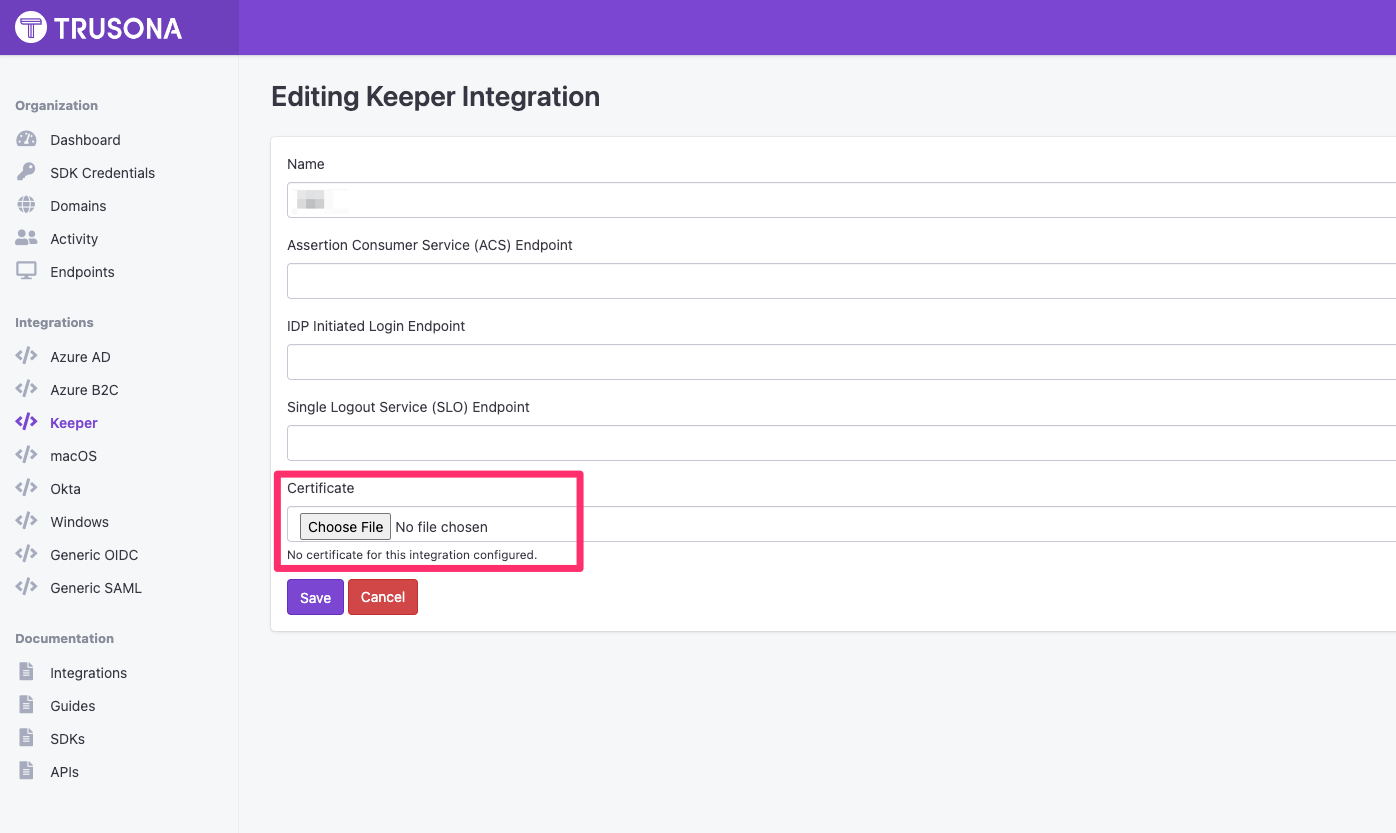
4.1. Uploading the Certificate
- Navigate back to the Trusona Dashboard.
- Select ‘Keeper’ on the left-hand navigation.
- Locate the Keeper Integration you previously created and select ‘Actions’.
- Select ‘Edit’.
- Upload the certificate that was downloaded from Keeper by clicking ‘Choose File’ button under ‘Certificate’ and selecting the
.crtfile.
4.2. Inputting SAML Information from Keeper into Trusona
- Enter the information from step 3.2 into your integration in the Trusona Dashboard. Please be mindful of the order of the information.
- Assertion Consumer Service (ACS) Endpoint
- IDP Initiated Login Endpoint
- Single Logout Service (SLO) Endpoint
- Click ‘Save’.
5. User Provisioning and Authentication
5.1. Just-In-Time Provisioning
- Download the Trusona app and sign-up and register your work email address. For additional help registering your work email address, see our Registering with Trusona Knowledge Base article.
- If ‘Just-In-Time Provisioning’ is activated (see step 3.1), sign in to Keeper’s Web Vault. If ‘Just-In-Time Provisioning’ is NOT activated, skip to step 5.2. Note that the Keeper Web Vault is different than the Keeper Admin Portal.
- Click Login.
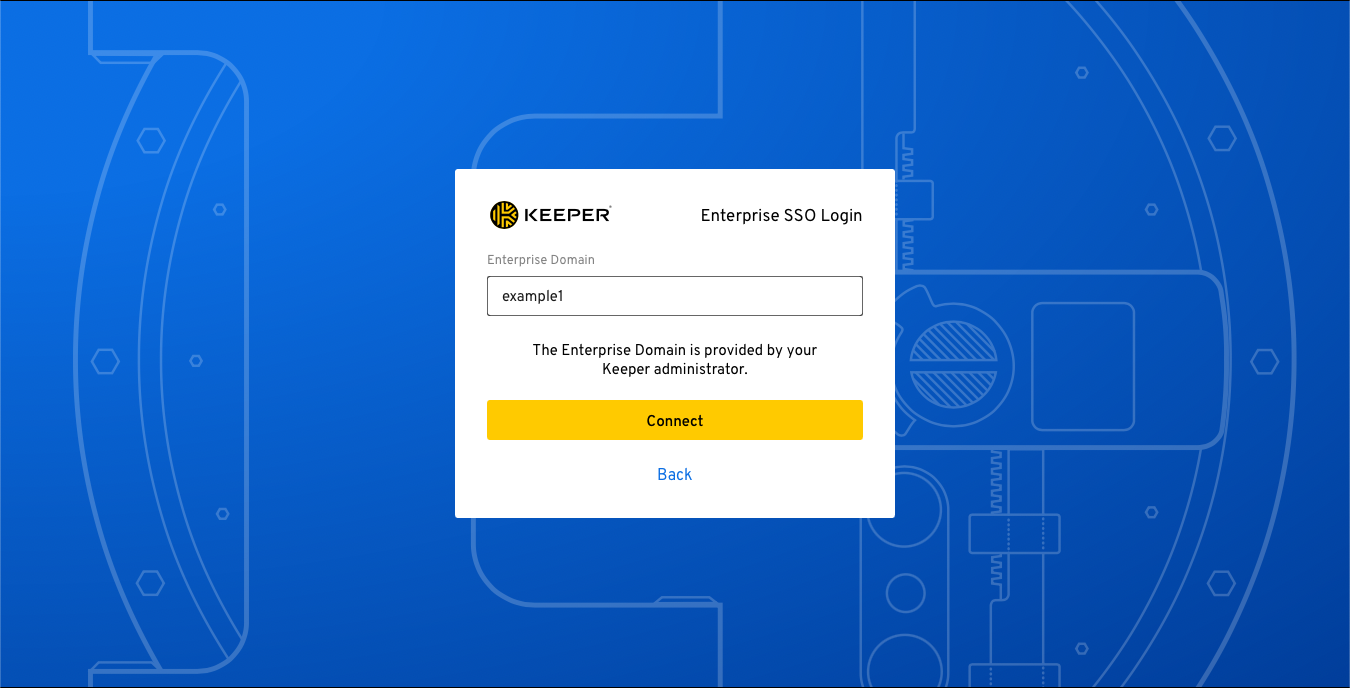
- At the bottom of the page, click ‘Enterprise SSO Login’ then ‘Enterprise Domain’. Do not enter your email address.
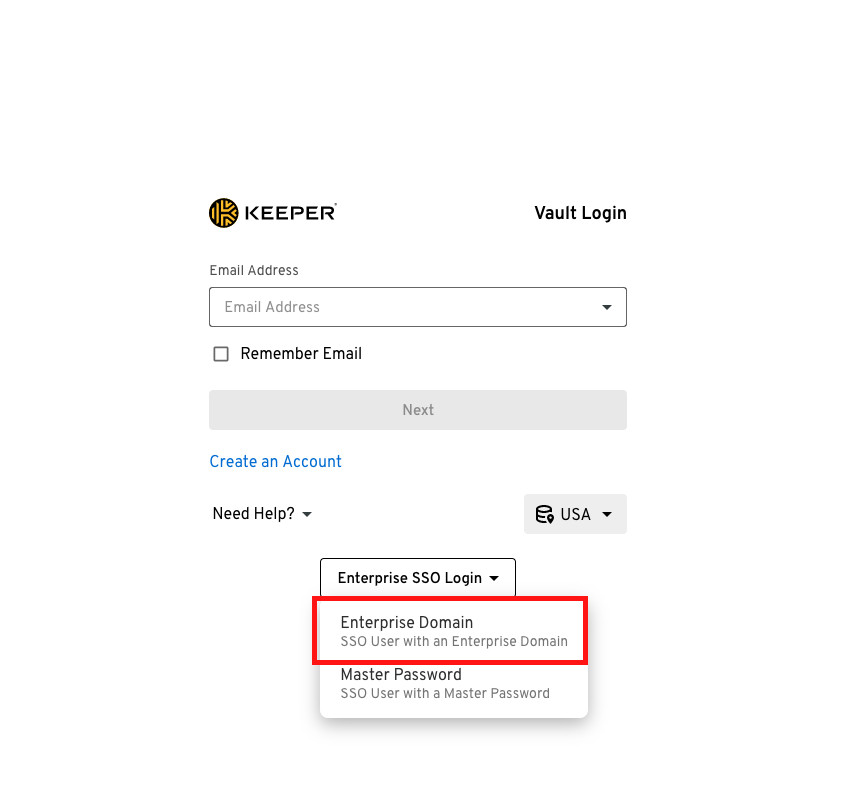
- Enter your custom ‘Enterprise Domain’ created in step 3.1 and select Connect.
- Log in by scanning the QR code and approving the security challenge using the Trusona mobile app.
- Once you are logged in, an account was automatically provisioned for you in Keeper.
- Next time you need to access your Keeper Web Vault, log in using your work email address, or the email address you registered within the Trusona mobile app.
- See the Keeper Video for more information.
The email(s) provisioned in Keeper must match those used in the Trusona app.
5.2. (Optional) Manual Provisioning
- Follow these steps if JIT (Just-In-Time) Provisioning was not enabled in step 3.1.
- Log in by scanning the QR code and approving the security challenge using the Trusona mobile app.
- If ‘Just-In-Time Provisioning’ is NOT activated, click on the ‘Users’ tab and select ‘Add Users’.

- Enter the email used when signing up for Trusona under ‘Email Address’. Enter the user’s name under ‘Full Name’.
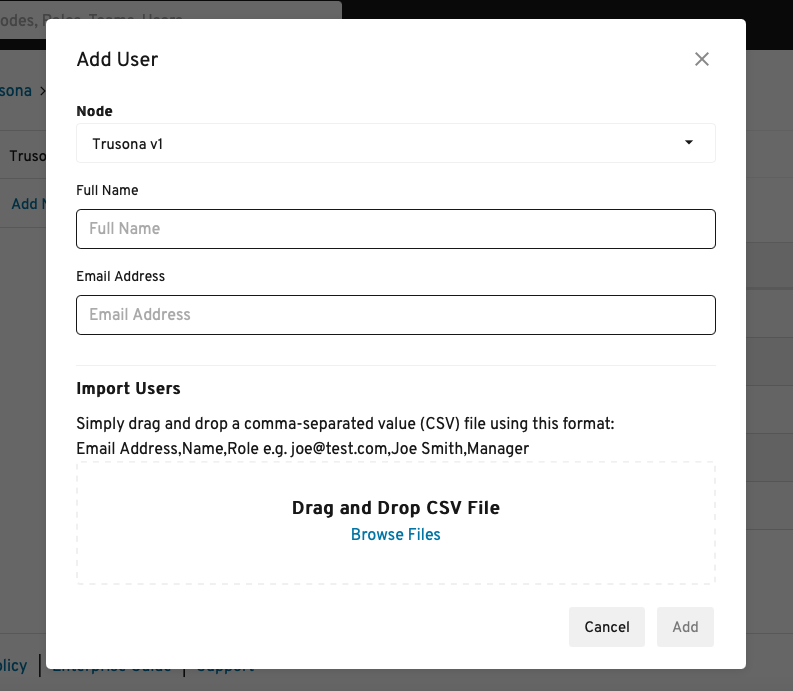
- For a large number of users, you may upload CSV of users in the following format by clicking ‘Browse Files’ under ‘Drag and Drop CSV File’:
Email Address,Name,Role e.g. joe@test.com,Joe Smith,Manager
The email(s) provisioned in Keeper must match those used in the Trusona app.
- The user(s) who were added, are now provisioned in Keeper. Users who are manually provisioned, will receive an email to finish setting up their account.
- Once a provisioned user has finished setting up their account, they can navigate to Keeper’s Web Vault to log in.
- They will need to enter the email address that was provisioned for them.
- Then complete their login by scanning the QR code and approving the security challenge using the Trusona mobile app.
- See the Keeper Video for more information.
- For further information on integrating Trusona with your Keeper SSO environment, please see Trusona - SSO Connect Cloud