
- 1. Navigate the dashboard
- 2. Create a new integration
- 3. Input Data Requested
- 4. System Protocols
- 5. Service Provider IDP Connection
- 6. Service Provider Selector
- 7. Authentication Policy Contract
- 8. Identity Provider Adapter
- 9. Authentication Policies: Selector Policy
- 10. Authentication Policies: Adapter Policy
- 11. Ordering of Authentication Policies
- 12. Identity Provider SP Connection
- 13. Modified HTML Template
- 14. Modified Default Login
- 15. Custom Trusona Login
This guide was written using Ping Federate v9.3.1. This integration also works on Ping v8.4+, but the steps and screenshots described below will vary.
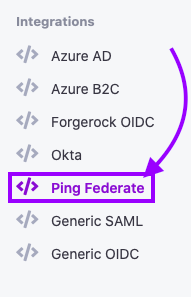
1. Navigate the dashboard
On the left-side of Trusona Integration Dashboard, click on the Ping Federate tab from the navigation menu.
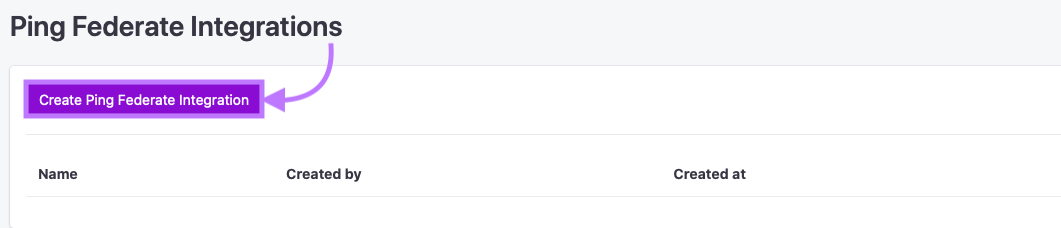
2. Create a new integration
Click on the “Create Ping Federate Integration” button
3. Input Data Requested
Enter values for Name, Email domain(s) & the Base URL of your Ping installation. Then click Save
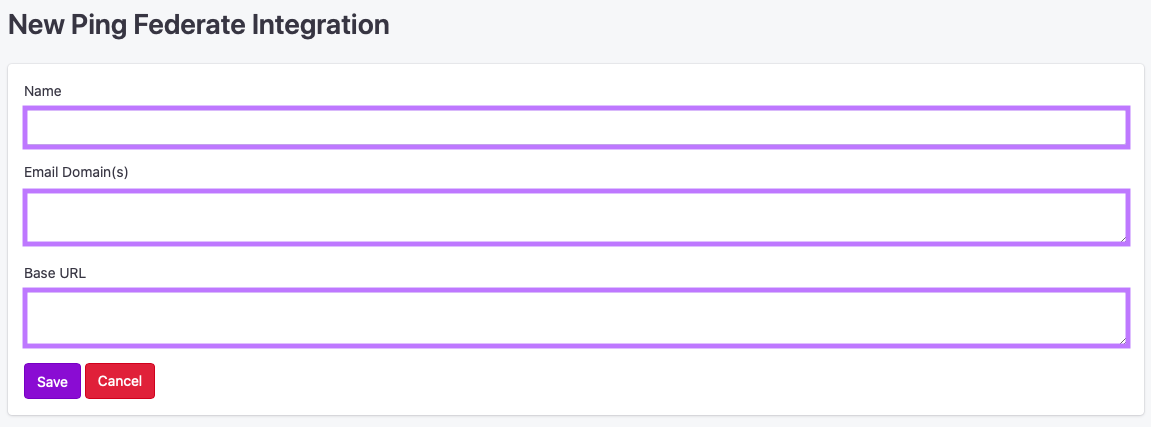
Trusona will provide you with the Service Provider SAML metadata endpoint URL
You should now be able to see integration details that you will use in the proceeding steps.
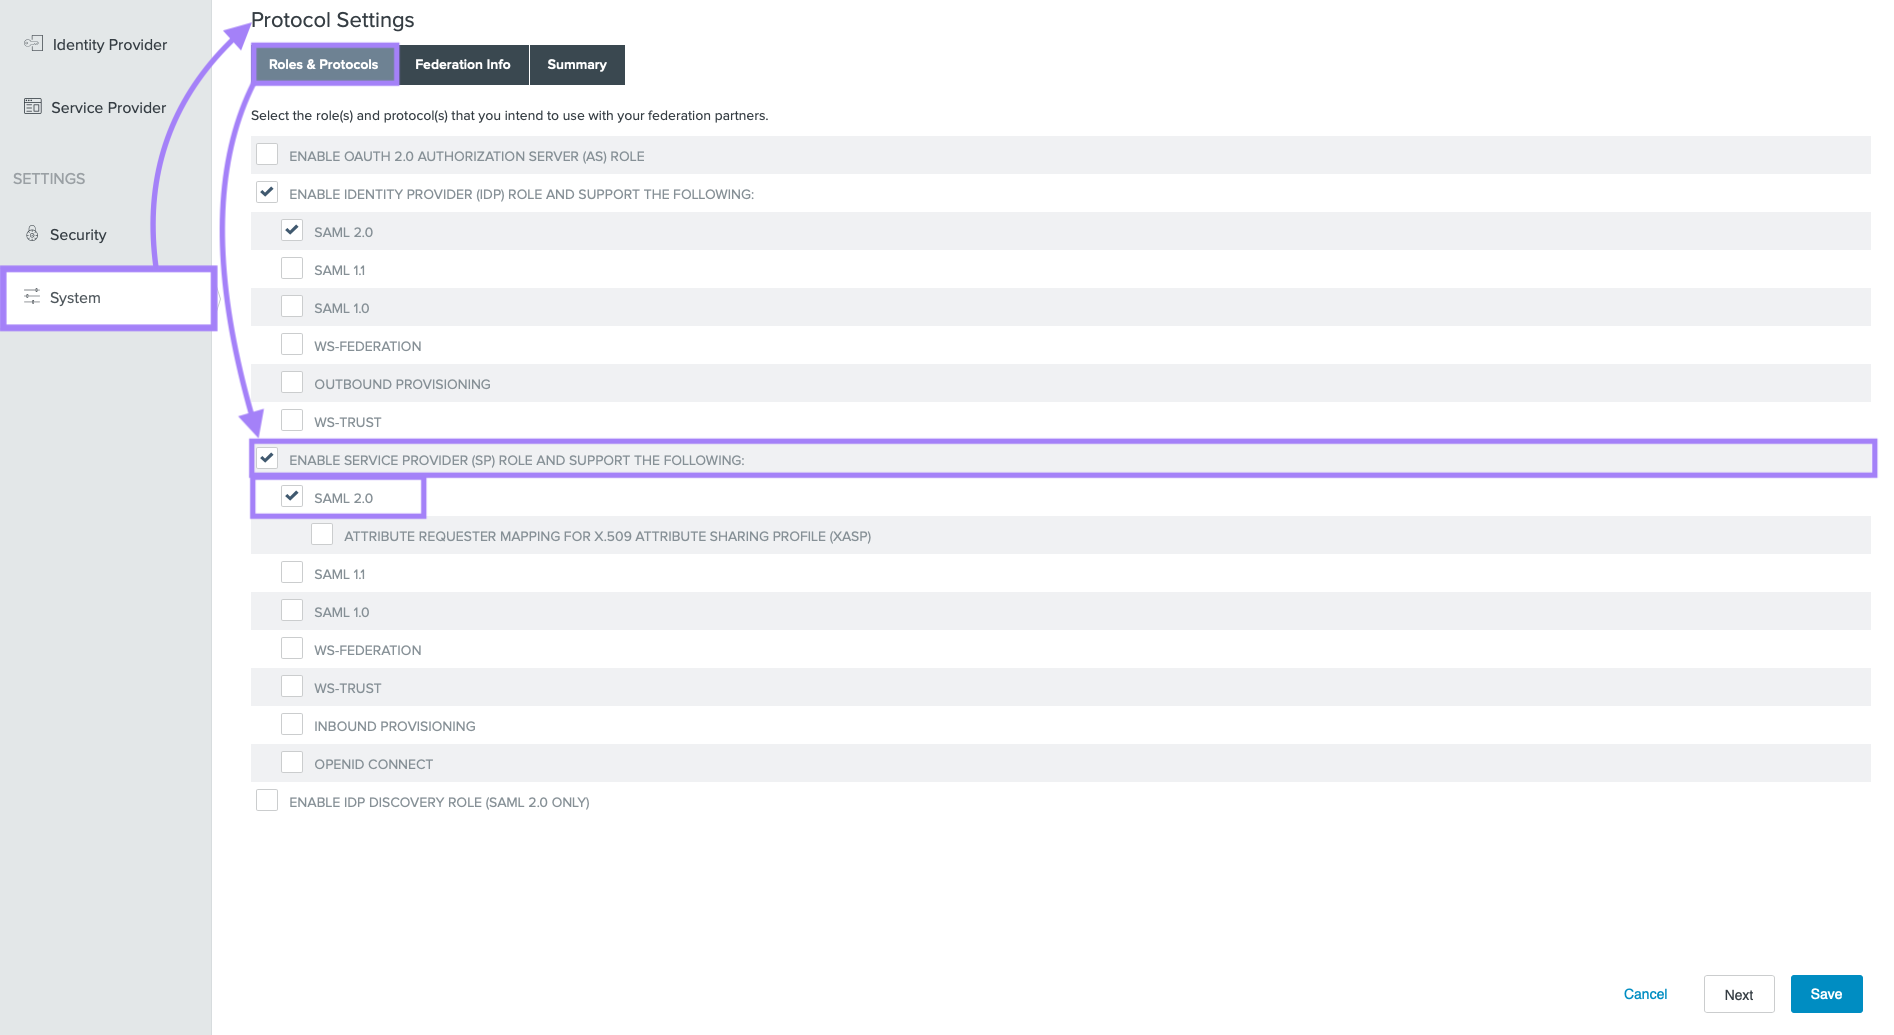
4. System Protocols
To configure Trusona with Ping, your system will need to understand SAML 2.0. The following steps accomplish that.
- Go to
System→Protocol Settings→Roles & Protocols - Check the boxes alongside:
ENABLE SERVICE PROVIDER (SP) ROLE AND SUPPORT THE FOLLOWINGandSAML 2.0 - Click on
Save
5. Service Provider IDP Connection
- Go to the
Service Providertab - Under IDP Connections, click on
Create New - Confirm that
Browser SSO Profilesis selected. Click onNext - Only
Browser SSOshould be selected. Click onNext - For METADATA, select
URLthen →Manage Partner Metadata URLs→Add New URL - Follow the subsequent steps to successfully add and load the remote metadata by specifying the metadata URL provided to you
- Click on
SavethenNext - Accept the default values, and click on
Next - Click on
Configure Browser SSO - Select the
SP-INITIATED SSOcheckbox then click onNext - Click on
Configure User-Session Creation - Select
NO MAPPINGand click onNext - Accept the default values under Attribute Contract and click on
Next, then click onDone - Click on
Next - Click on
Configure Protocol Settings - Accept the default values and click on
Next - Under Allowable SAML Bindings only
POSTshould be checked. - Click on
Next - Accept the default values under Overrides
- Click on
Next - Under Signature Policy, select
USE SAML-STANDARD SIGNATURE REQUIREMENTSand click onNext - Under Encryption Policy, select
NONEand click onNext - Click through the subsequent screens, either the
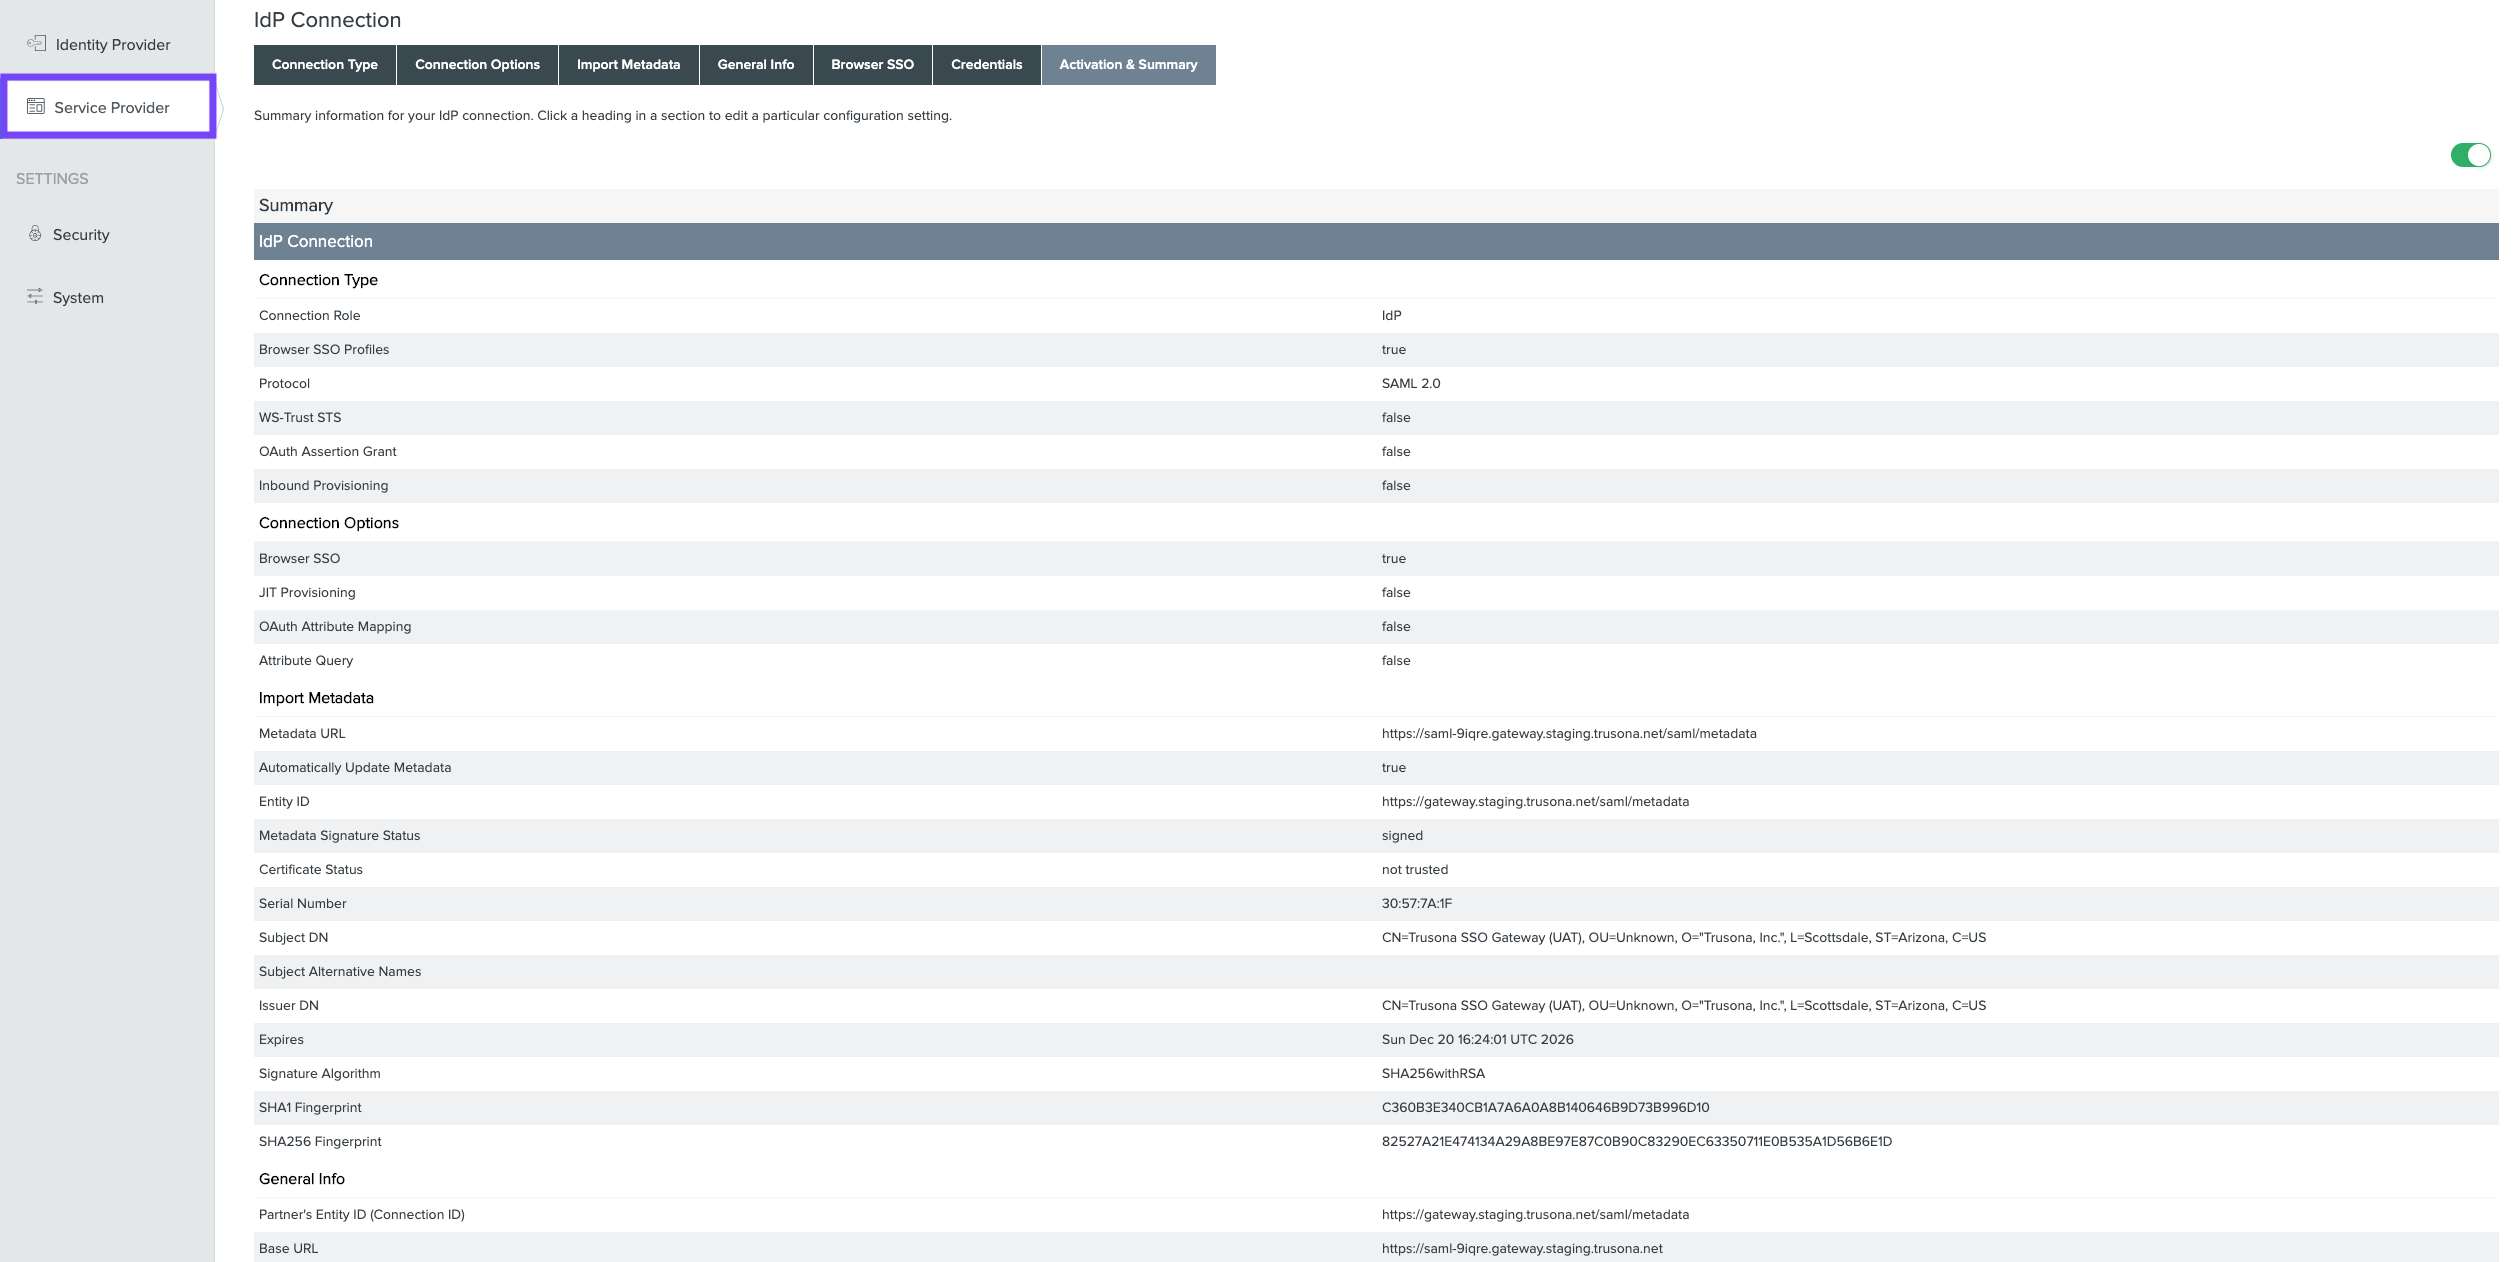
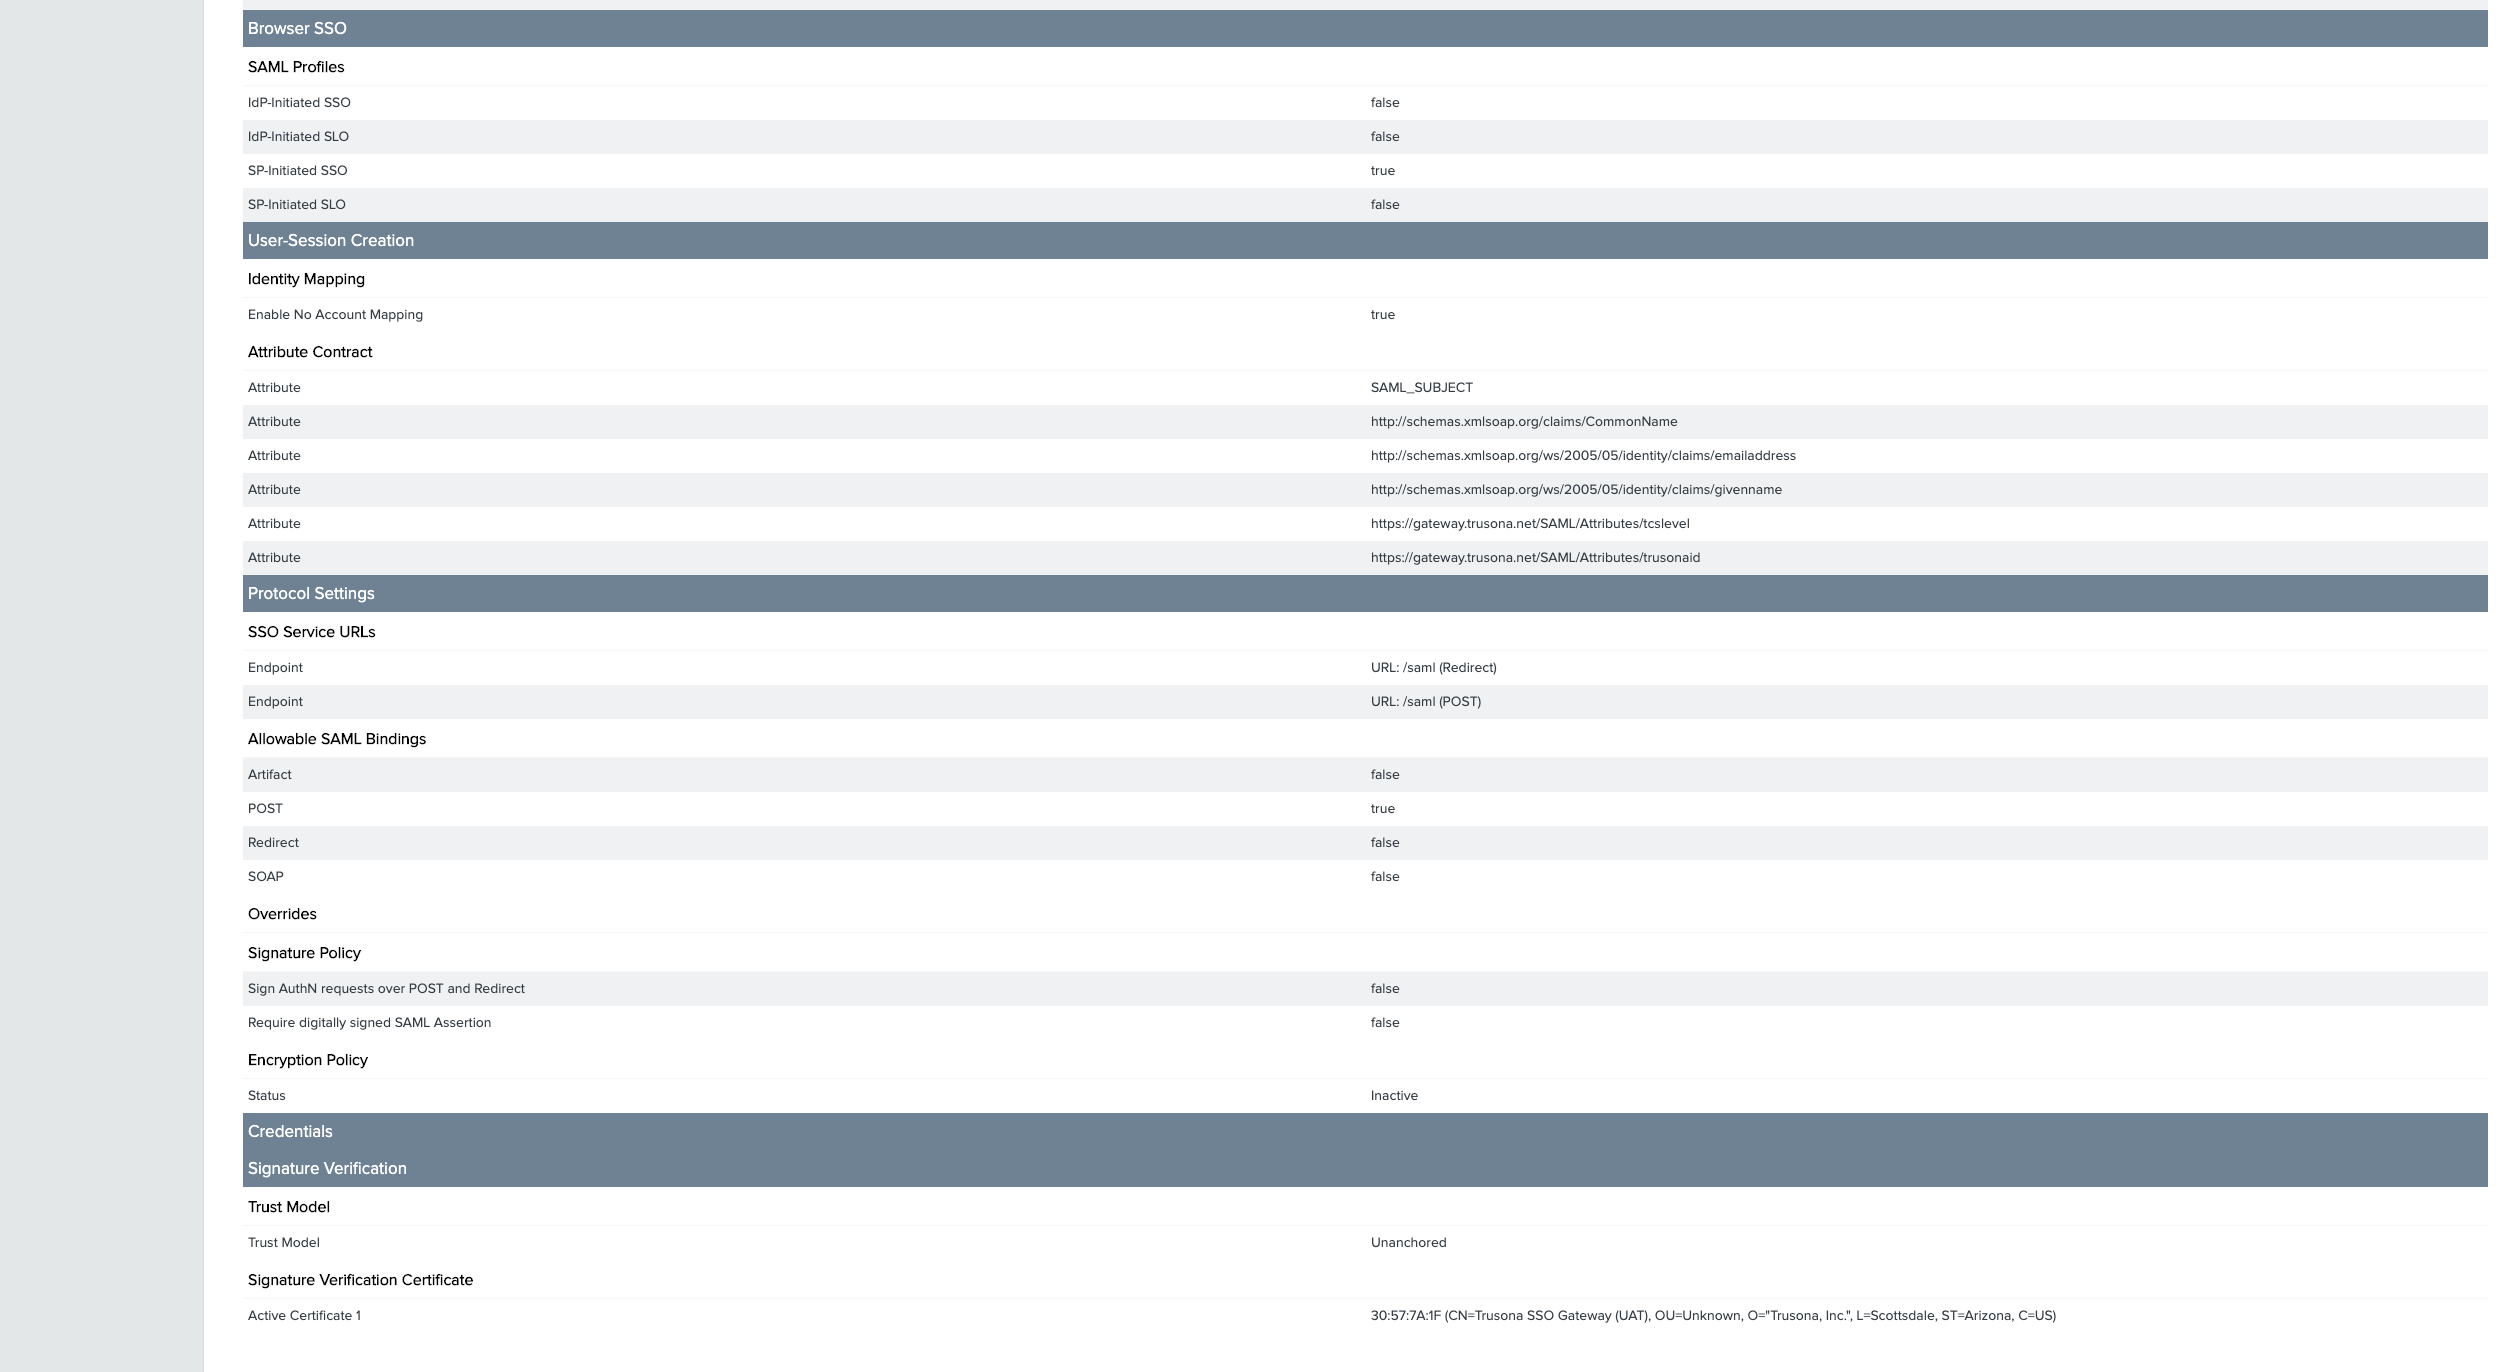
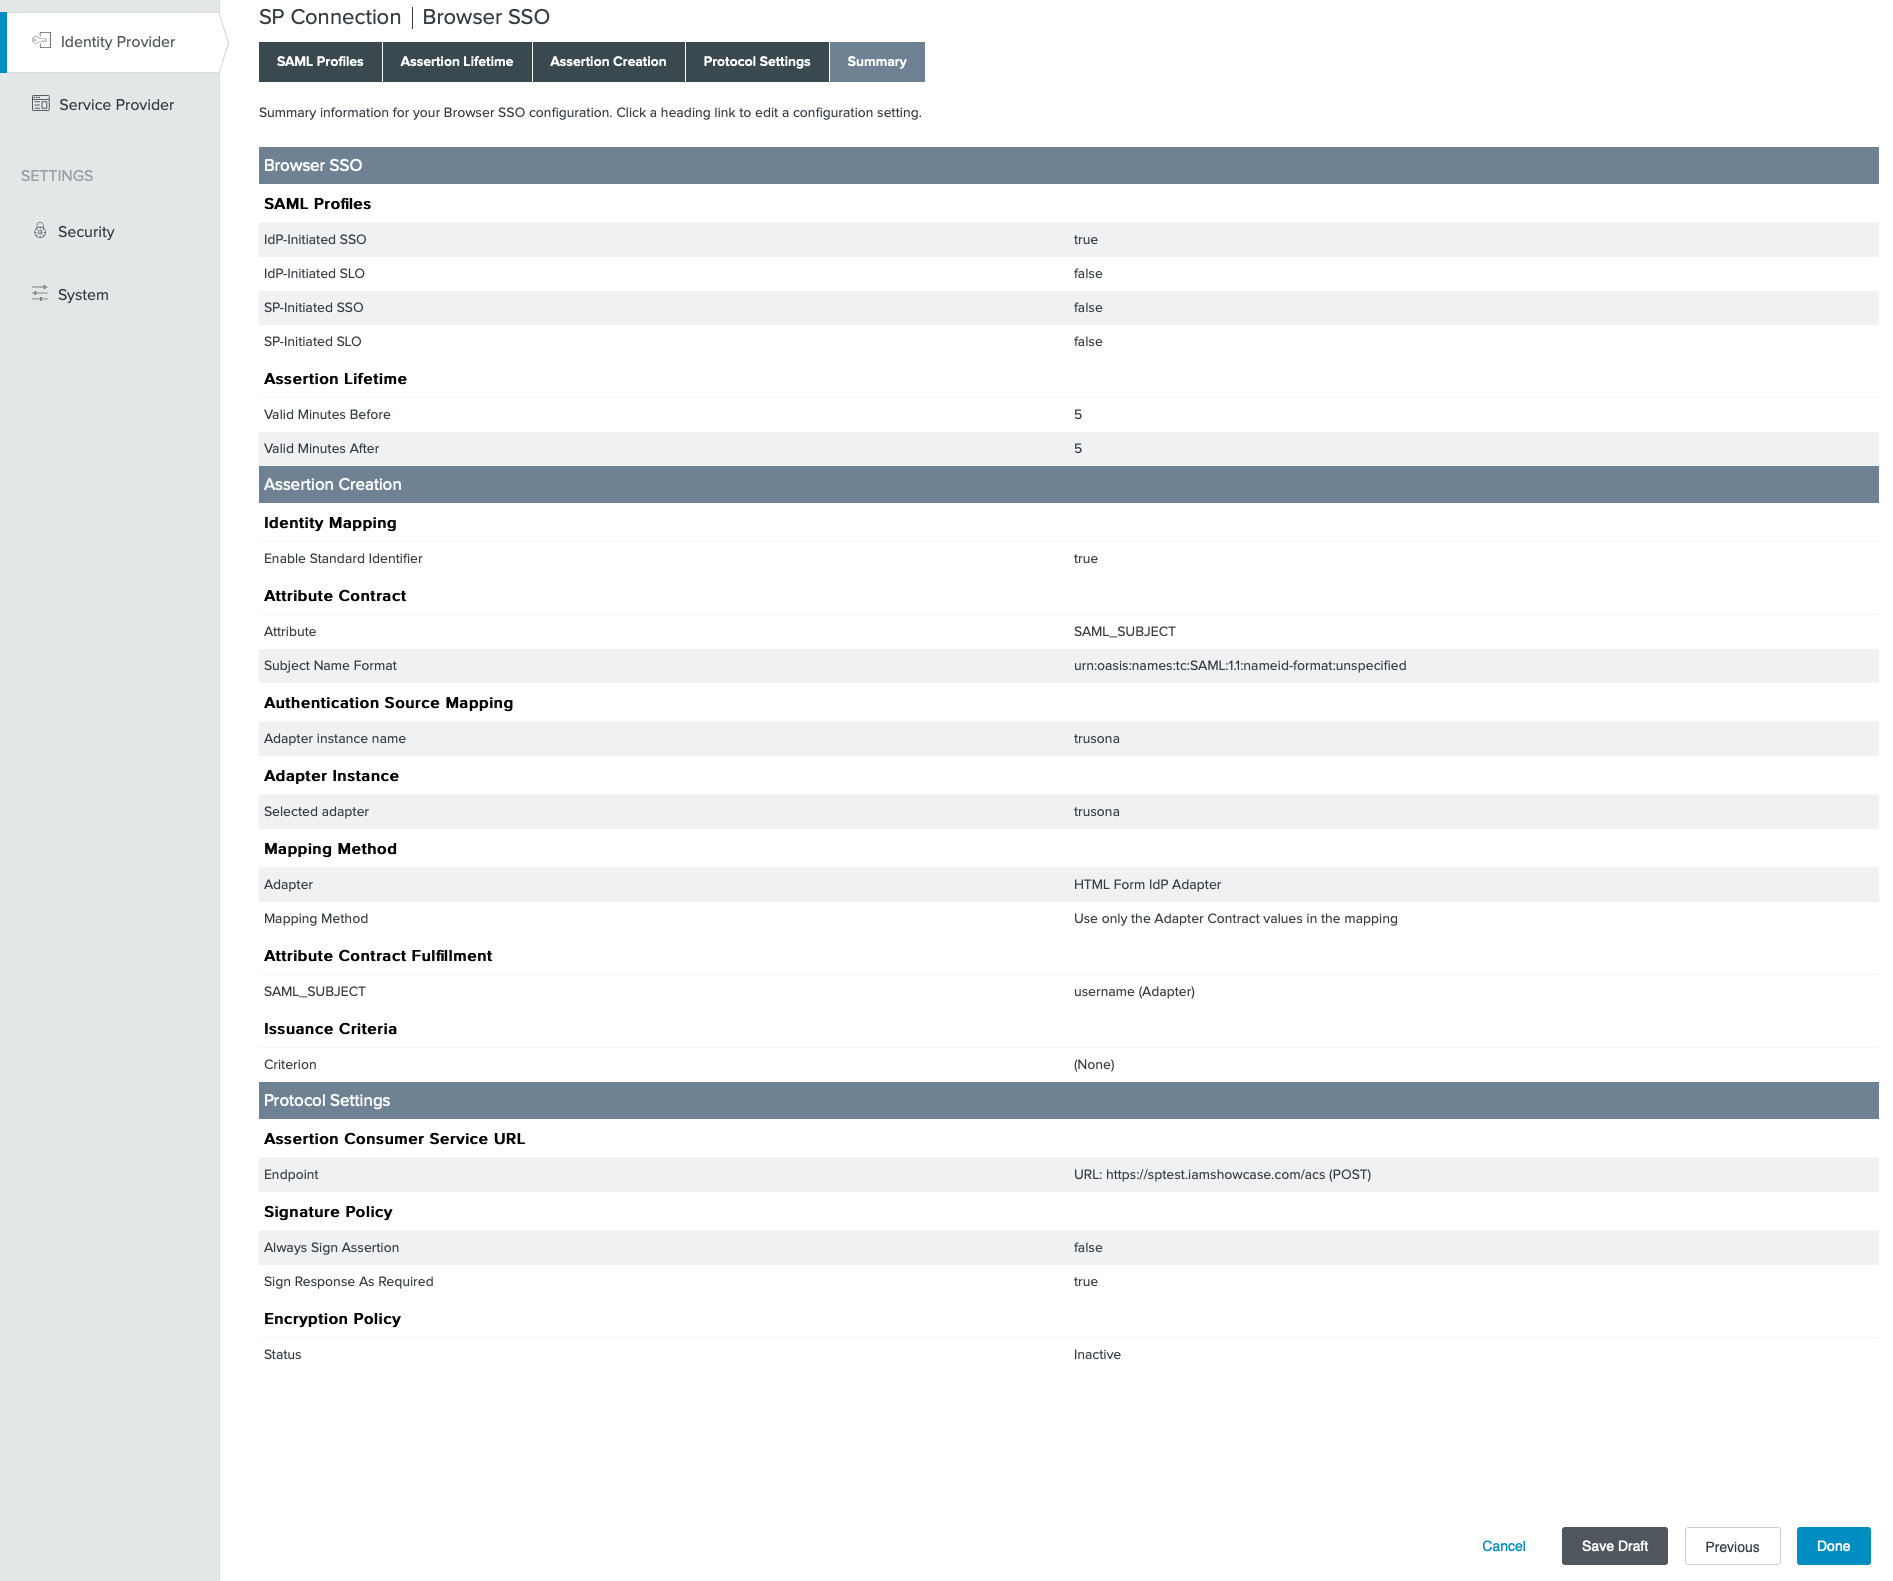
DoneorNextbuttons, and arrive at the Summary - Compare with the screenshot below, then click on
Save
6. Service Provider Selector
- Go to
Service Provider→Selectors - Click on
Create New Instance - Provide memorable a Instance Name and Instance ID
- For Type select
HTTP Request Parameter Authentication Selectorand click onNext - For HTTP REQUEST PARAMETER NAME specify
trusona - Uncheck
CASE-SENSITIVE MATCHINGand click onNext - Enter
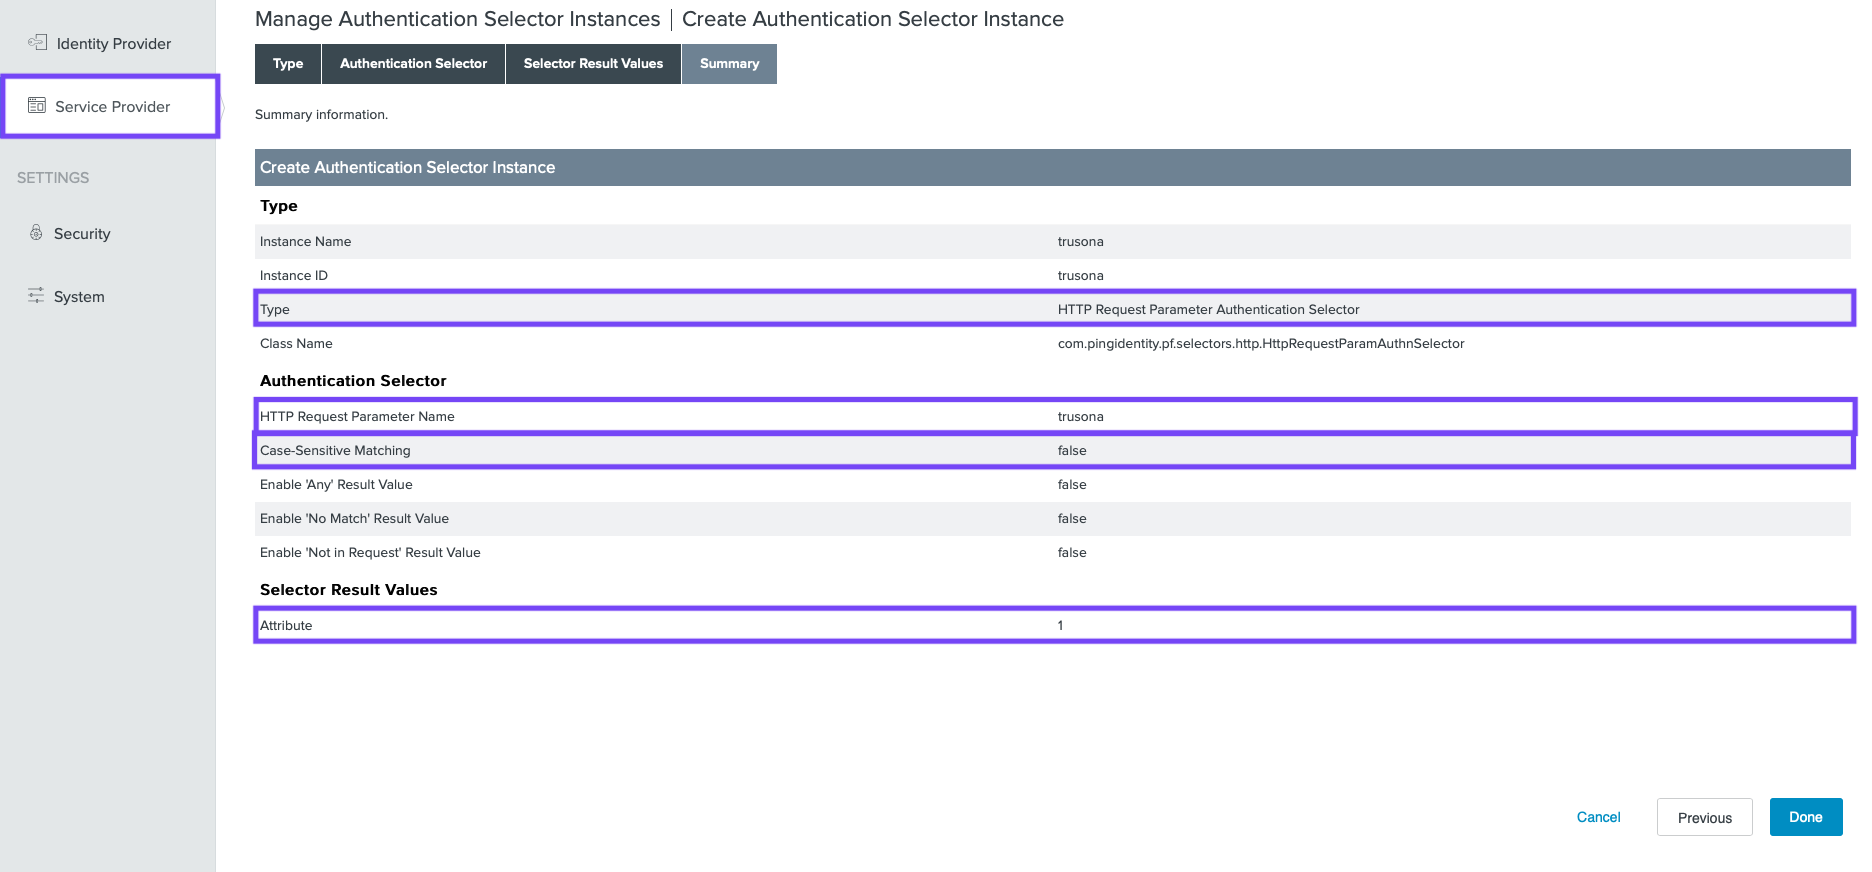
1as a Result Value and click onAdd, then click onNext - Compare with the screenshot below, click on
Done, then click onSave
7. Authentication Policy Contract
Only do this if there are no existing Authentication Policy Contracts
- Go to
Service Provider→Policy Contracts - Click on
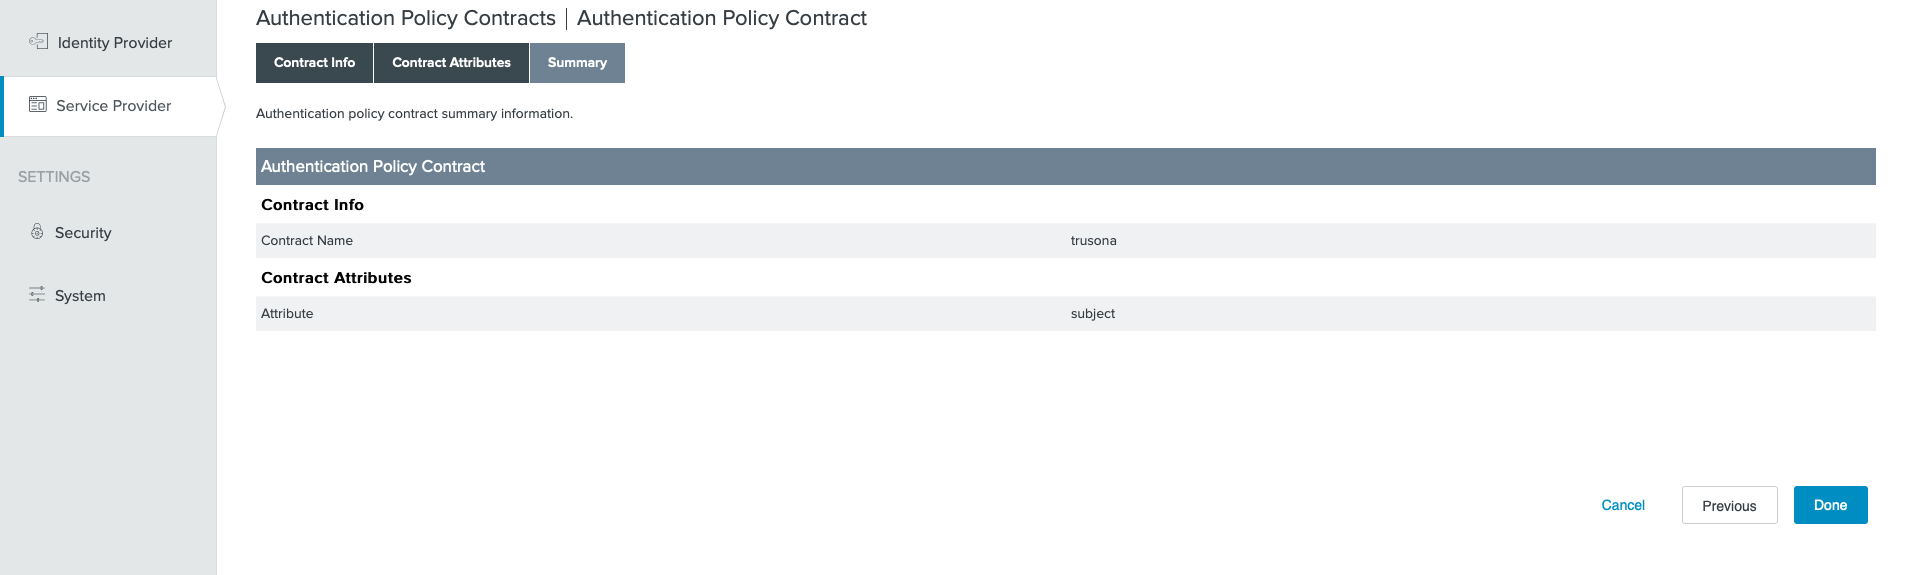
Create New Contract - Specify a memorable Contract Name and click on
Next - Accept the default values, and click on
Next - Click on
Doneand then click onSave
8. Identity Provider Adapter
- Go to
Identity Provider→Adapters→Create New Instance - Specify an Instance Name and Instance ID
- For the Type select
HTML Form IdP Adapter - Do not select a Parent Instance then click on
Next - Click on
Add a new row to Credential Validatorsand select an existing Password Credential Validator - Click on
Update - Make additional changes to the rest of the settings as necessary for your organization, and click on
Next - Click on
Nextto accept the default Adapter Attributes - Check the box on the
usernameattribute on thePseudonymcolumn and click onNext - Click on
Done

9. Authentication Policies: Selector Policy
- Go to
Service Provider→Policies→Add Policy- Optionally, you may update an existing Selector Policy
- Select the Selector policy that was previously created.
- Under
1select the IDP connection that was previously created. - Select a FAIL Rule of
Done - Select the previously created Policy Contract as
Success
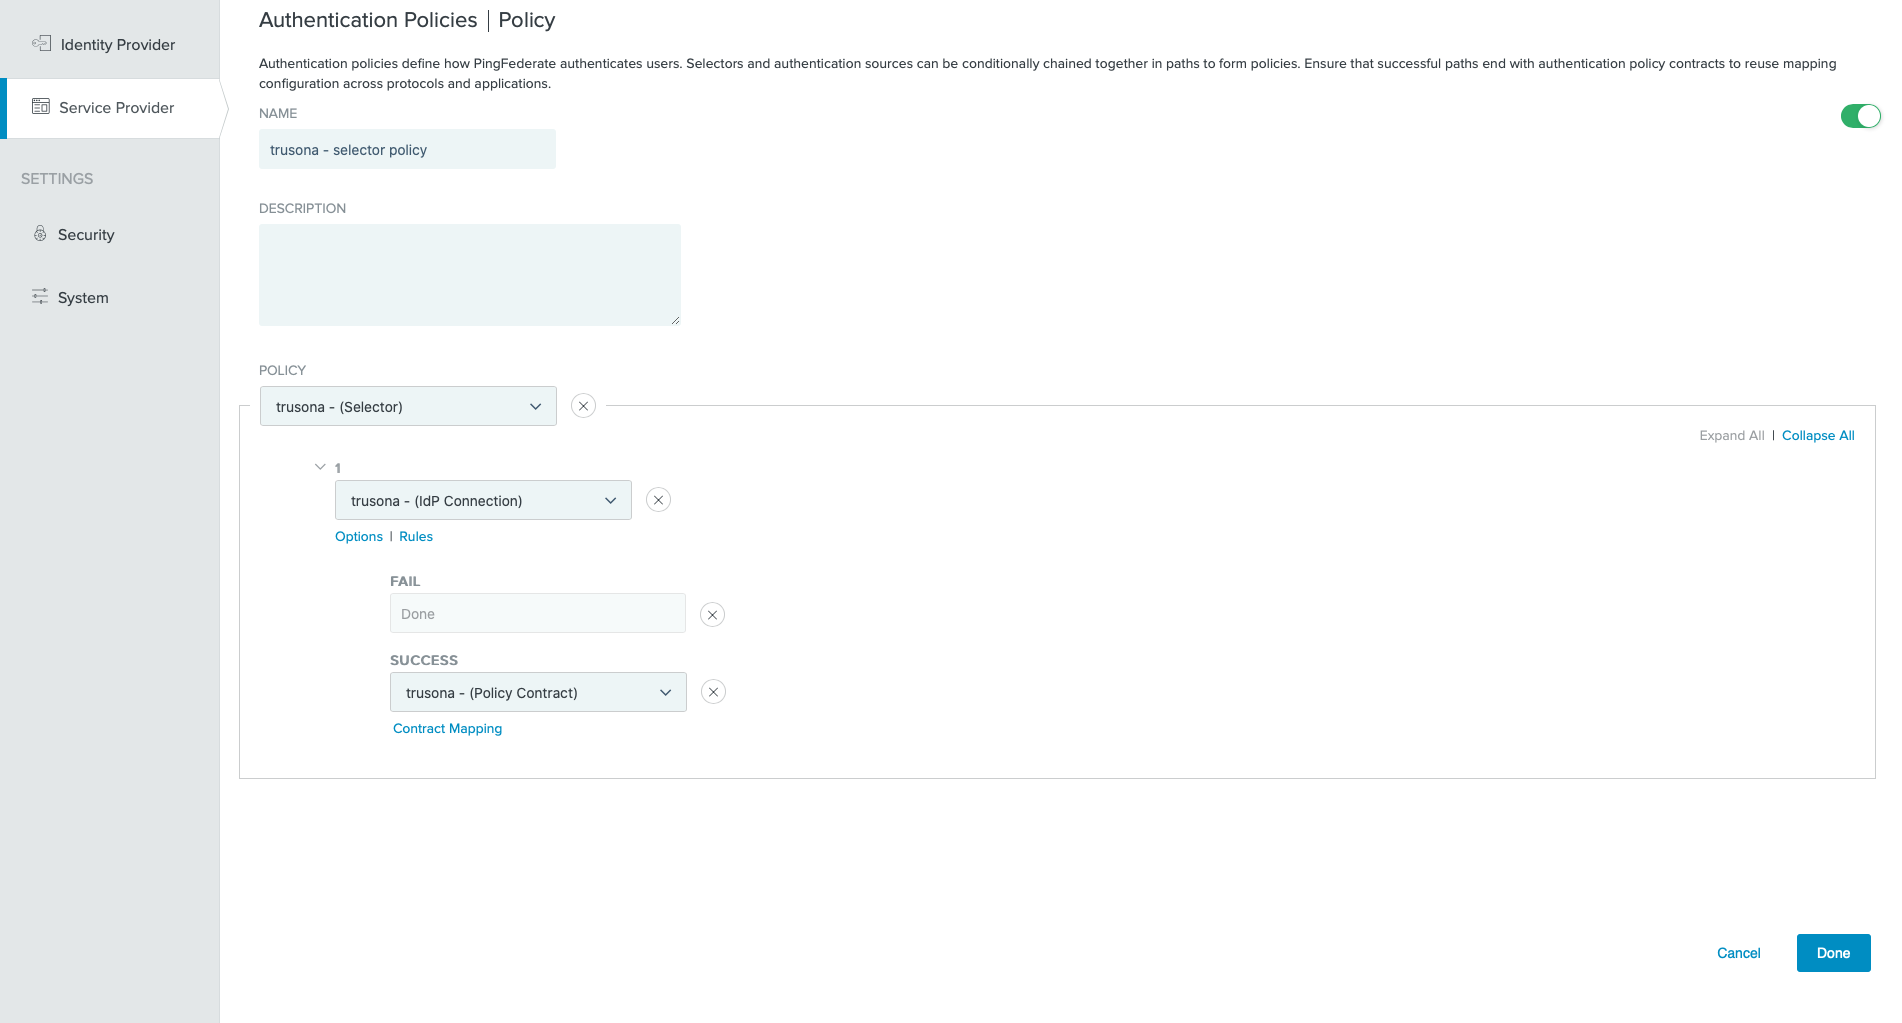
- Click on
Contract Mapping, then click onNext - On the Source column select the IDP connection that was previously created
- On the Value column select
SAML_SUBJECT - Click on
Next - Click on
Next

- Compare screenshots, then click on
Done - Click on
Donethen click onSave
10. Authentication Policies: Adapter Policy
- Go to
Service Provider→Policies→Add Policy- Optionally, you may update an existing Adapter Policy
- Select the IDP Adapter that was previously created.
- Select a FAIL Rule of
Done - Select the previously created Policy Contract as
Success
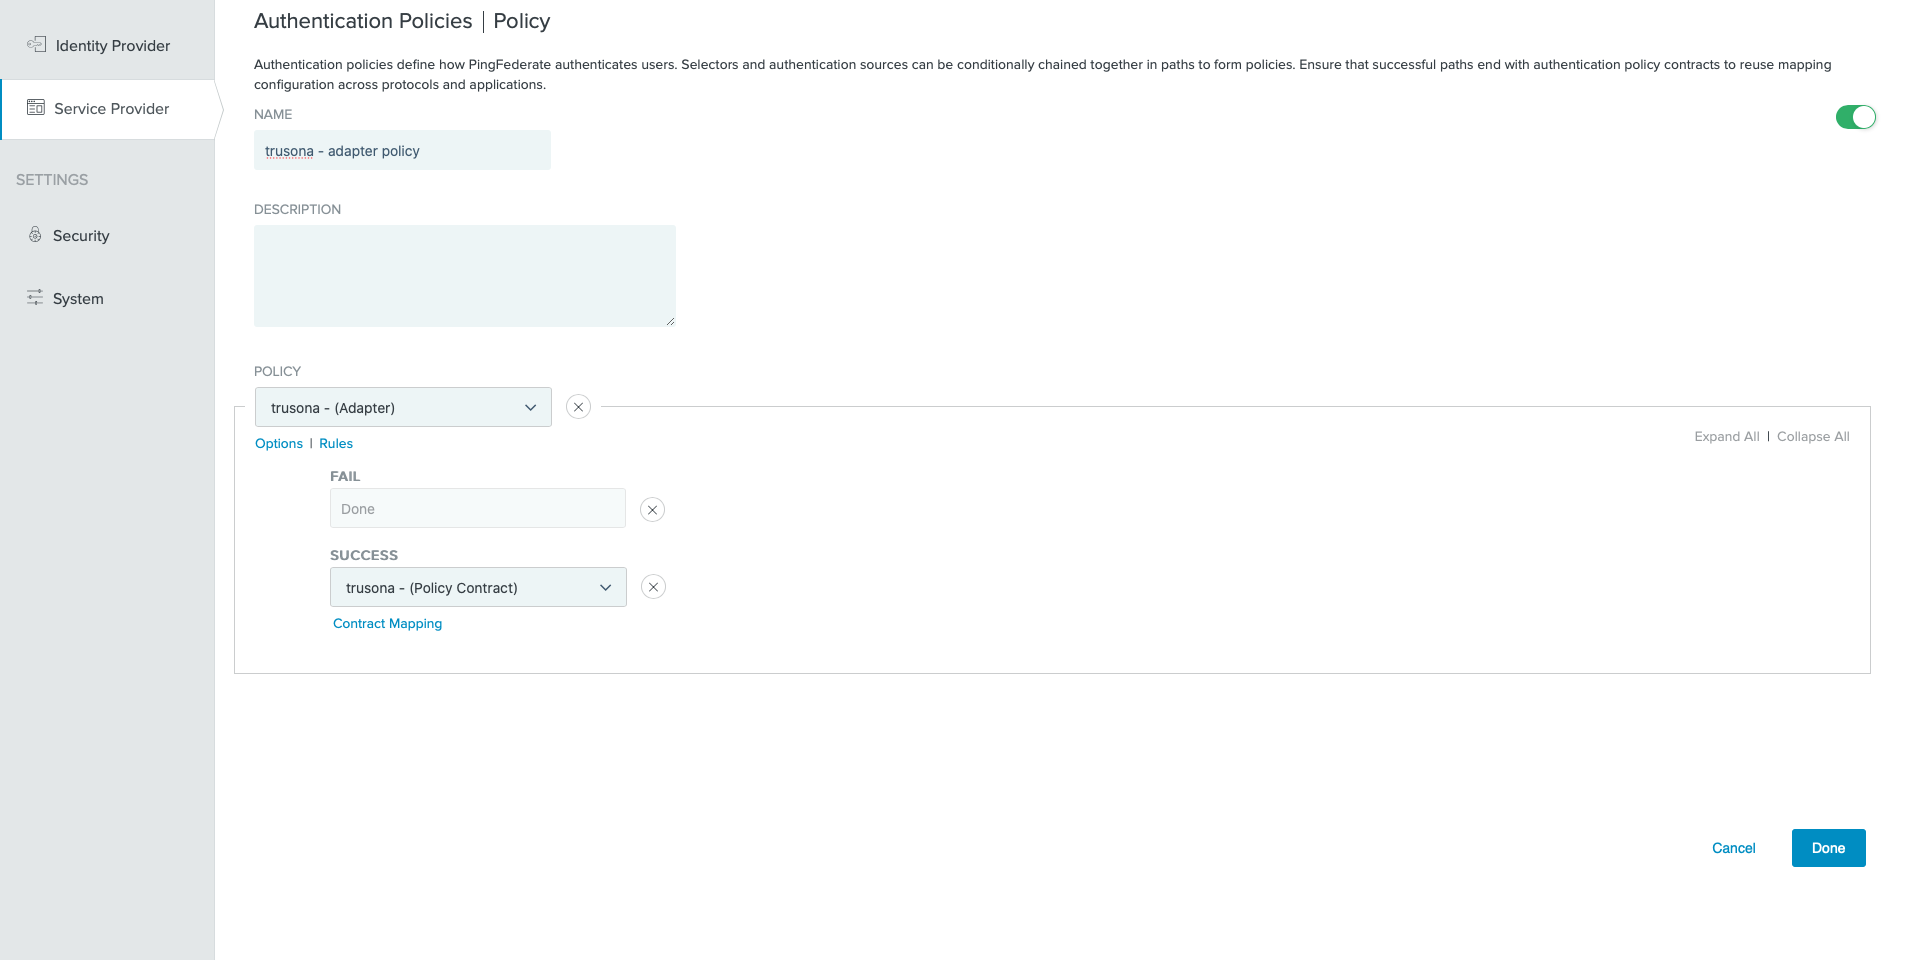
- Click on
Contract Mapping, then click onNext - On the Source column select the created IDP Adapter
- On the Value column select
username - Click on
Next - Click on
Next

- Compare screenshots, then click on
Done - Click on
Donethen click onSave
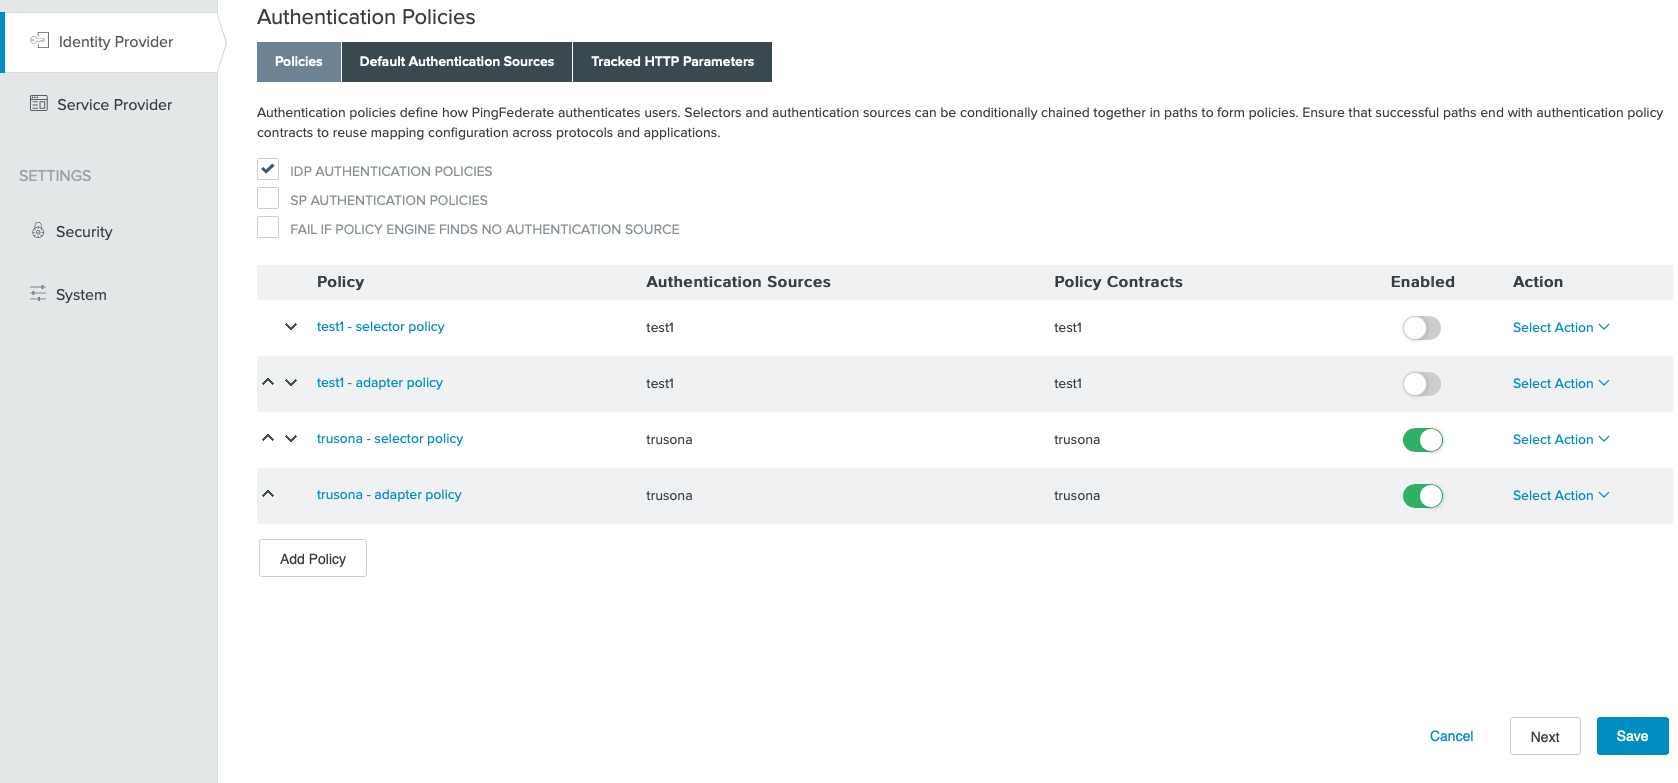
11. Ordering of Authentication Policies
The order of the authentication policies matters.
For the newly created policies, ensure that the Selector Policy is listed BEFORE the Adapter Policy.
Use the provided UI controls to make any necessary changes.
12. Identity Provider SP Connection
- Go to
Identity Provider→SP Connections→Create New - Under Connection Template accept the default and click on
Next - Click on
Next - Under Connection Options check the
Browser SSObox and click onNext - Select
Noneunder Import Metadata and click onNext - Specify memorable values for the required fields and click on
Next - Click on
Configure Browser SSO - Select
IDP-INITIATED SSOand click onNext - Click on
Next - Click on
Configure Assertion Creation - Select the
STANDARDIdentity Mapping and click onNext - Click on
Next - Click on
Map New Authentication Policy - Select the previously created Authentication Policy Contract and click on
Next - Select
USE ONLY THE ADAPTER CONTRACT VALUES IN THE SAML ASSERTIONand click onNext - Under the Source column select
Authentication Policy Contract - Under the Value column select
subjectand click onNext - Click through the next set of screens, either
NextorDone - Click on
Configure Protocol Settings - Specify an Index value of
0 - Select a Binding value of
POST - Specify an Endpoint URL
$PingBaseFederateURL/idp/startSSO.pingReplace
$PingBaseFederateURLwith the correct value for your deployment - Click on
Addthen click onNext - Click through the next series of screens and get to the Browser SSO Summary
- Compare screenshots and click on
Done - Click on
Next - Click on
Configure Credentials - Complete the subsequent steps based on your Ping Federate deployment.
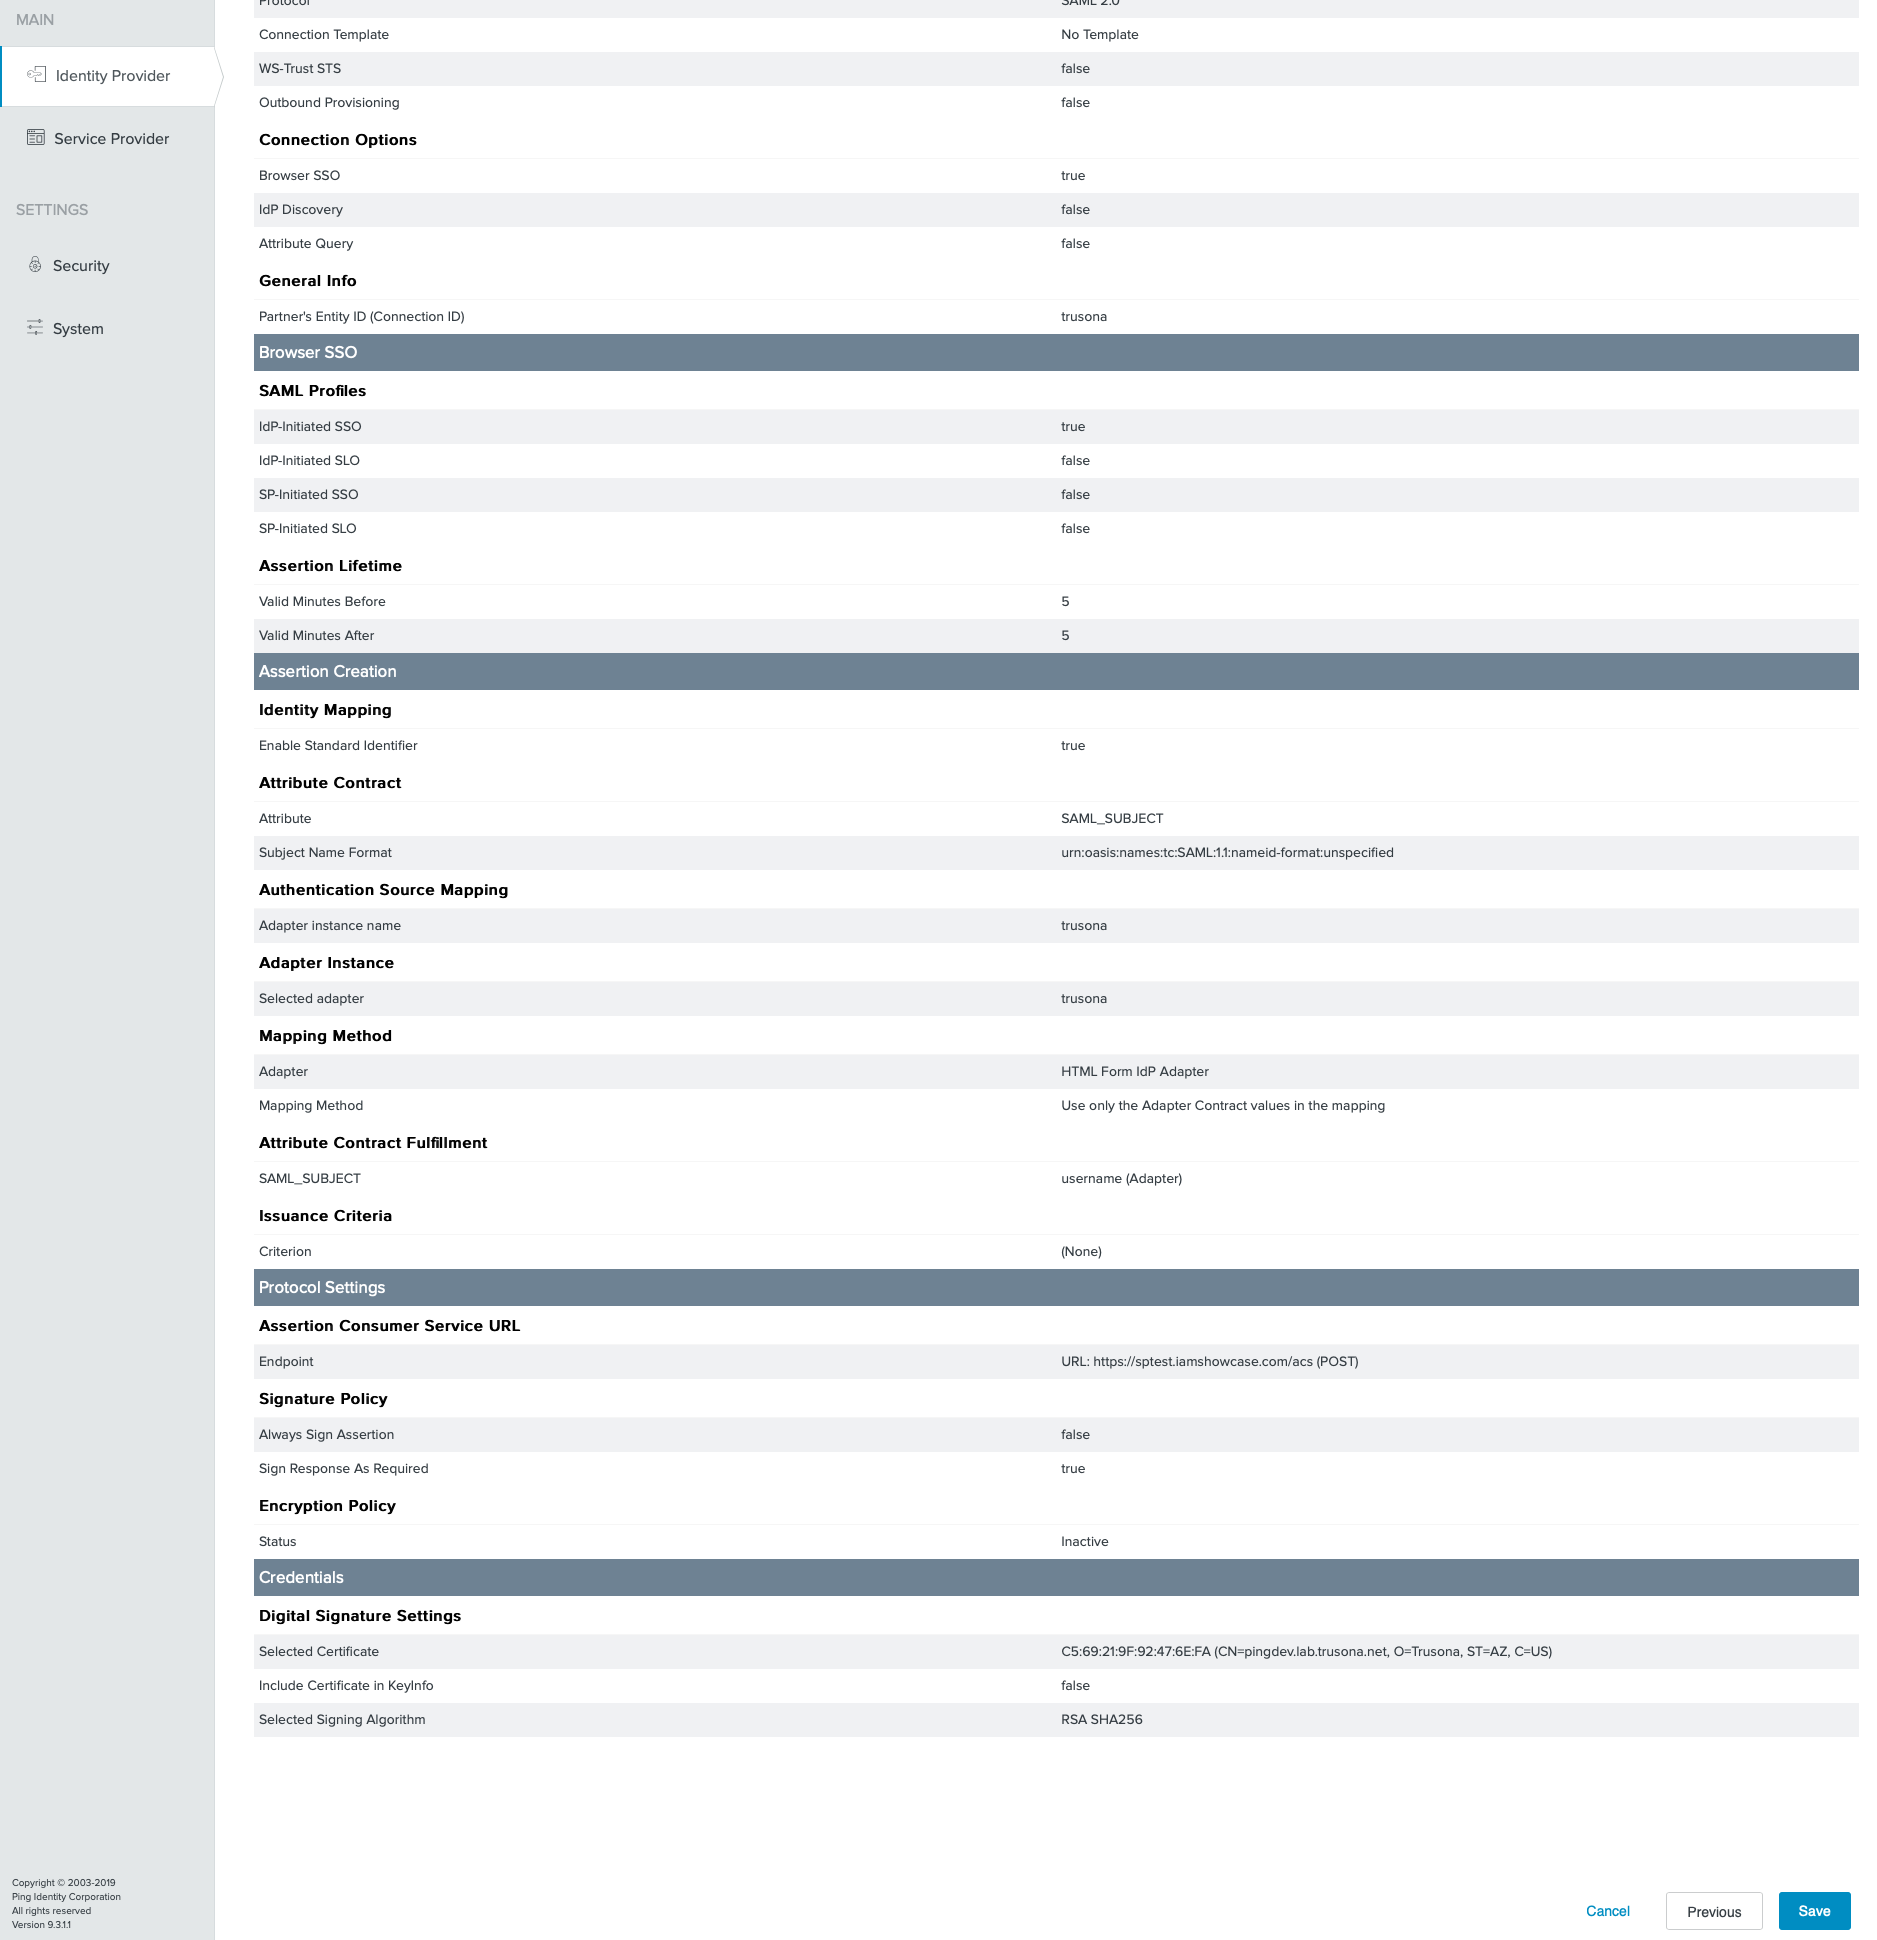
- Compare screenshots and click on
Save
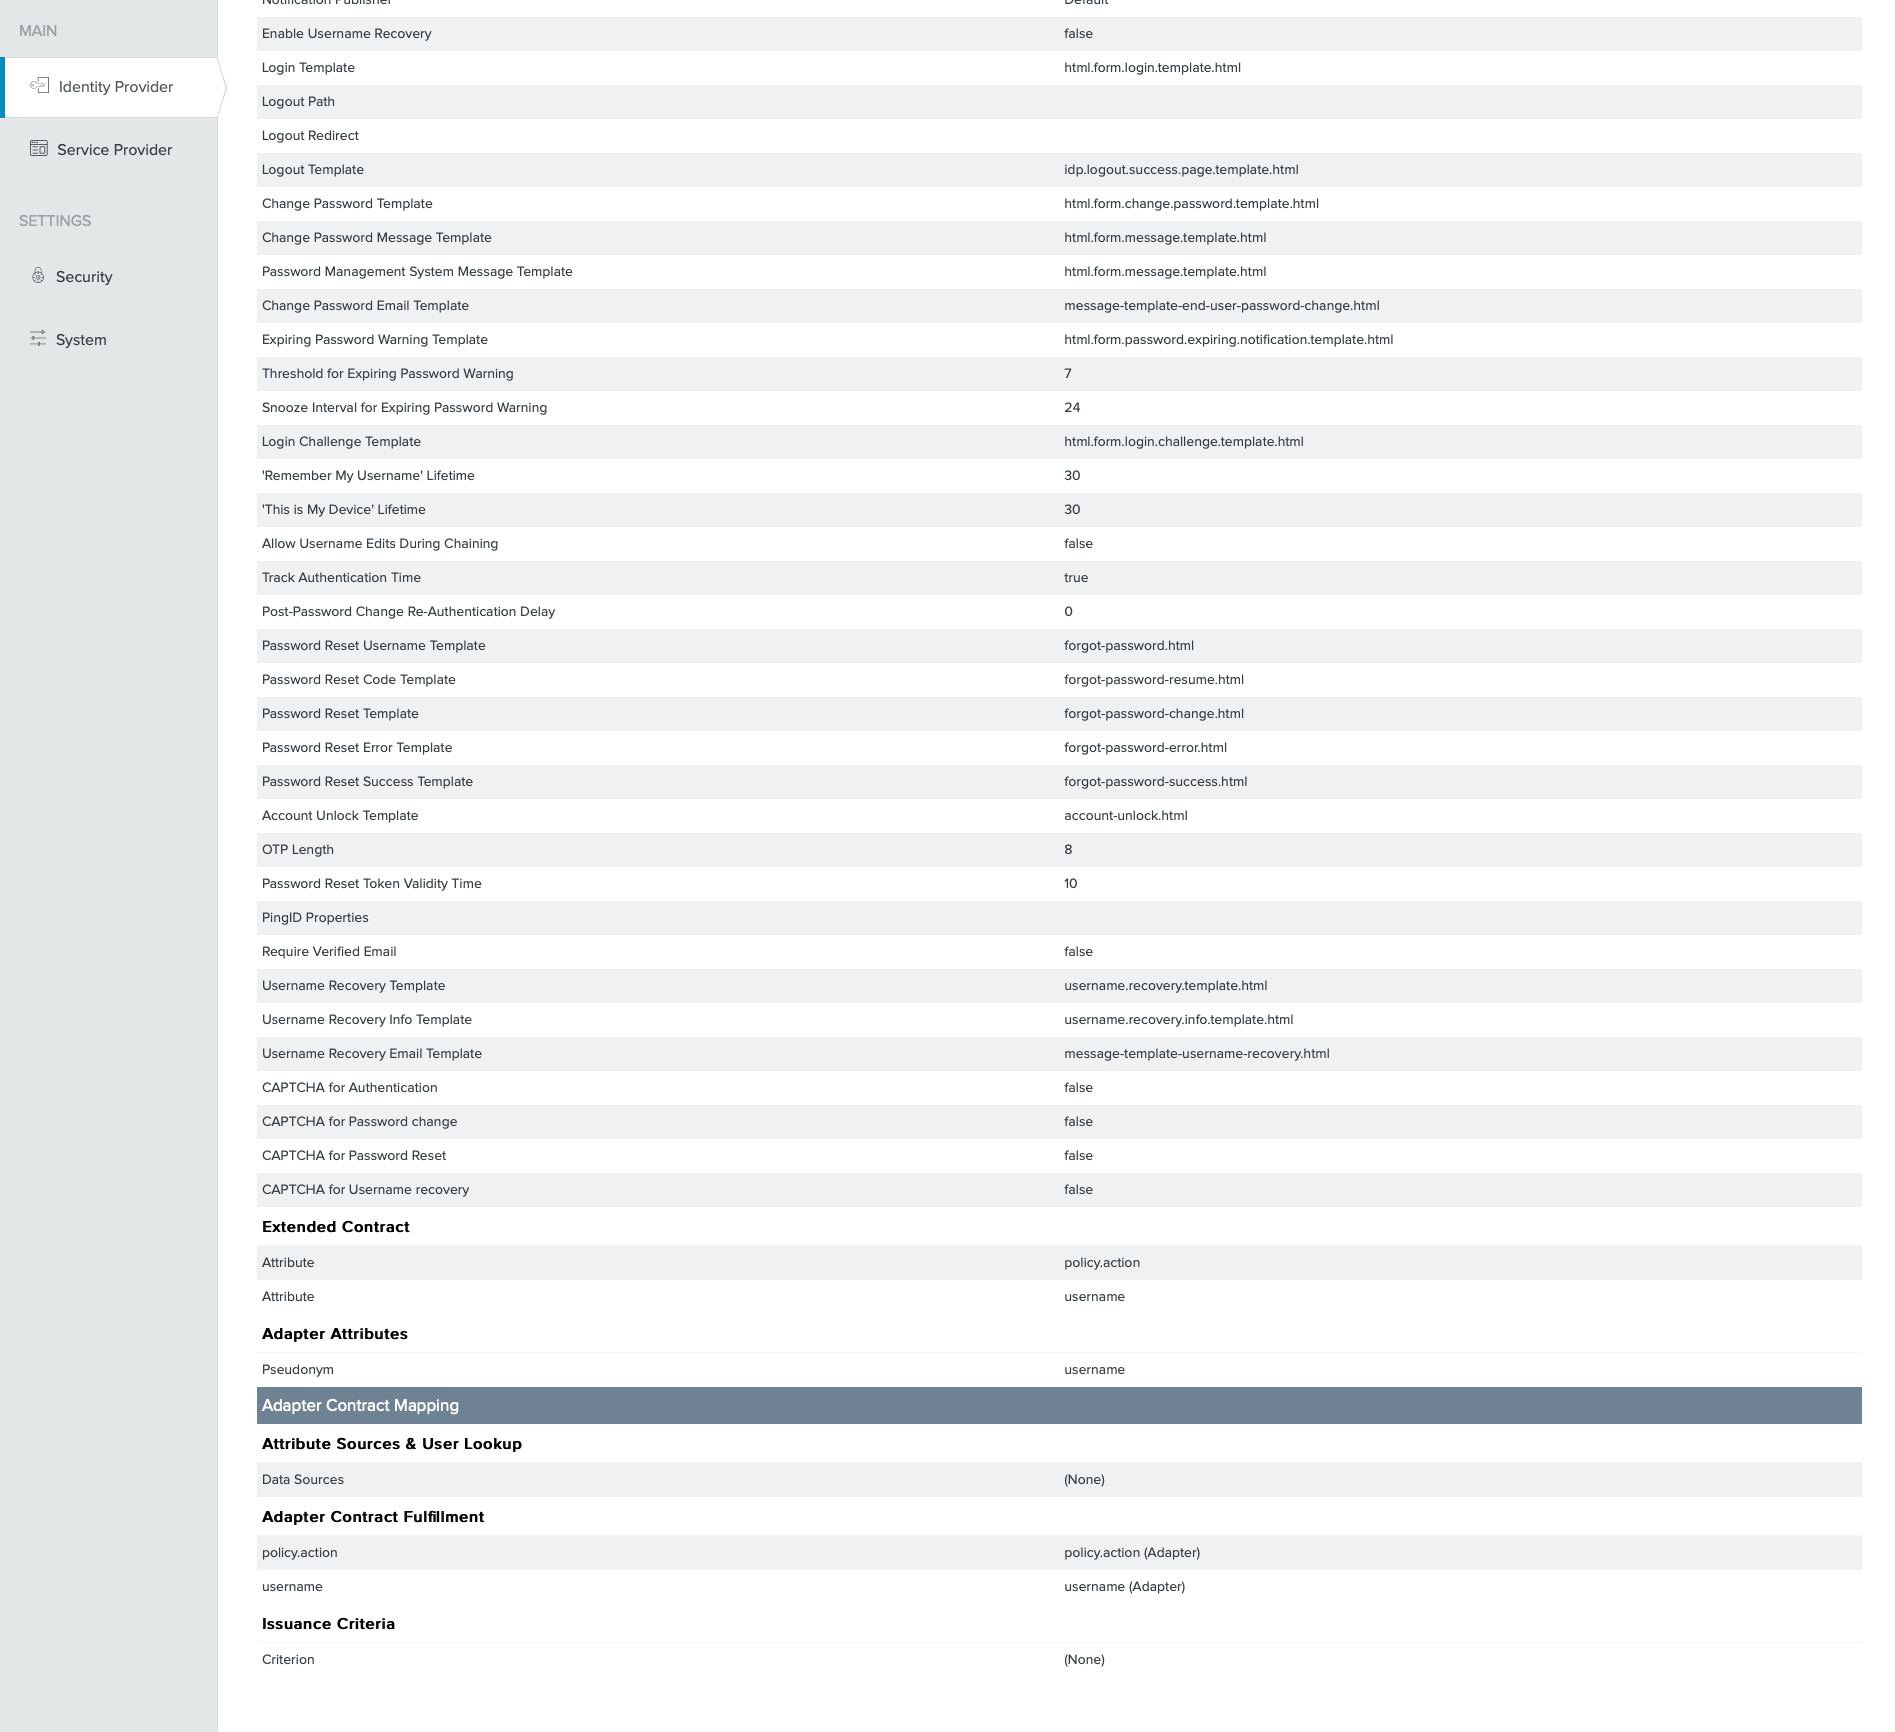
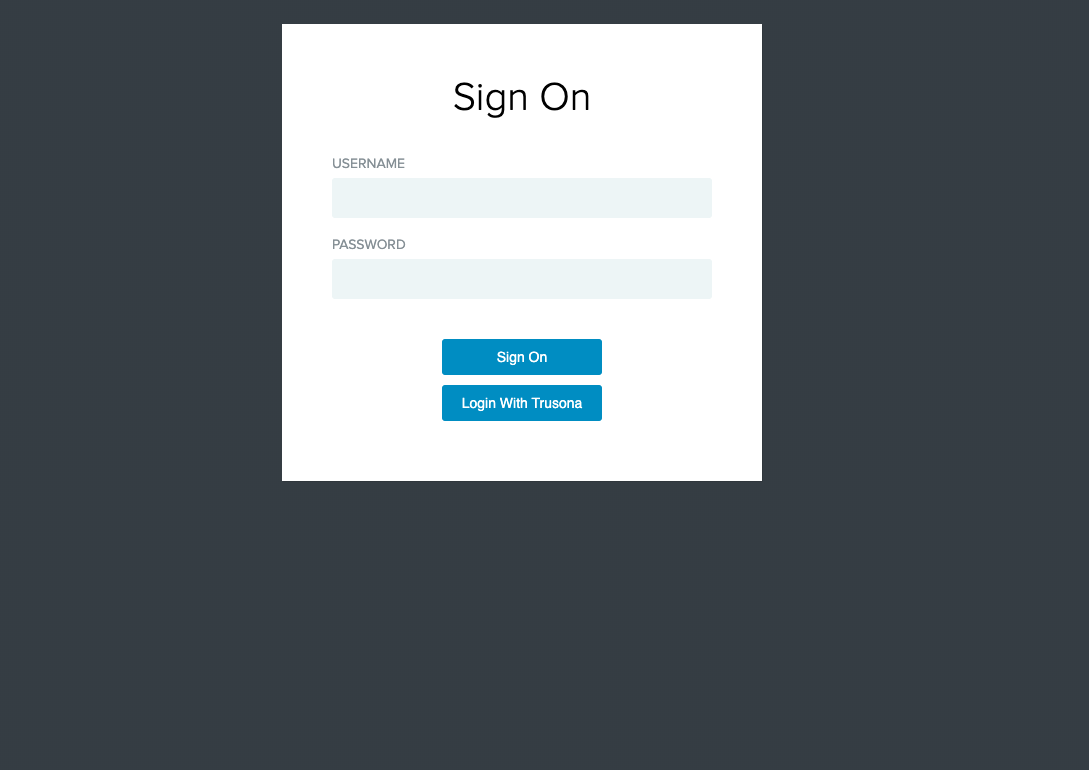
13. Modified HTML Template
Your Ping Federate login template should be modified to include the “Login with Trusona” button.
Trusona provides a template that can replace the default html.form.login.template.html login template.
If you’re already using a custom template, you can add the “Login with Trusona” button to your existing template with the following HTML snippet:
<a onclick="location.replace(location.href + '&trusona=1')" title="Login With Trusona">Login With Trusona</a>
14. Modified Default Login
15. Custom Trusona Login