1. Overview
Pulse Secure Connect integrates with Trusona using SAML 2.0 providing primary authentication without passwords. The Trusona user’s verified email address will be returned in the SAML Response.
Further authorization is performed by Pulse Secure by making an LDAP query based on the verified email address in the SAML assertion from Trusona.
2. Prerequisites
This document assumes you a have Pulse Connect Secure 9.0R1 or later and an LDAP store such as Microsoft Active Directory.
Before proceeding, ensure that you have the following steps completed:
- Have admin access to the Trusona Dashboard
- Have admin access to the Pulse Secure Admin Console
- Have access to your Domain’s DNS records to verify your domain
3. Verify your domain
- Navigate to the Trusona Dashboard and log into your account
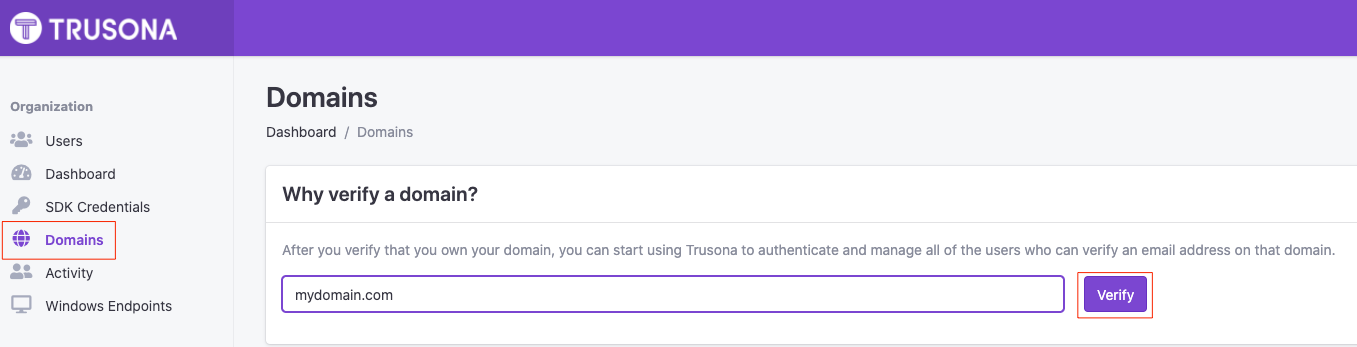
- From your Trusona account dashboard, select ‘Domains’ on the left-hand navigation
- Enter in the domain you would like to verify and select ‘Verify’
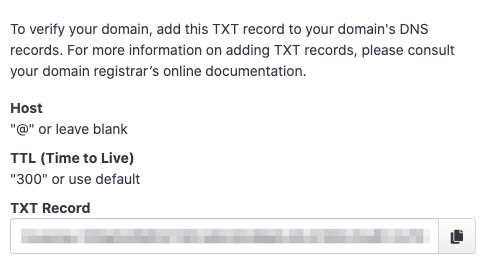
- Add the generated TXT Record to your domain’s DNS records. Once the TXT record has been created, it can take a couple of minutes for us to verify your domain due to propagation
- Refresh the page after a couple of minutes in order to see if your domain has been verified
4. Creating a SAML integration in Trusona
4.1. Create a Trusona SAML integration
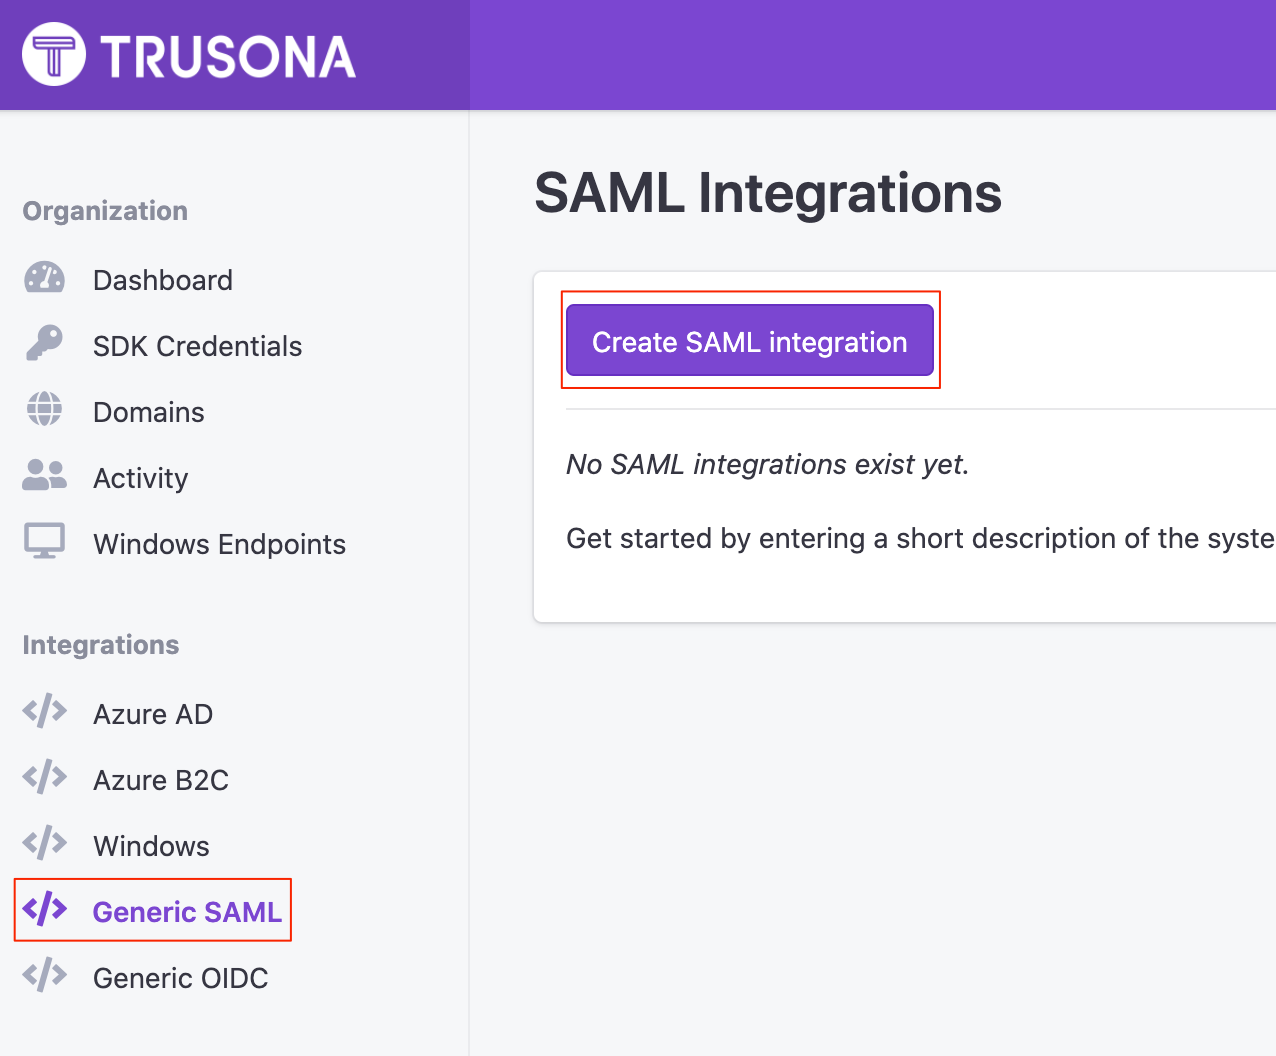
- From the Trusona Dashboard, select ‘Generic SAML’ on the left-hand navigation
- On the Generic SAML Integrations page, select Create SAML integration
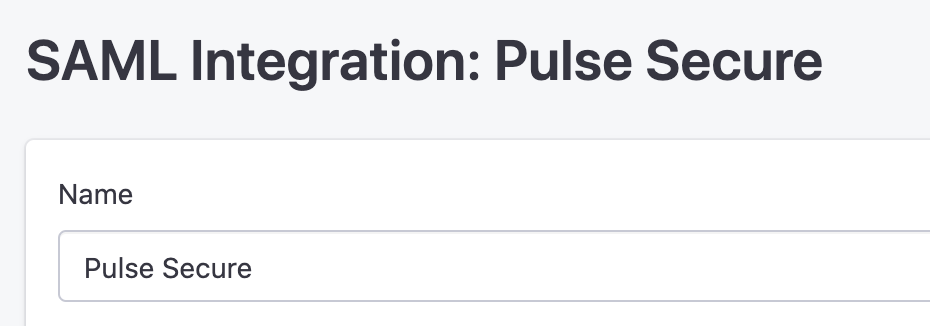
- Enter the following information:
- Name: Provide a name for your integration
- Select ‘Save’
4.2. Retrieve the Metadata URL
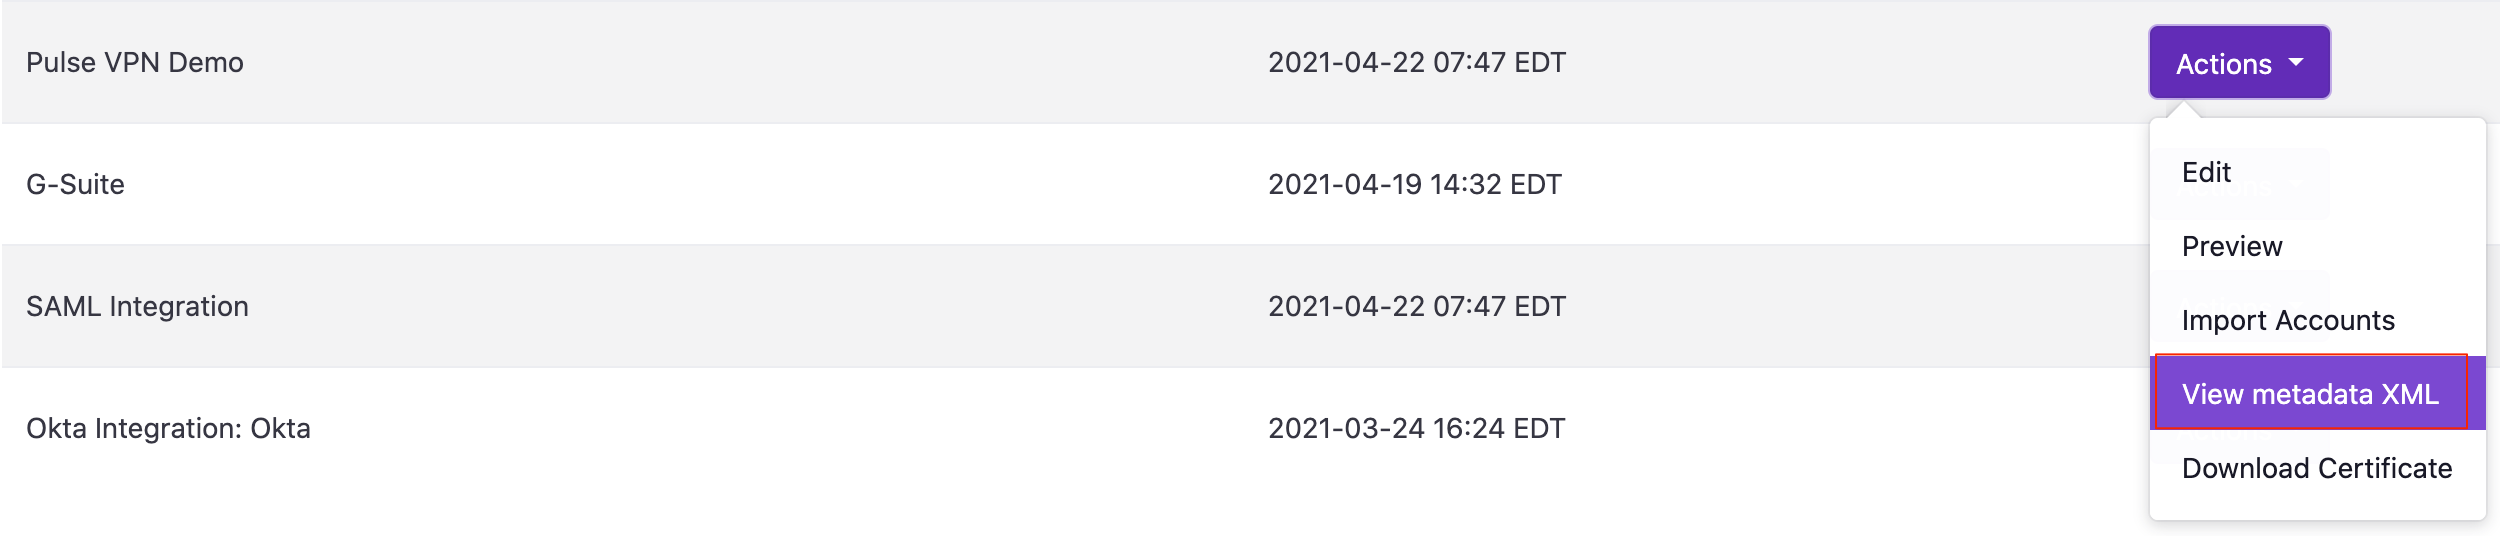
- On the Generic SAML Integrations page, find your newly created Pulse Secure SAML integration
- Click on ‘Actions’
- Select ‘View Metadata URL’
- Take note of the URL as this will be needed in a later step. This is your Download URL

5. Configure Pulse Secure
Once you have created a SAML integration within the Trusona Dashboard, you can begin configuring a SAML IdP on your Pulse Secure.
5.1. System SAML Configuration
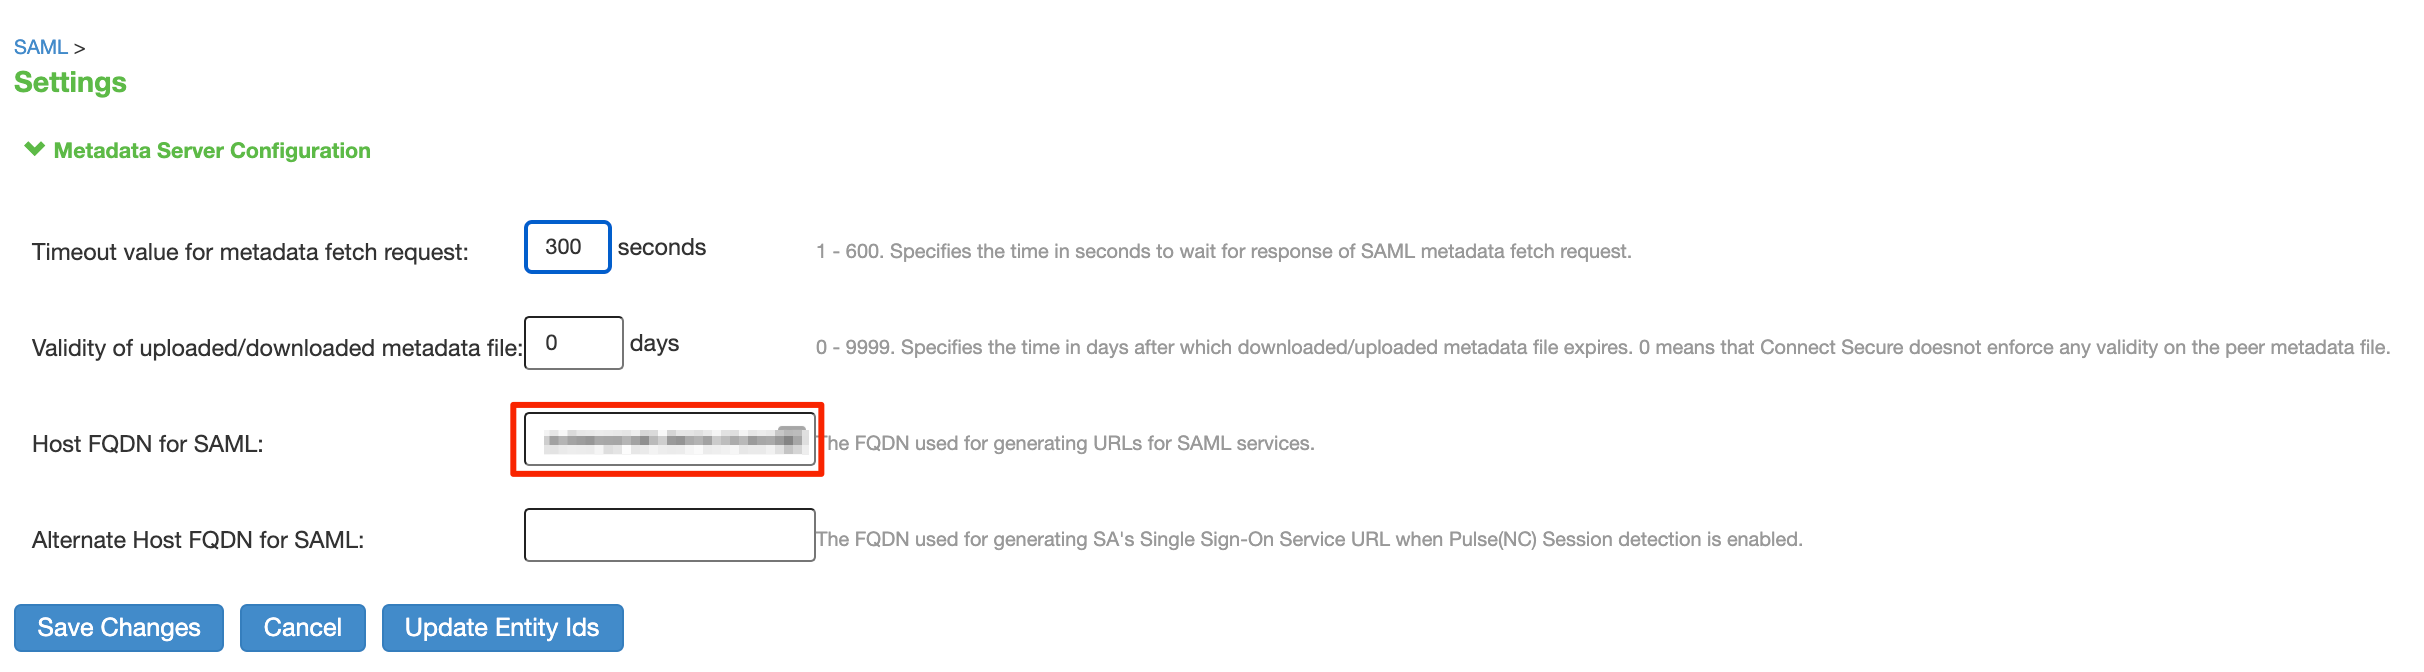
- In the Pulse Secure Admin Console, go to System -> Configuration -> SAML
- Select ‘Settings’

- Validate or populate the ‘Host FQDN for SAML’ field with the FQDN of your Pulse Secure Appliance.
- Select ‘Save Changes’
5.2. Add a SAML Metadata Provider
- Go to System -> Configuration -> SAML
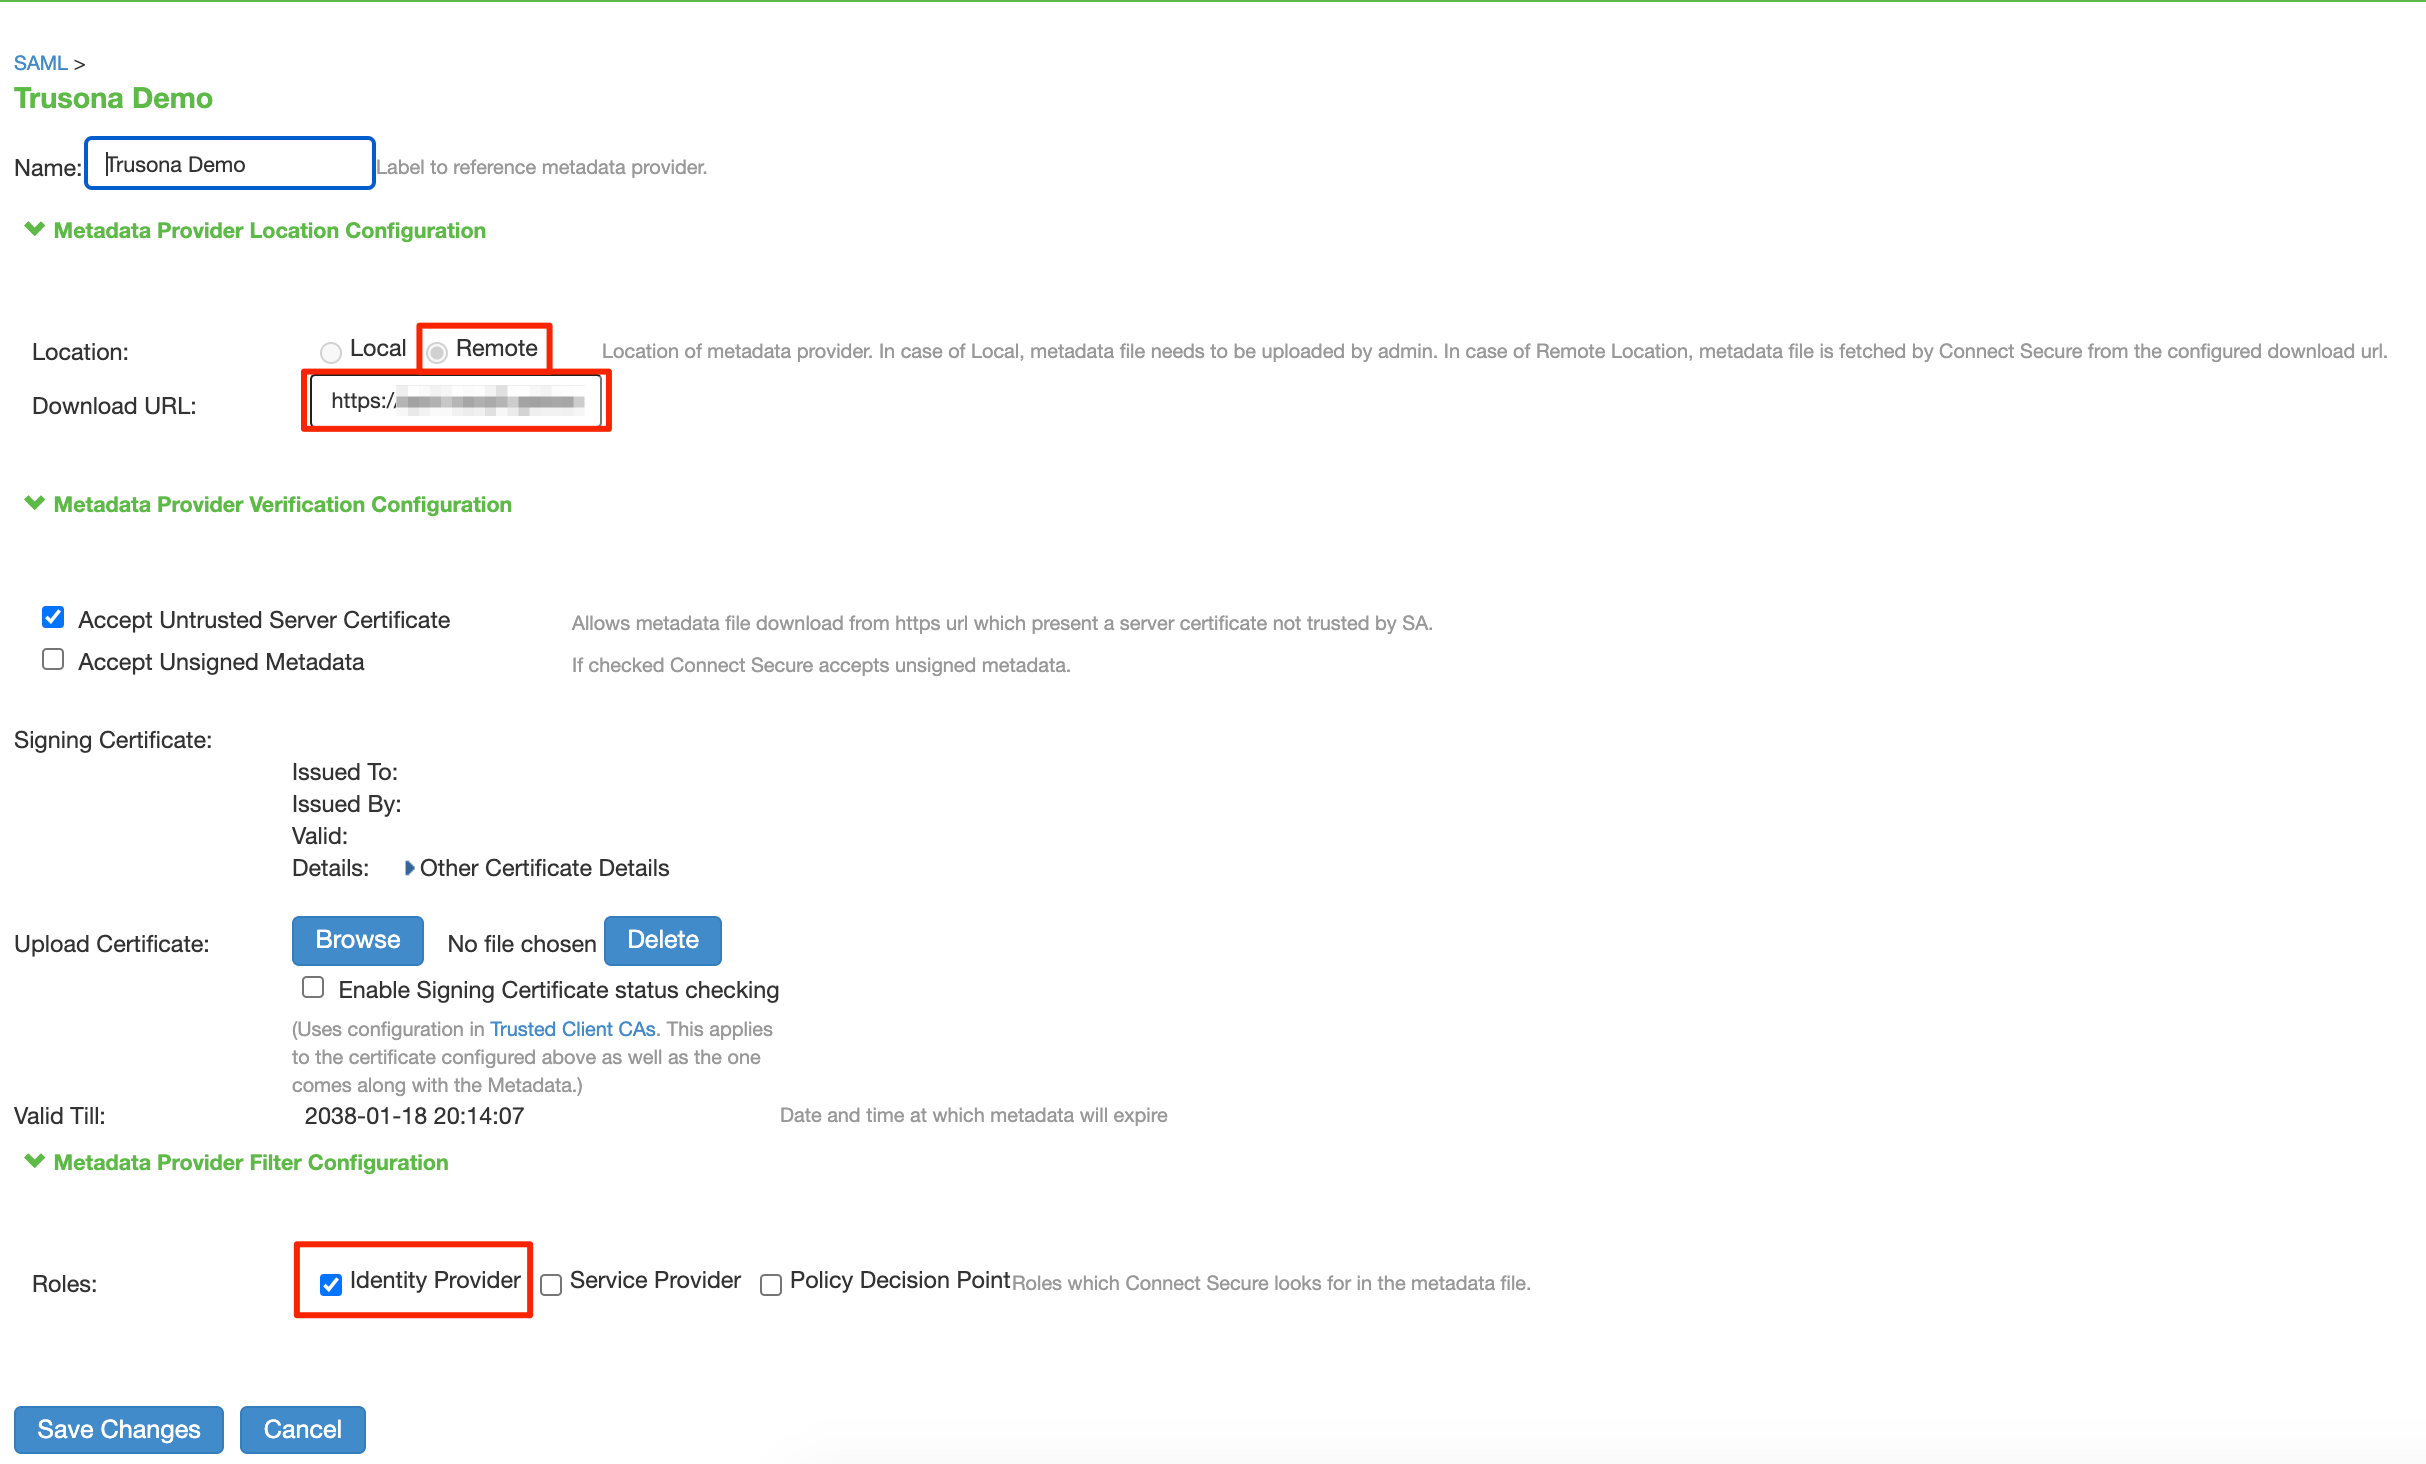
- Select ‘New Metadata Provider’

- Name: Provide a name, such as Trusona
- Location: Remote
- Download URL: Enter the Download URL. This is the URL of your Trusona SAML Metadata file found in section 4.2.
- Roles: Identity Provider
- Select ‘Save Changes’
5.3. Add a SAML Auth Server
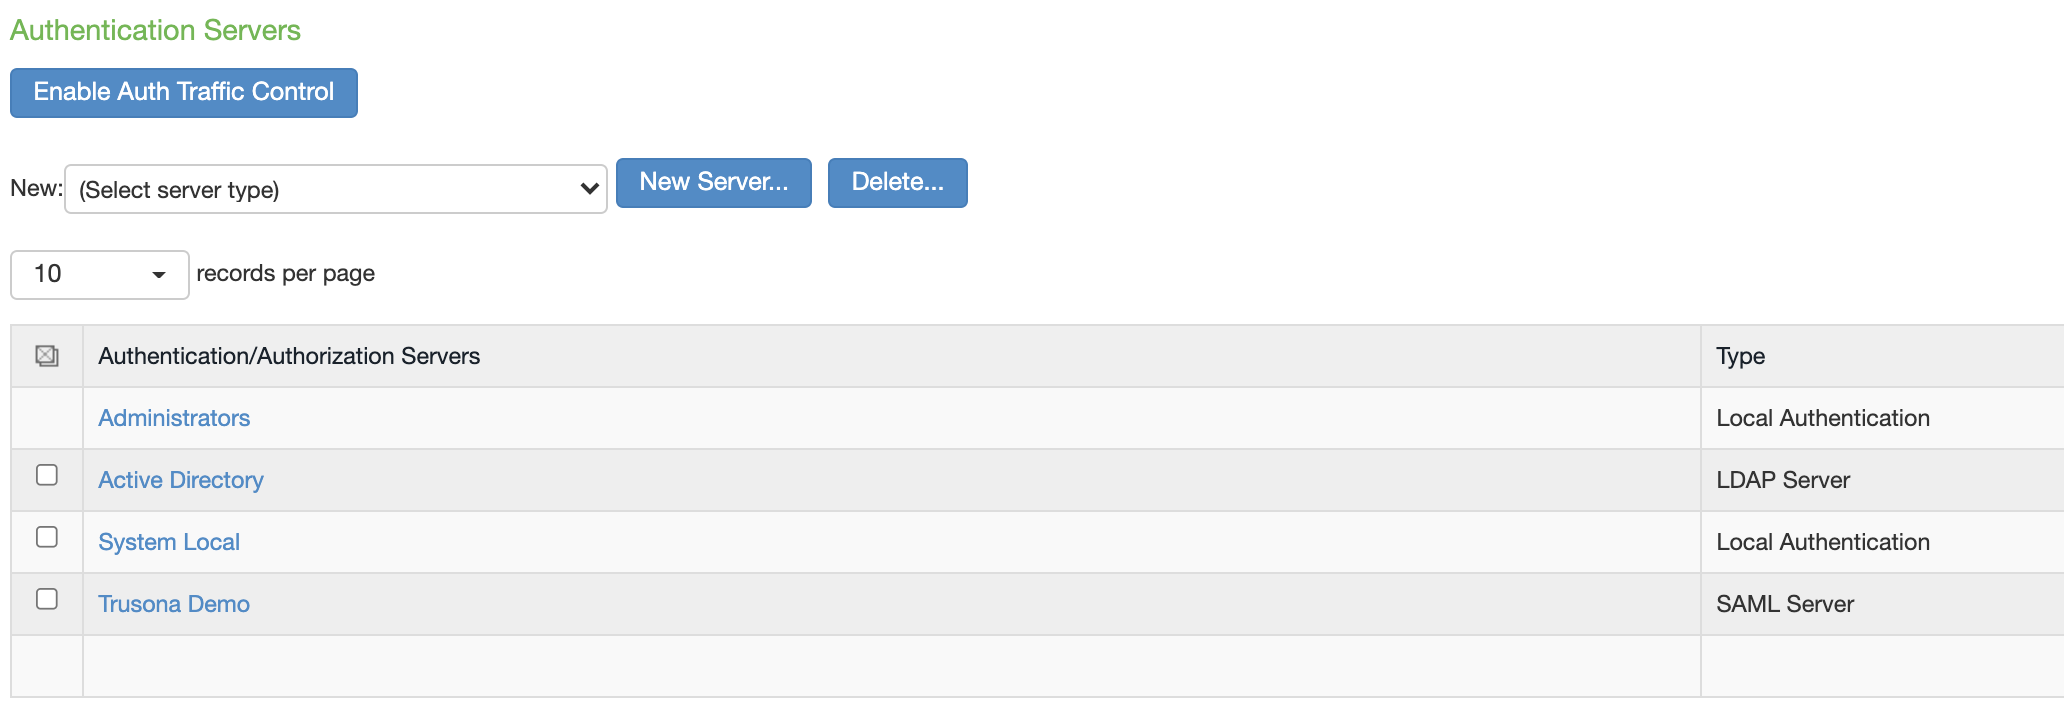
- Go to Authentication > Auth. Servers
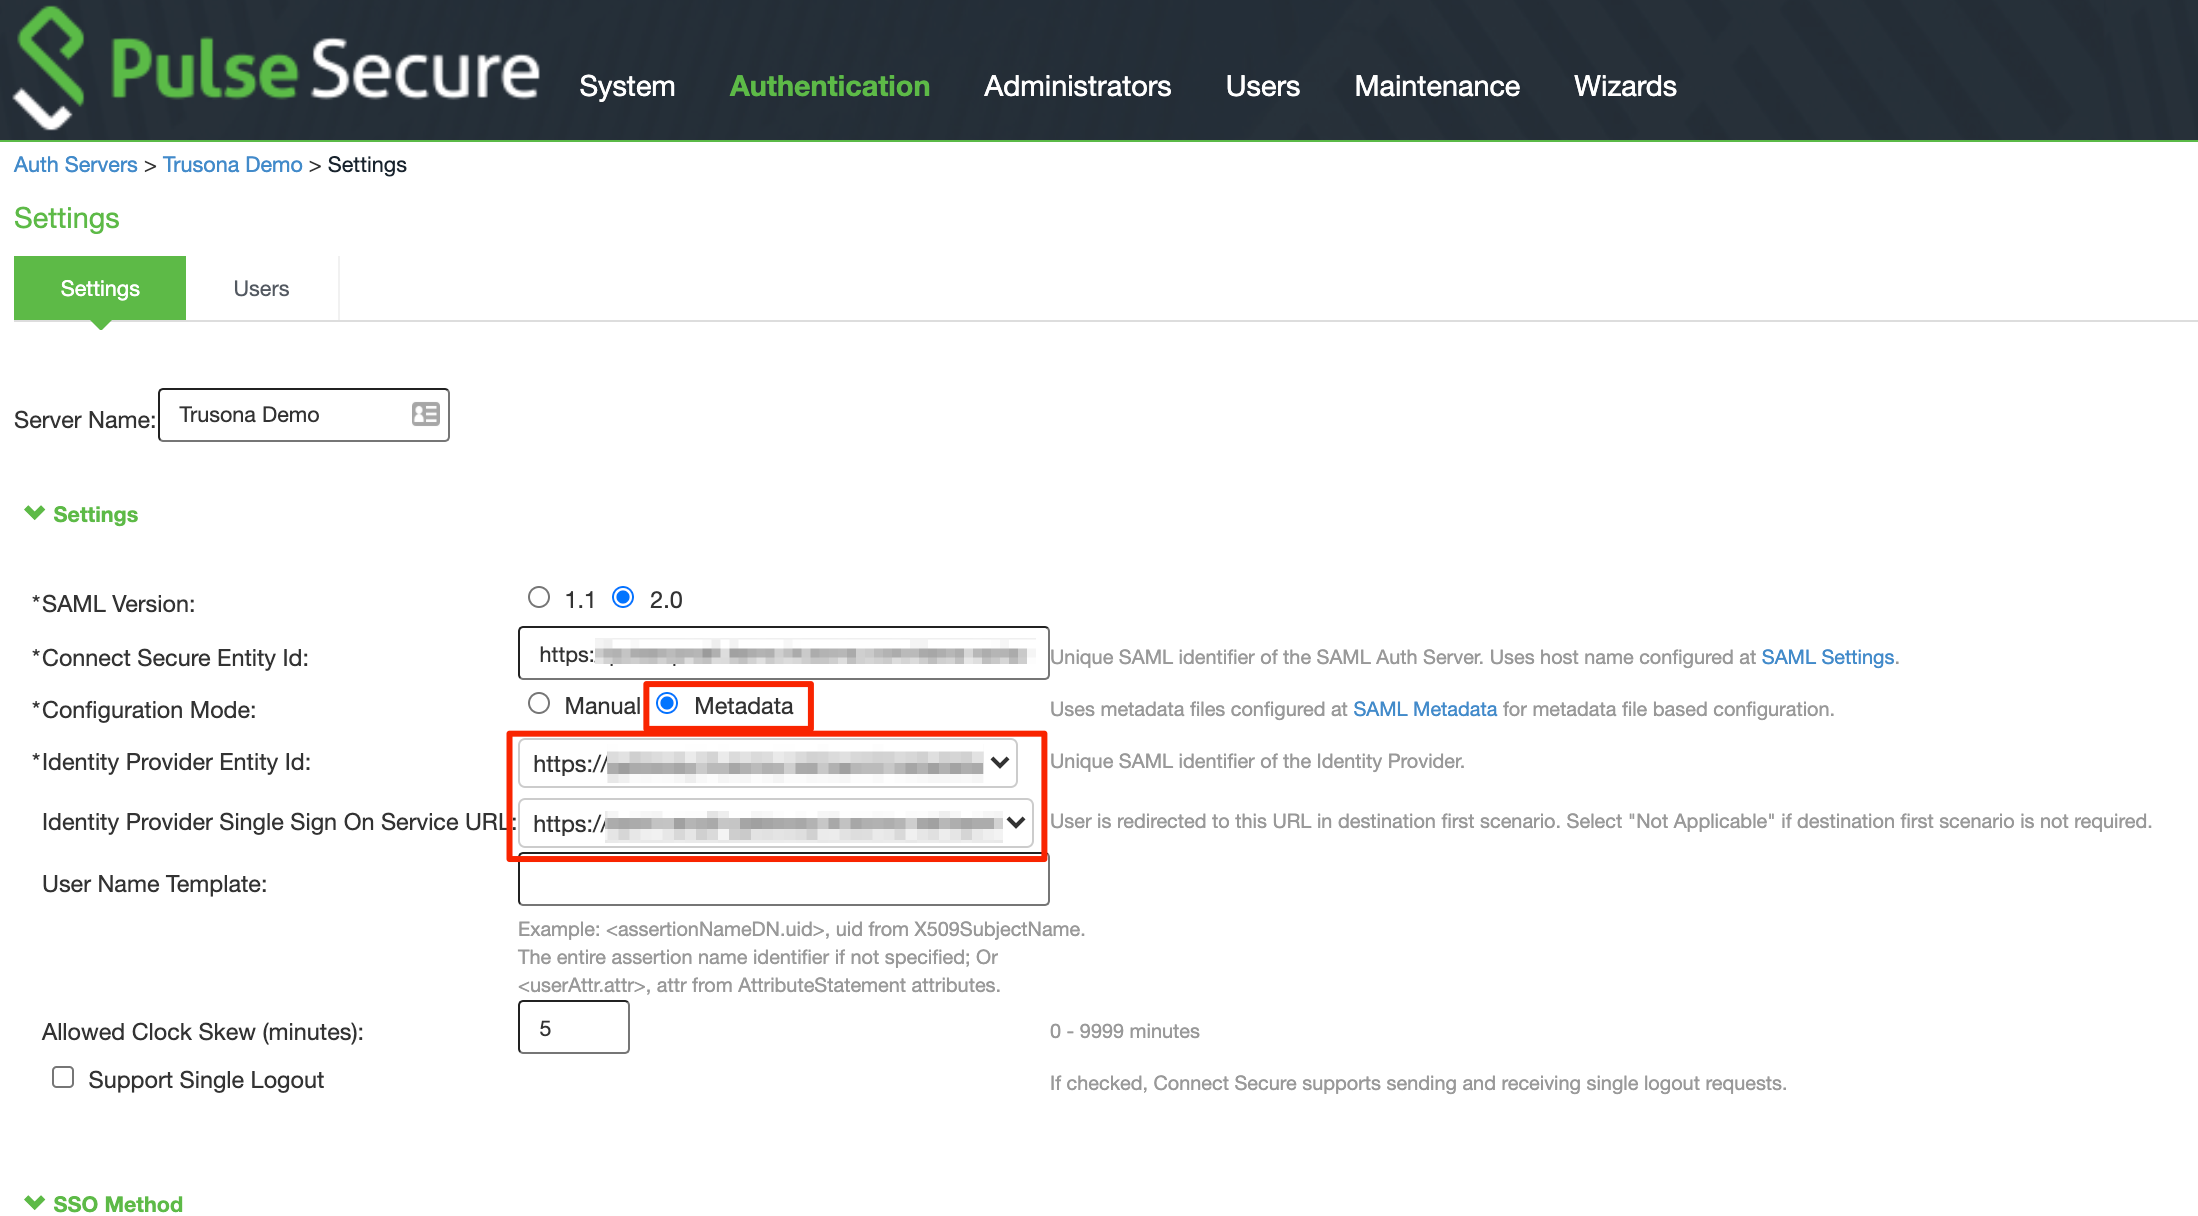
- Choose ‘New: SAML Server’ and select ‘New Server’
- Server Name: Provide a name, such as Trusona
- SAML Version: 2.0
- Configuration Mode: Metadata
- Identity Provider Entity Id: Select the Entity Id from your Trusona SAML Metadata XML file. You can find this in the Metadata XML generated in section 4.2.

- Identity Provider Single Sign On Service URL: Verify the correct Single Sign On Service URL is populated. You can find this in the Metadata XML generated in section 4.2.

- SSO Method: POST
- Select Certificate: Select the Trusona SSO Gateway Certificate
- Select Device Certificate for Signing: Choose a valid certificate that will be used for signing the requests
- Metadata Validity: 365 days
- Select ‘Save Changes’
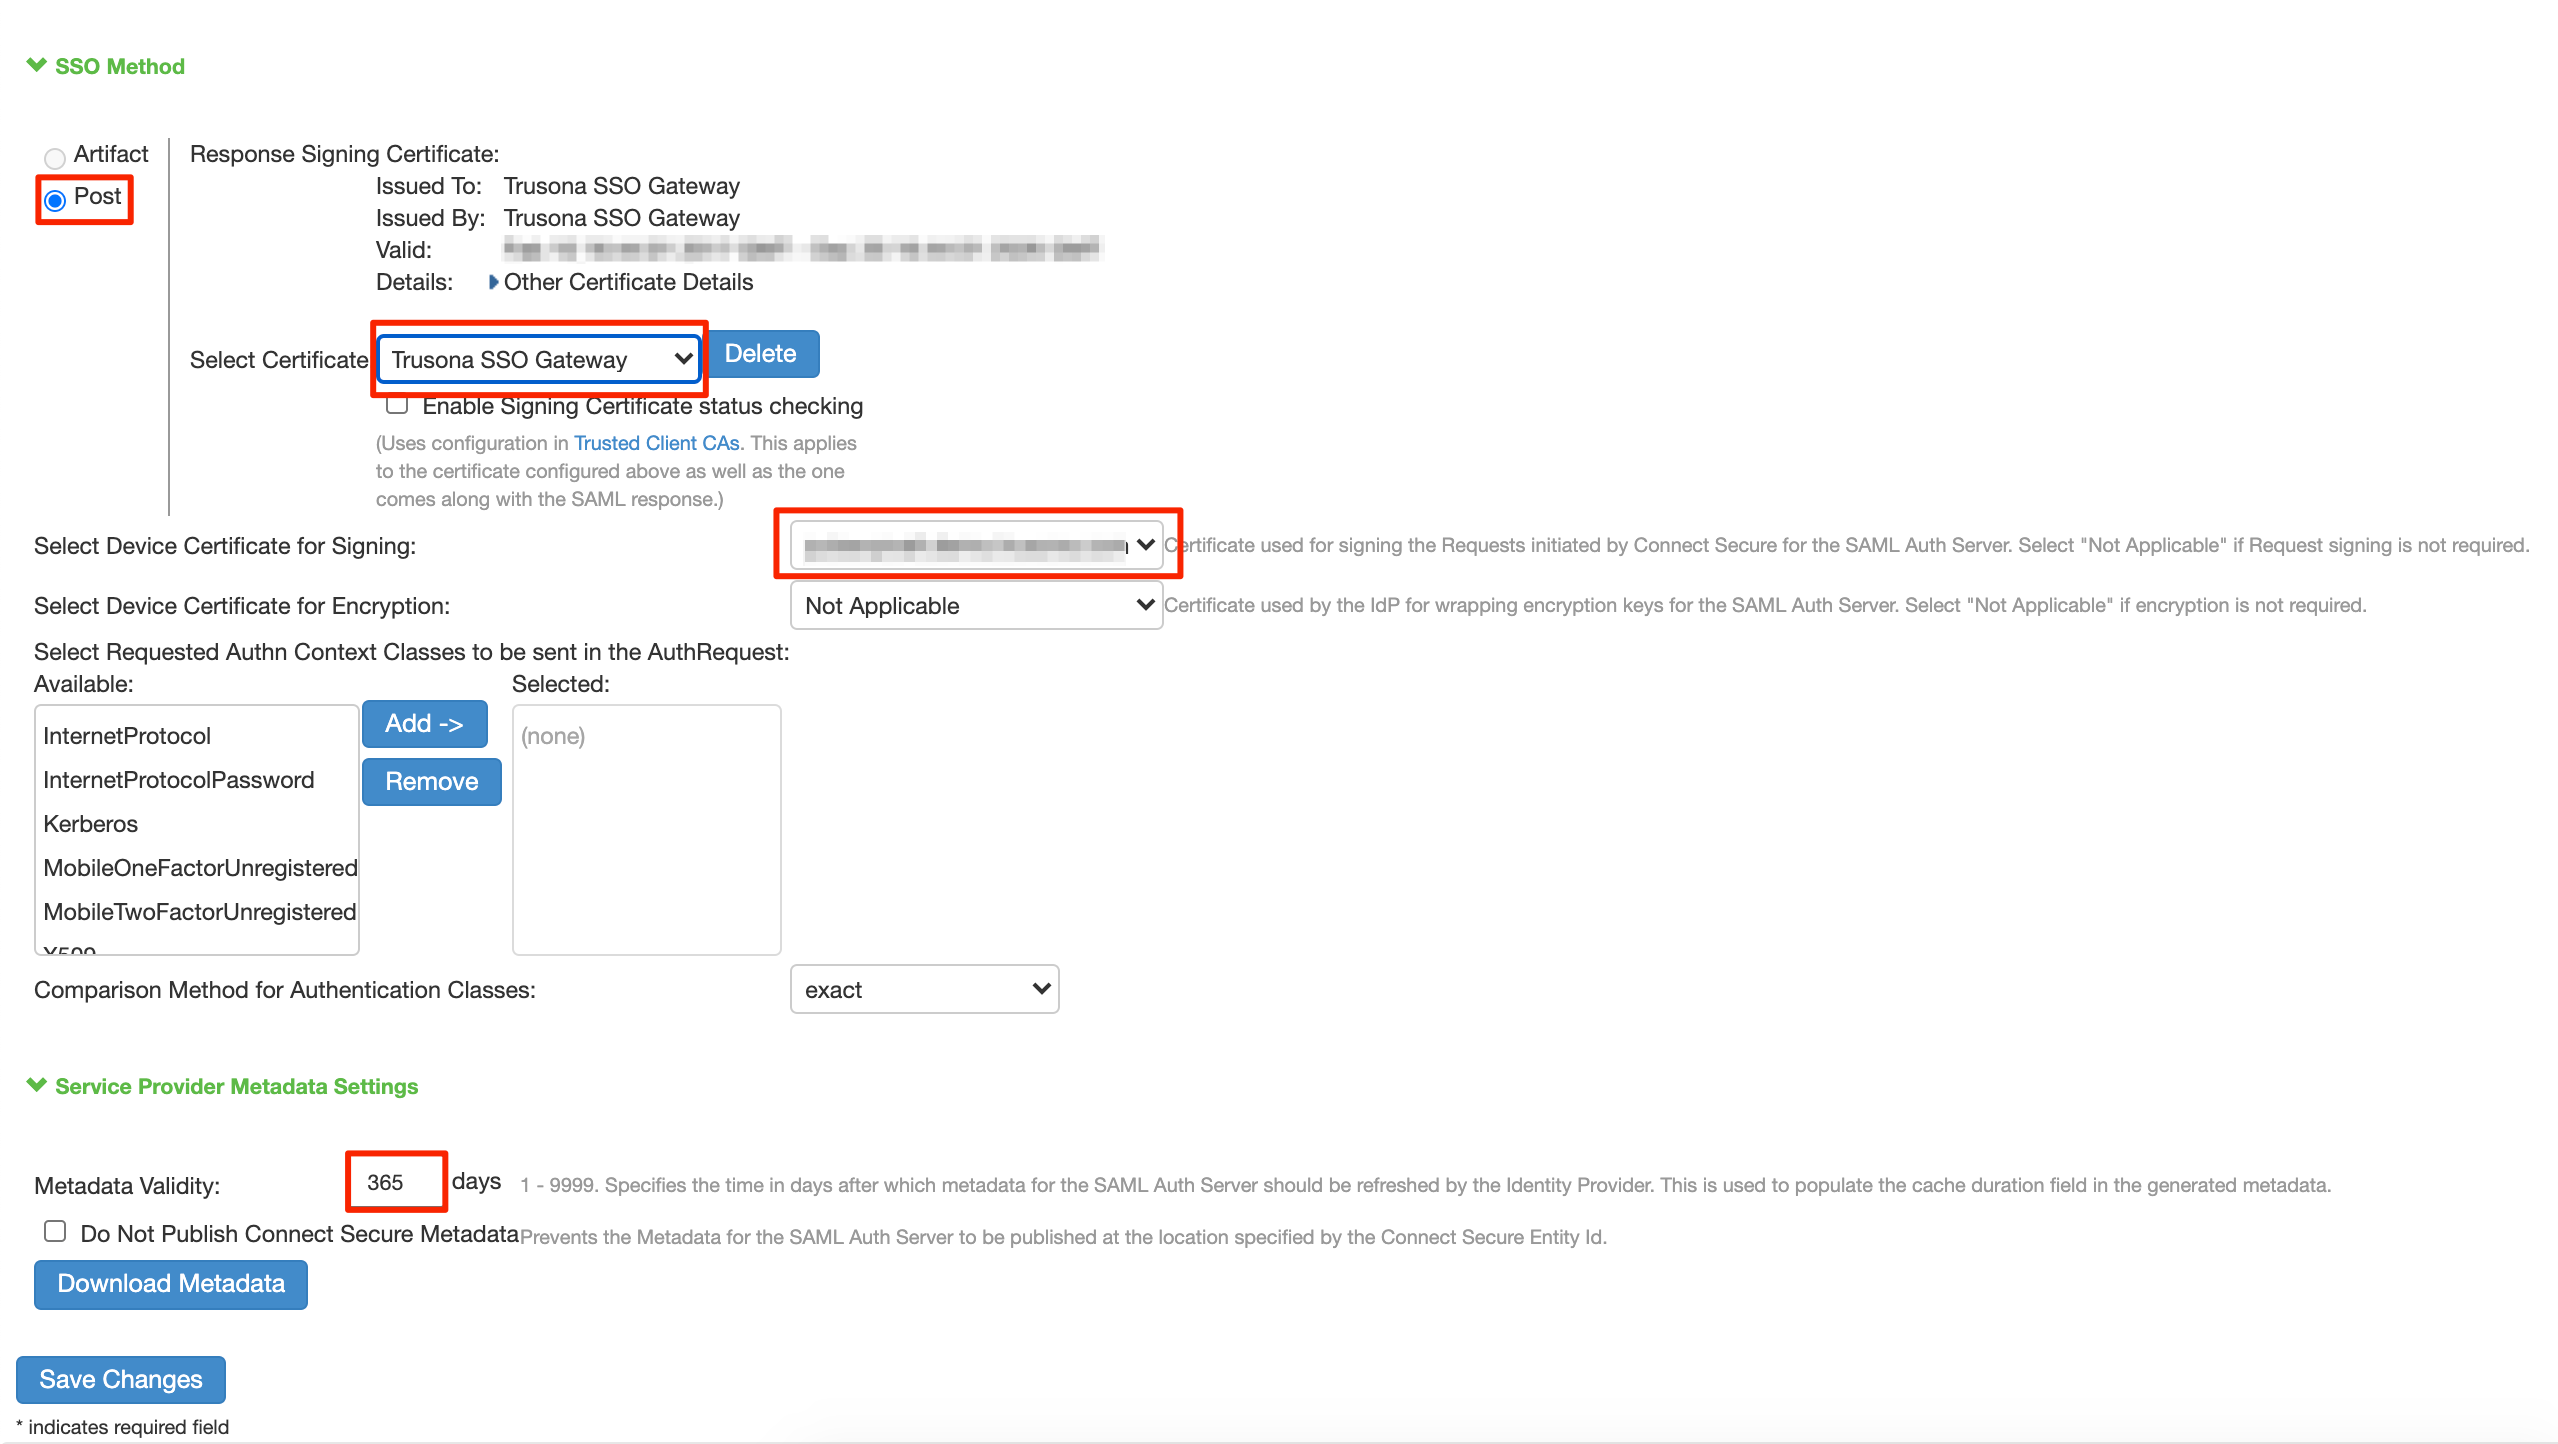
- Edit the Authentication Server you just created and click ‘Download Metadata’.
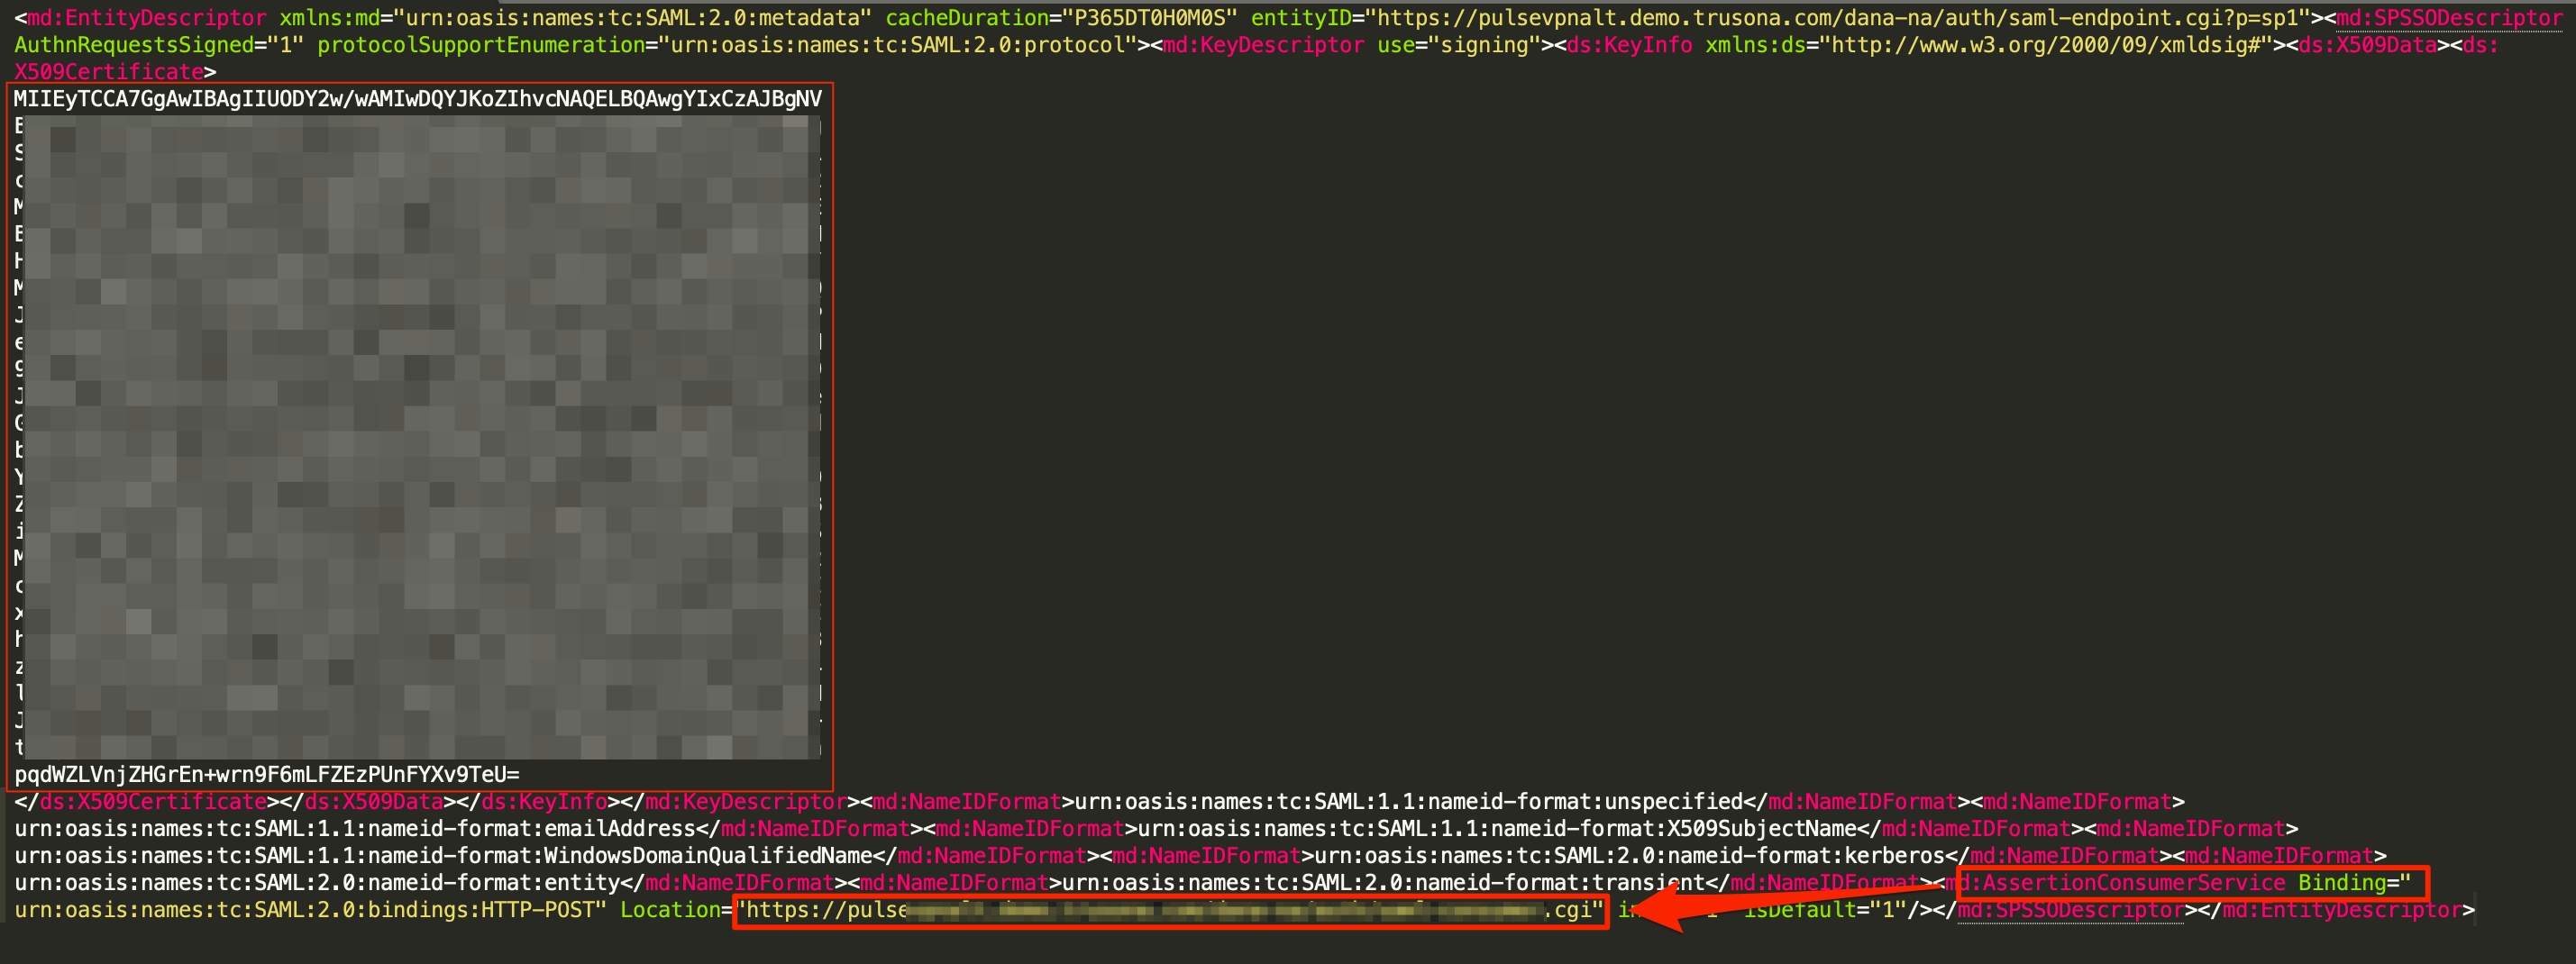
- Open the downloaded Metadata file and extract the following:
- AssertionConsumerService URL
- The Cert Data and save it as a .crt file. Be sure to add —–BEGIN CERTIFICATE—– and —–END CERTIFICATE—– to the file. See example screenshot below

5.4. Configure the Pulse Secure SAML integration in the Trusona Dashboard
- Navigate to the Trusona Dashboard and log into your account.
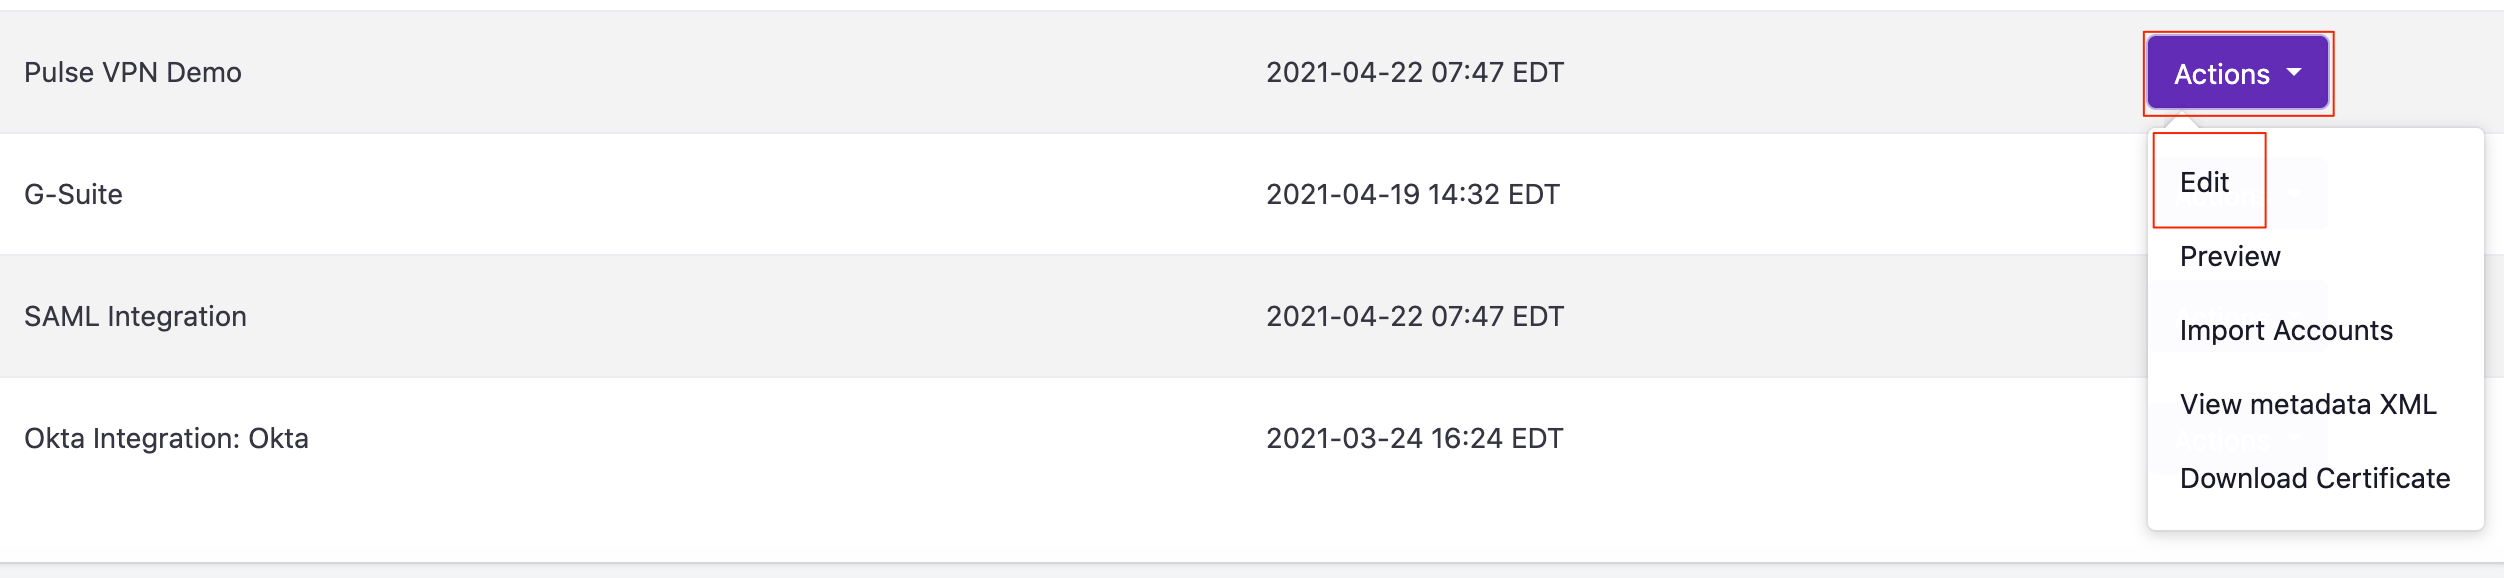
- Select ‘Generic SAML’ on the left-hand navigation
- Locate the Pulse Secure Integration you previously created
- Select ‘Actions’ > Edit
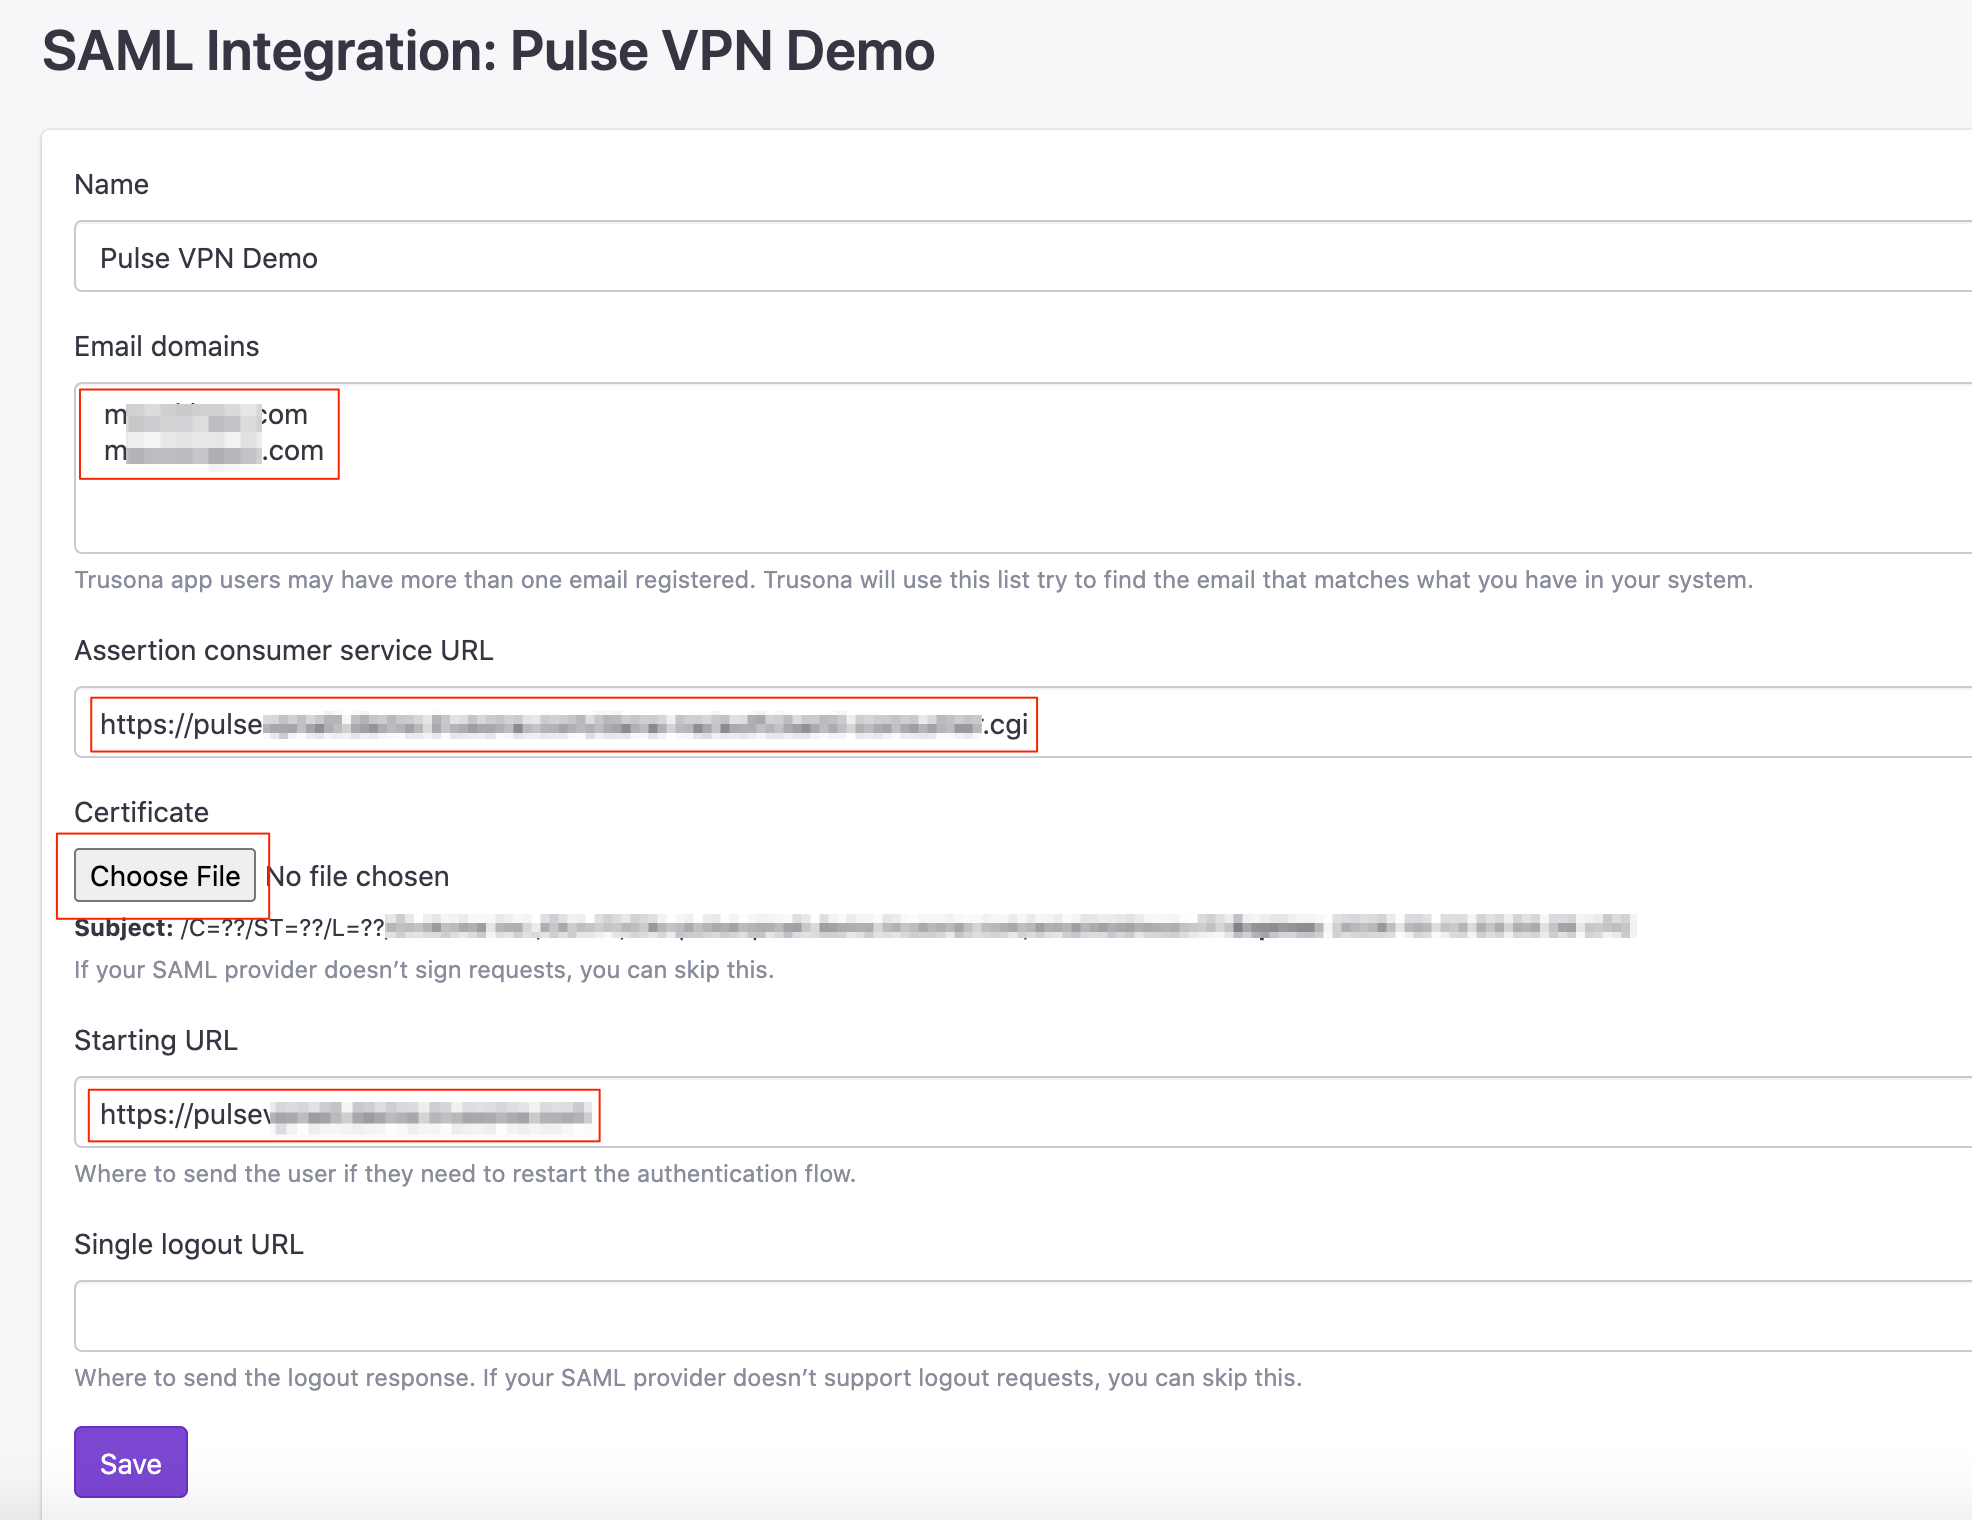
- Email Domains: Select one or multiple verified domains
- Assertion Consumer Service URL: Enter in the Pulse Secure AssertionConsumerService URL from the metadata file downloaded in section 5.3
- Certificate: Upload the certificate file you created when extracting the Cert Data from the Pulse Secure Metadata file in section 5.3
- Starting URL: Enter in the URL that your users navigate to in order to log into the Pulse Secure VPN
- Select ‘Save’.
5.5. Add an LDAP Auth Server for Authorization
Trusona requires looking up the user by their mail attribute. This may be incompatible with other uses of the LDAP Auth Server. Therefore, Trusona recommends creating a new LDAP Auth Server specifically for Trusona. General configuration of the LDAP Auth Server Settings is out of scope for this document. Please refer to the Pulse Secure Connect Administration Guide for more information.
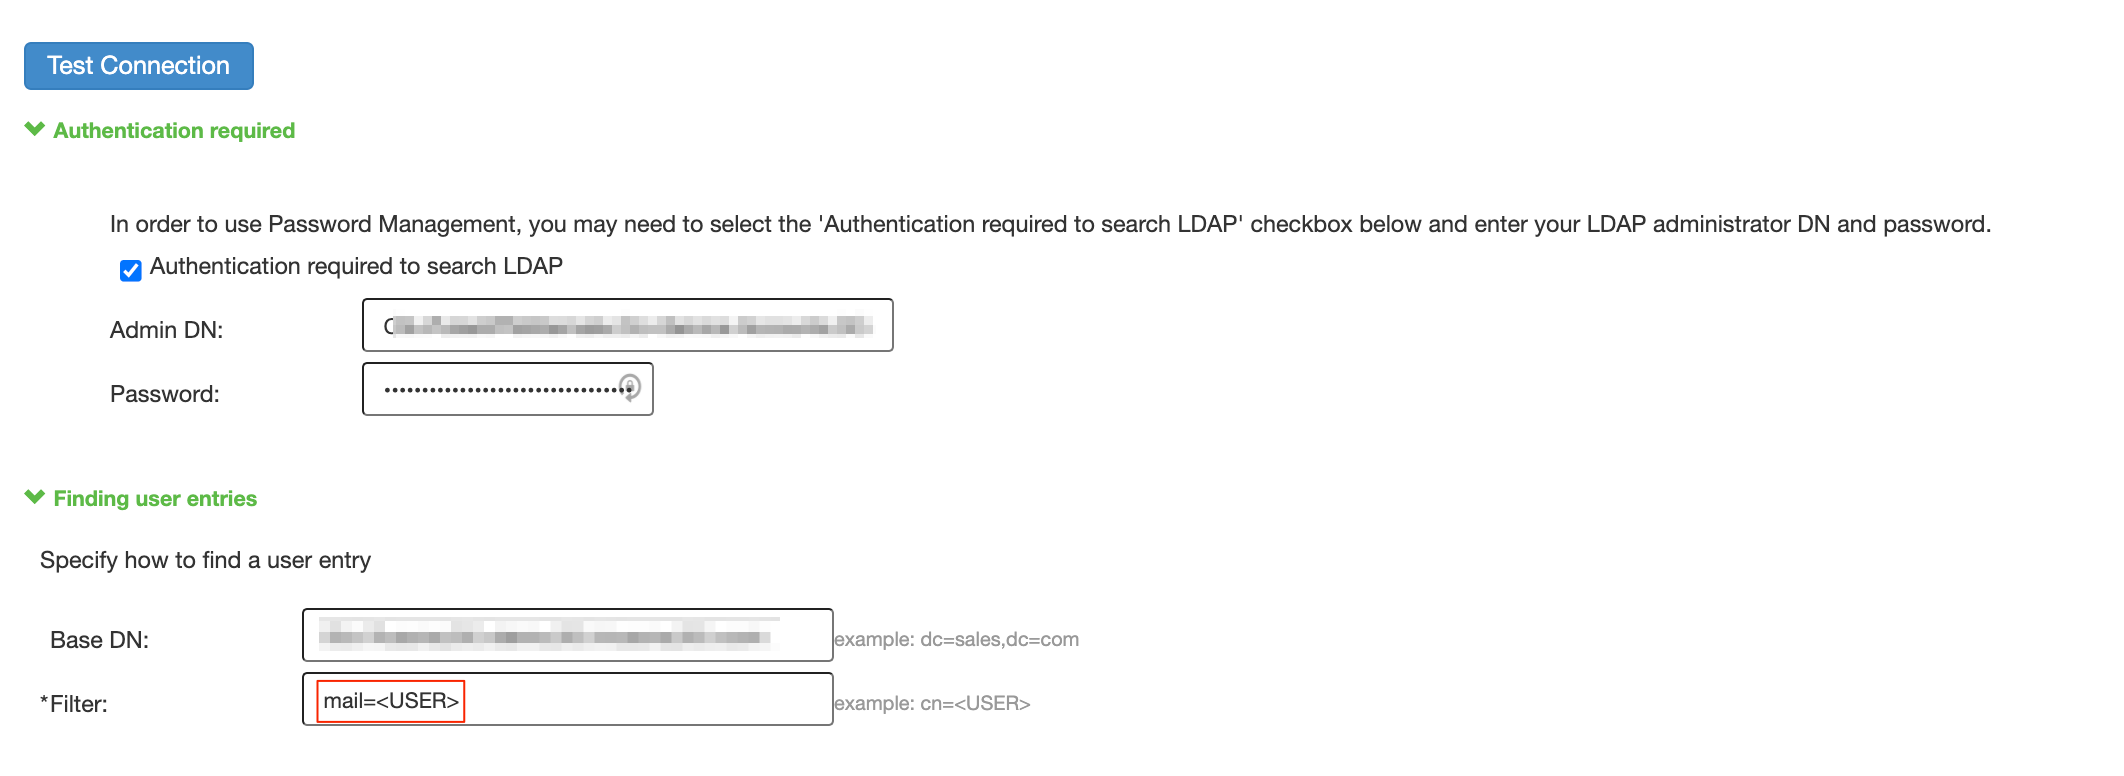
To configure the LDAP Auth Server to lookup users by their mail attribute do the following in the Pulse Secure Admin Console:
- Go to Authentication > Auth. Servers
- Select the LDAP Auth Server you wish to edit.
- Under Finding user entries, set “Filter” to mail=
- Select ‘Save Changes’
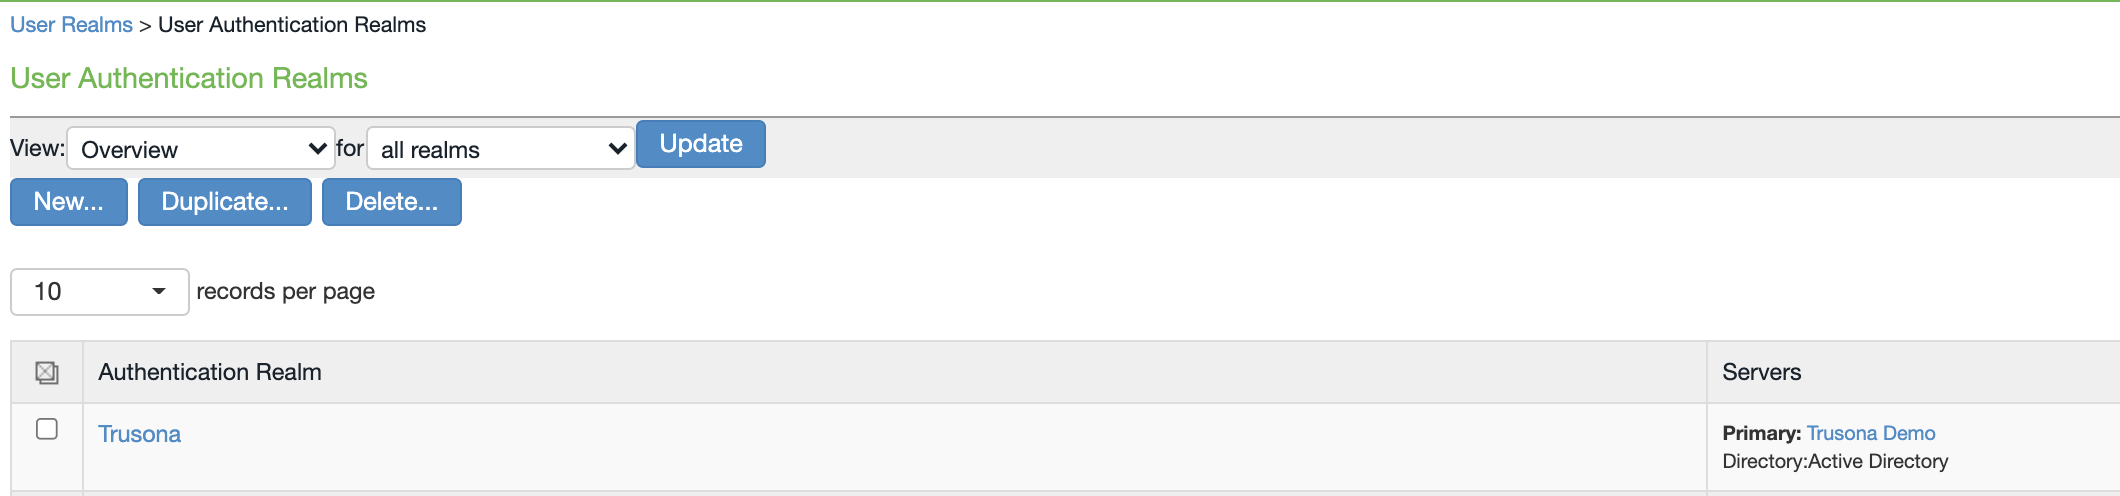
5.6. Configure a User Realm to use Trusona
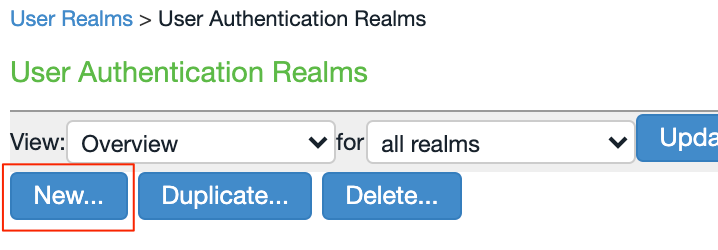
- Go to Users -> User Realms and create a new realm or edit an existing one.
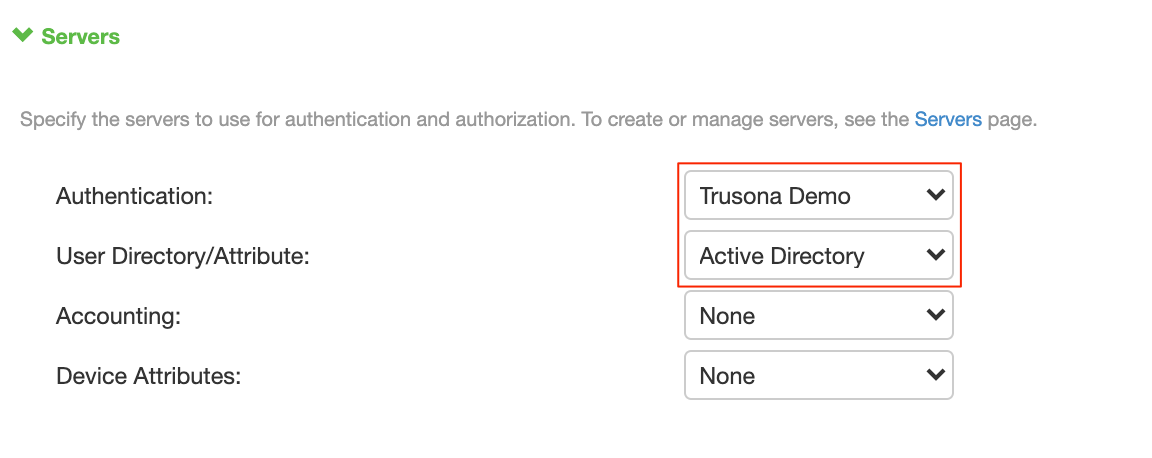
- Under Servers, set Authentication to the Trusona SAML Auth Server configured in section 5.3
- Under Servers, set User Directory/Attribute to the LDAP Auth Server configured in section 5.5
- Select ‘Save Changes’
Note: Ensure Role mapping is configured for the User Realm. If not configured, users may not be able to sign into the VPN with Trusona.
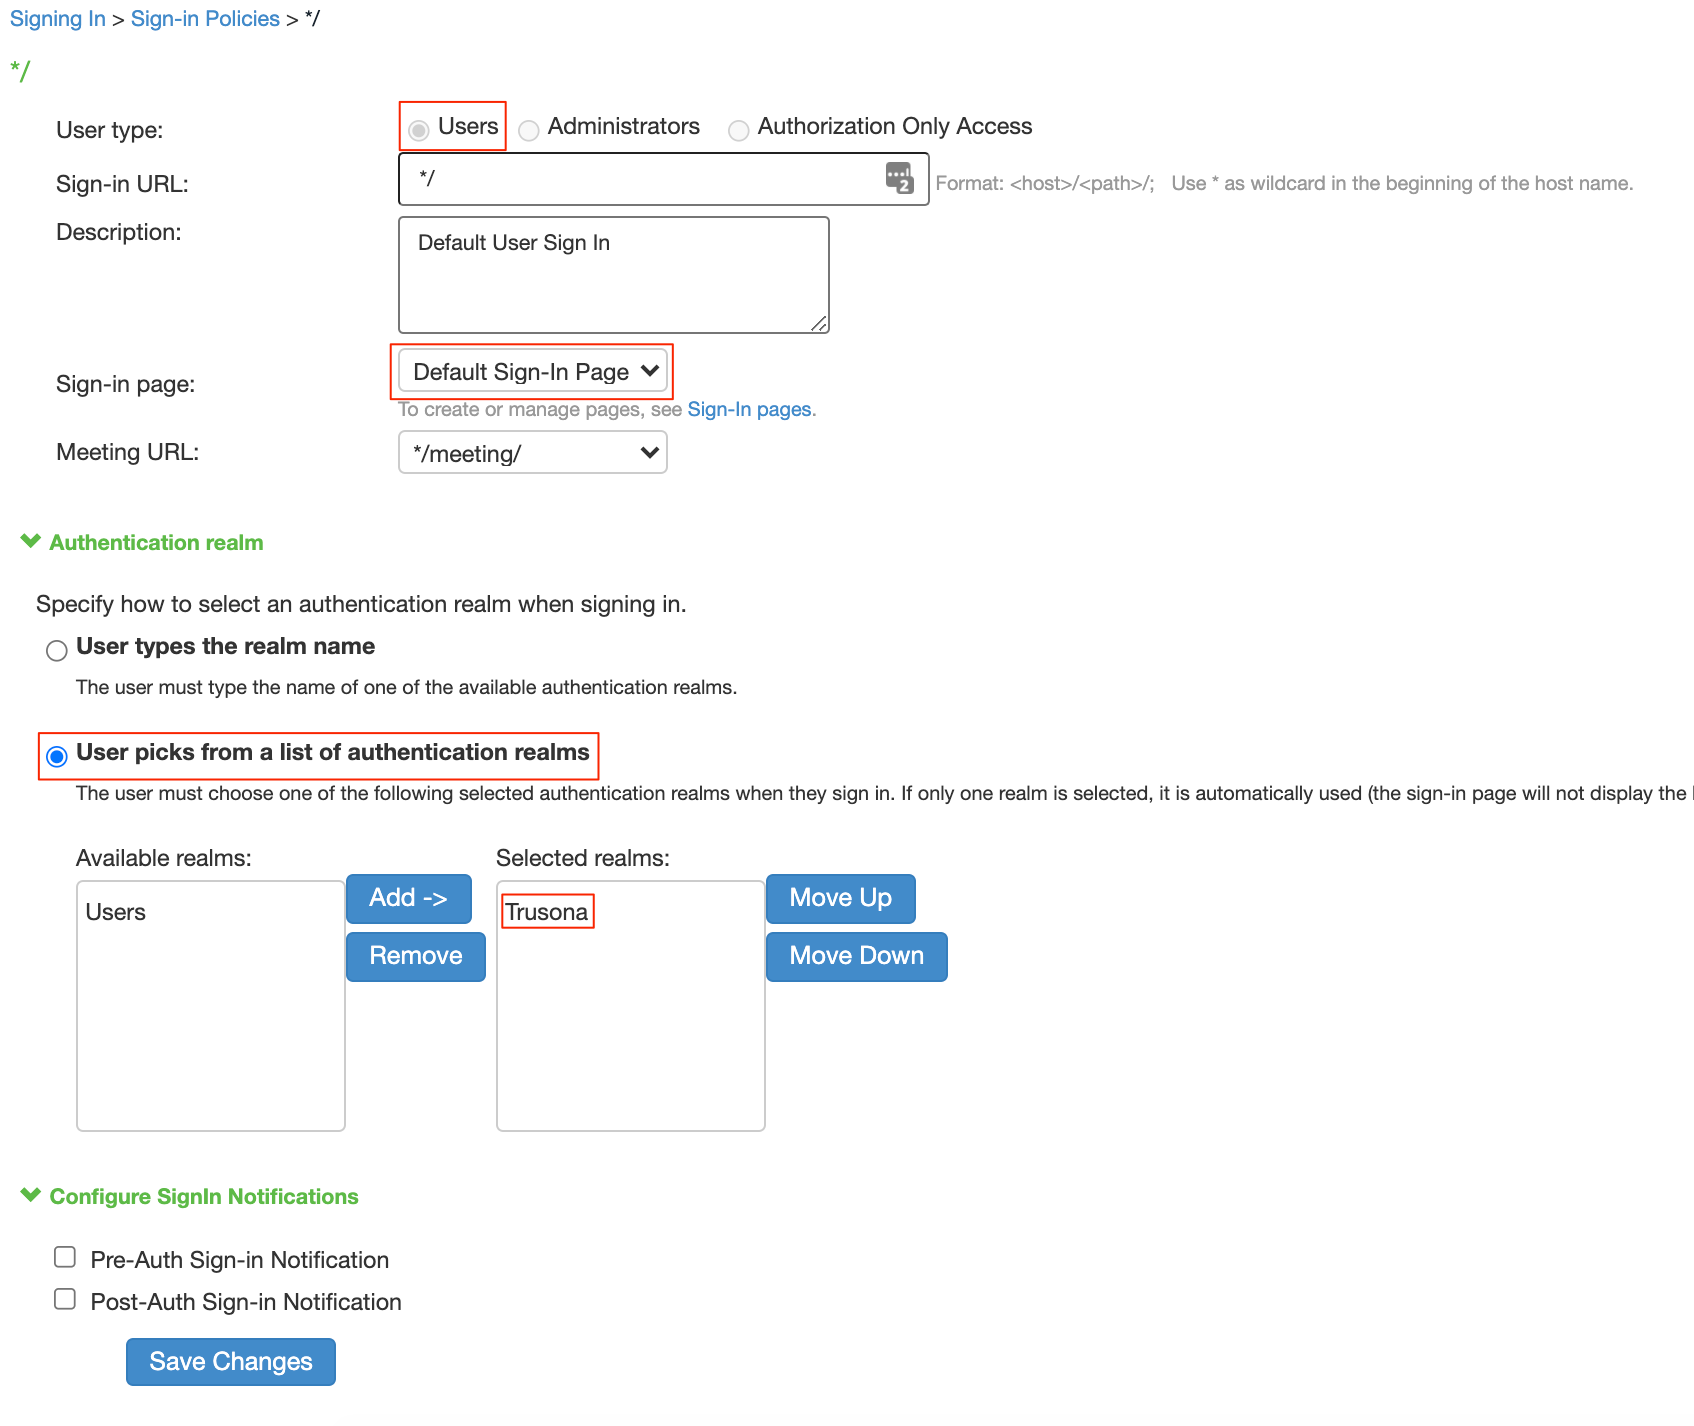
5.7. Configure your Sign-in policy
In order for your users to be prompted for Trusona, you need to edit an existing sign-in policy or create a new one.
- Go to Authentication > Signing In > Sign-In Policies
- Edit an existing User URL or create a new one
- User Type: Users
- Sign-in Page: Default Sign-In Page
- Under Authentication Realm, select ‘User picks from a list of Authentication Realms’ and add the user realm you configured with Trusona.
- Select ‘Save Changes’
6. Verify the Configuration
- Create a user in your LDAP directory with the mail attribute set.
- Install the Trusona app and register a user using the same email address as specified in the mail attribute for the user that was created in LDAP.
- Visit the public URL for your Pulse instance.
- You will be directed to a Trusona login page with a QR code.
- Scan the QR code using the Trusona app.
- You will receive a Security Challenge in the Trusona app that allows you to accept or reject the login attempt.
- Accept the Security Challenge.
- You will be directed to the Pulse dashboard page.