1. Prerequisites
Before proceeding, ensure that you have the following steps completed:
- In your Active Directory lab environment, set up a Citrix Connector
- Have admin access to the Trusona Dashboard
- Have admin access to Citrix Cloud
Reference the Citrix product documentation as needed for the above steps.
2. Configuring SAML
2.1. Create the SAML integration
- Navigate to the Trusona Dashboard and log into your account.
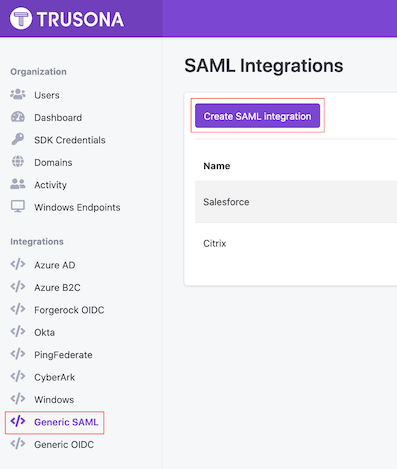
- From your Trusona account dashboard, select ’Generic SAML’ on the left-hand navigation.
- On the Generic SAML Integrations page, click on Create SAML integration
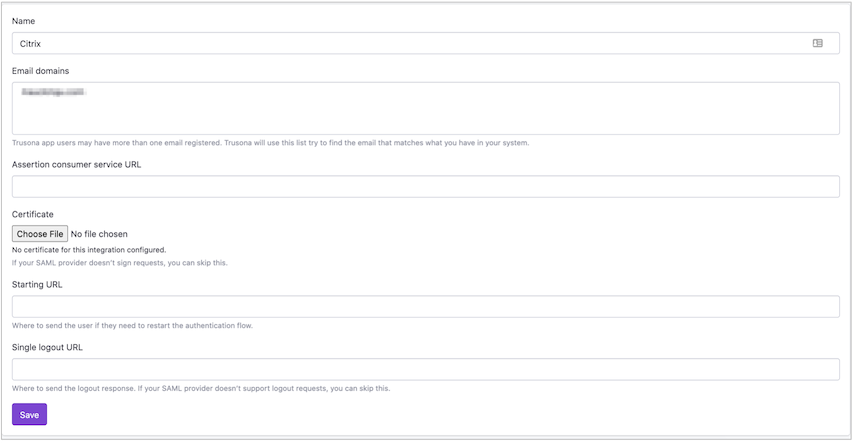
- Enter the following information:
- Name: Name of your integration
-
Assertion consumer service url:
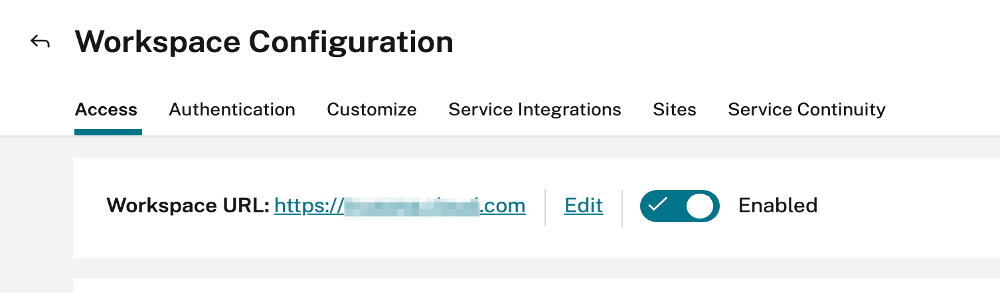
https://saml.cloud.com/saml/acs - Starting url: This is your Workspace URL that users log into. You can find this information in your Citrix Workspace Admin Console by going to Workspace Configuration > Access.
-
Logout URL:
https://saml.cloud.com/saml/logout/callback
- Click ‘Save’. You will be redirected back to the Generic SAML Integrations page.
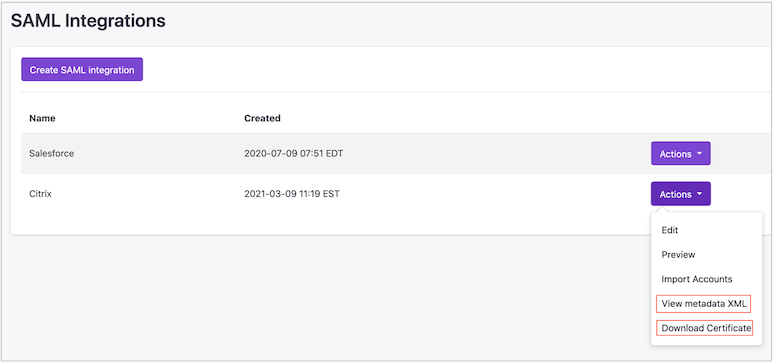
- Find your newly create SAML integration, click on the Actions button to the right, and select Download Certificate and View metadata XML
- In the Metadata XML file, find the following values:
- SSO URL: locate the SingleSignOnService line and make note of the URL.
- Single Logout URL: locate the SingleLogoutService line and make note of the URL


2.2. Configure Citrix
Once you have created a SAML integration within the Trusona Dashboard, you can begin configuring Citrix.
- Log into a Citrix Workspace Admin Account.
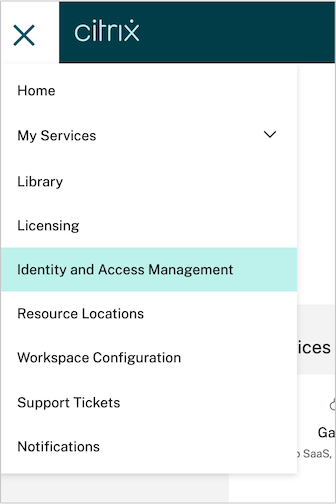
- From the main dashboard page, click on the hamburger icon in the upper left-hand corner and select ‘Identity & Access Management’.
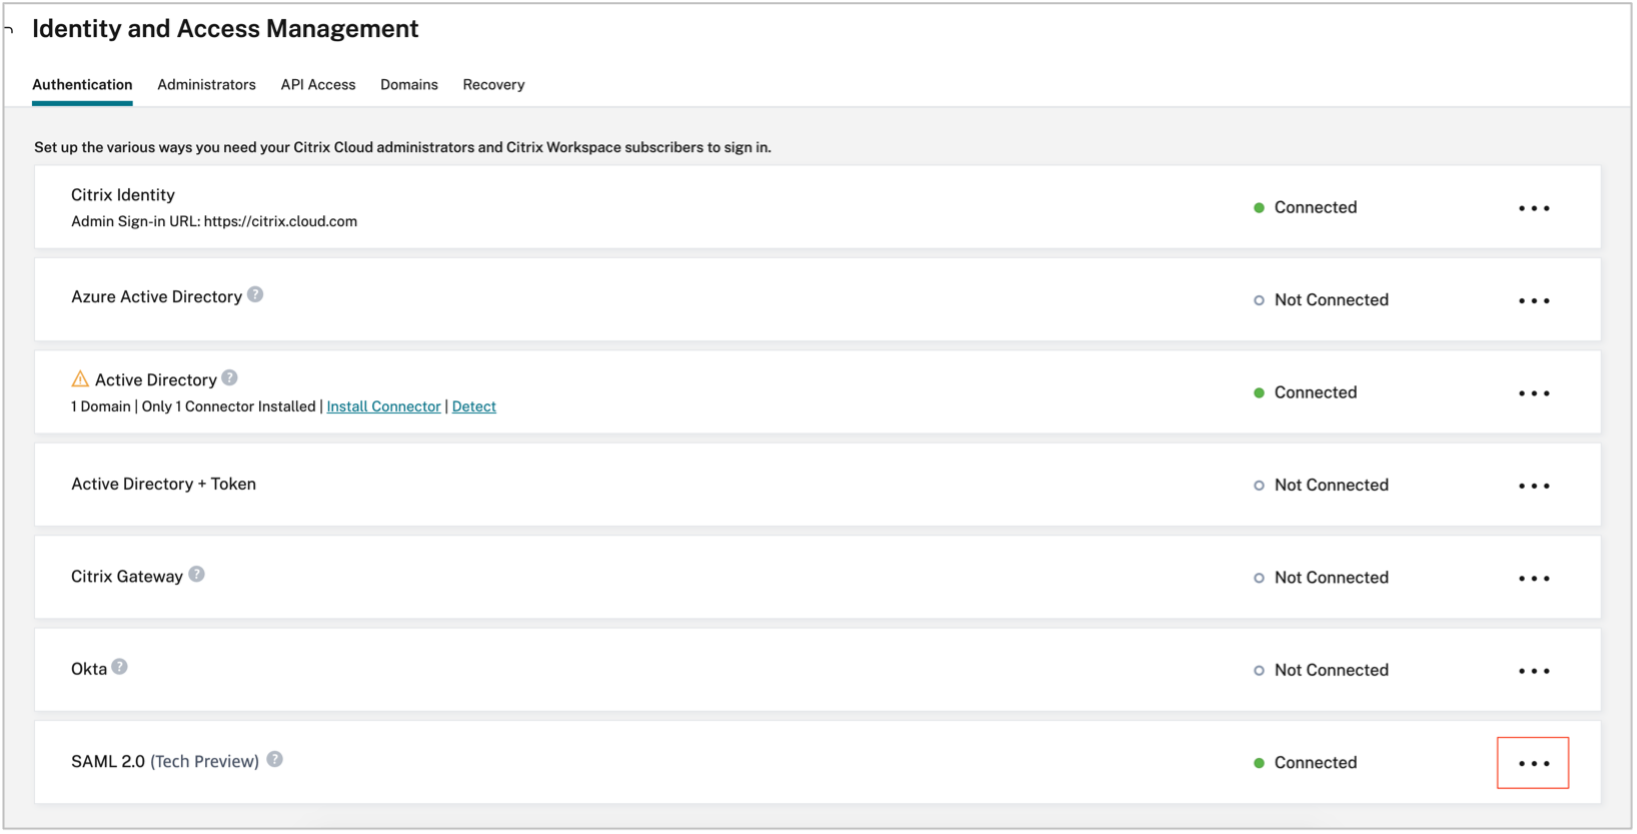
- On the Authentication Tab, locate the section labeled SAML 2.0 (Tech Preview), click on the 3-dot icon, and select connect. (You will be taken to a new Configuration page for SAML. We recommend leaving this tab open.)
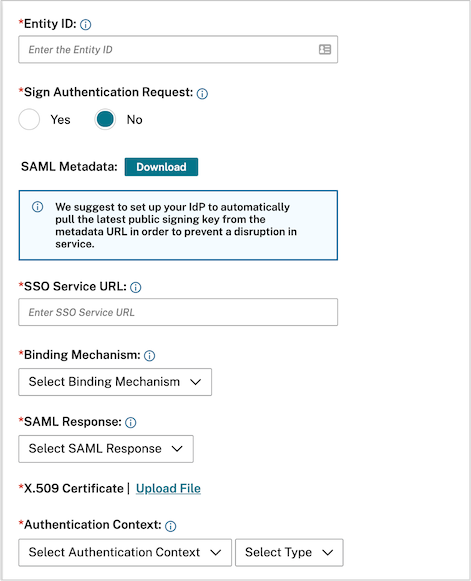
- On the Configuration page for SAML, enter the following information:
-
Entity ID:
https://gateway.trusona.net/saml/metadata -
Sign Authentication Request: The Sign Authentication Request will depend on your company’s policies.
- Select Yes to allow Citrix Cloud to sign authentication requests, certifying they came from Citrix Cloud and not a malicious actor. If you select Yes, you will need to download the SAML metadata file from the SAML configurations page in Citrix, extract the certificate data, and save it as a .crt. Upload this cert to the SAML integration you created for Citrix, within the Trusona Dashboard.
- Select No if you prefer to add the Citrix ACS URL to an allow list that your SAML provider uses for posting SAML responses safely.
- SSO Service URL: This is the SingleSignOnService URL that was extracted earlier from the Trusona Metadata file.
- Binding Mechanism: HTTP-Redirect or HTTP-POST. We recommend using HTTP-POST, but both Citrix and Trusona support either one.
-
SAML Response: Choose
Must Sign Assertion. - X.509 Certificate: Upload the certificate downloaded earlier from the Trusona Dashboard.
- Authentication Context: Choose ‘Unspecified’ and ‘Minimum’.
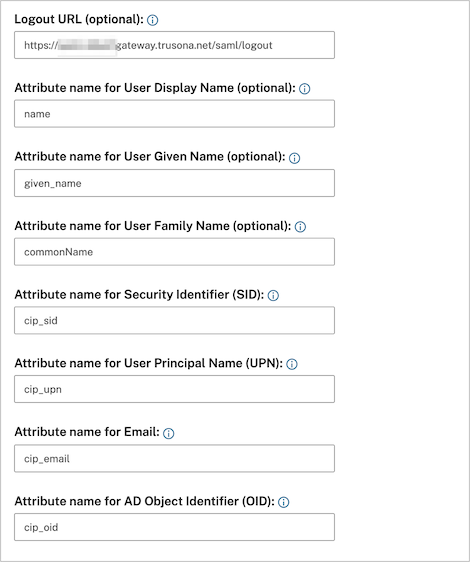
- Logout URL: This is the SingleLogoutService URL that was extracted earlier from the Trusona Metadata file.
- Attribute mapping: Ensure each attribute matches the values in the table. (See table below)
-
Entity ID:
- Select Test and Finish. You will receive a notification that SAML was enabled successfully
2.2.1. Attribute mapping
| Attribute Name | Value |
|---|---|
| User Display Name (optional) | name |
| User Given Name (optional) | given_name |
| User Family Name (optional) | commonname |
| Security Identifier (SID) | cip_sid |
| User Principal Name (UPN) | cip_upn |
| cip_email | |
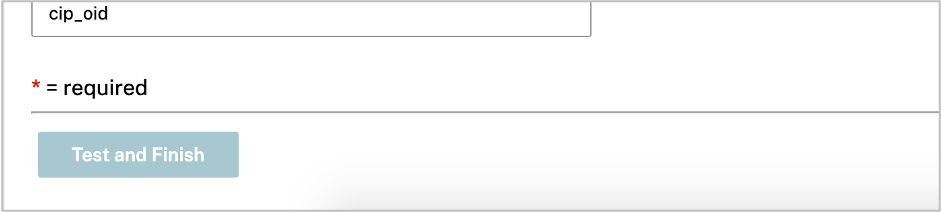
| AD Object Identifier (OID) | cip_oid |

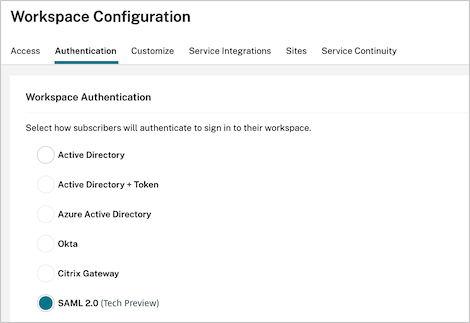
2.3. Enable SAML for Workspace Authentication
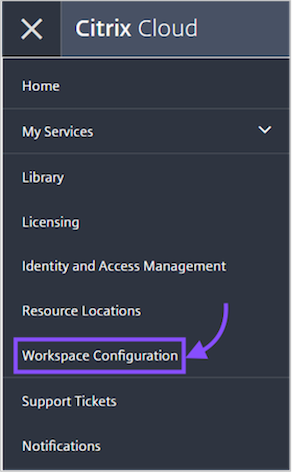
- Click on the hamburger icon in the upper left-hand corner and select Workspace configuration.
- On the authentication tab, select ‘SAML (Tech Preview)’
3. Syncing users
Your Citrix users need to be imported into Trusona in order for the integration to properly identify users during the authentication process. This will be done by exporting your targeted users from Active Directory to a CSV file that will be used to import your users.
3.1. Exporting users from Active Directory
- Log onto your Active Directory Domain Controller
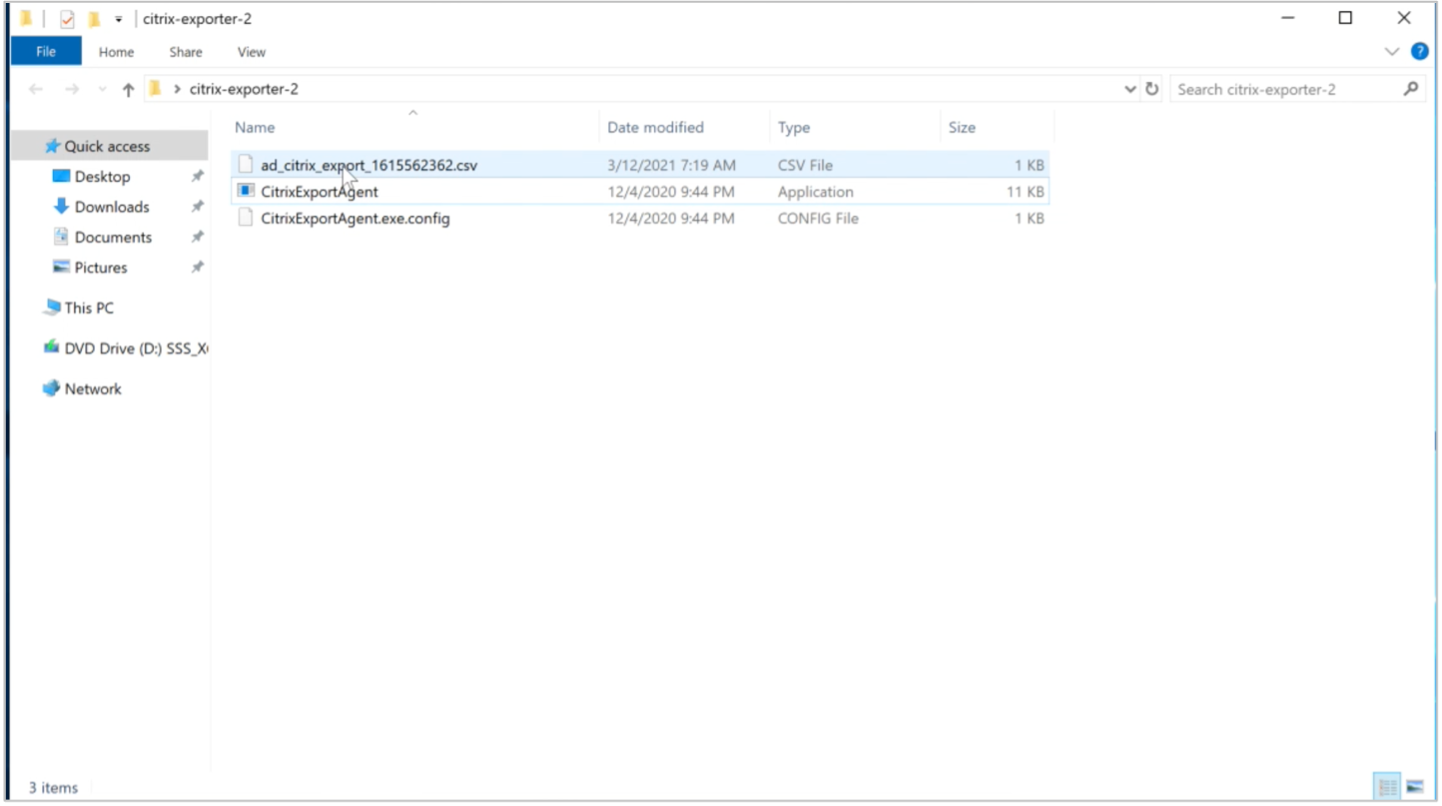
- Download the most recent version of the Trusona Citrix exporter
- Extract the zip file and run the CitrixExportAgent executable
- When prompted for the group, enter a group name to narrow the export or leave it blank to export your users located in ‘Domain Users’.
- A CSV file is created by the exporter and saved in the same directory.
3.1.1. Citrix Exporter notes
- The name of the group should not include the full DN.
- The Trusona Citrix Exporter queries the Active Directory for the list of users and filters them by group membership (if specified) and creates a CSV with the list of users.
- If you have multiple domains, the exporter will only query the Domain that the DC is joined to.

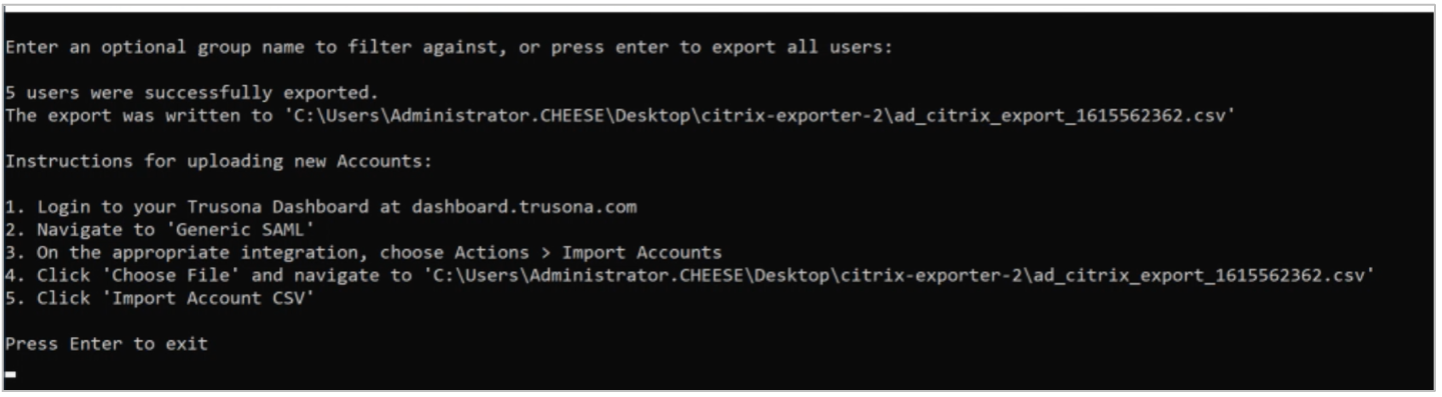
3.2. Importing users to Trusona
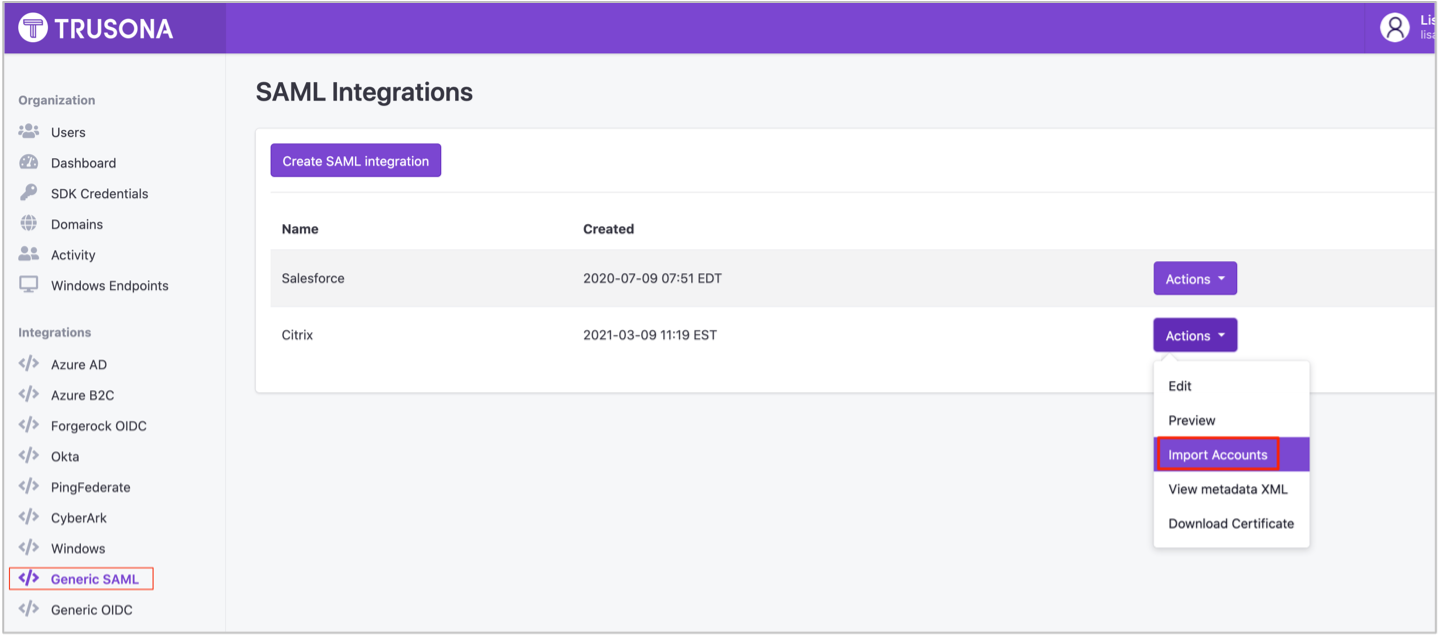
- Log into the Trusona Dashboard
- Select ‘Generic SAML’ on the left-hand navigation
- Locate the Citrix Integration you previously created and select the ‘Actions’ button
- From the dropdown menu, select ‘Import Accounts’
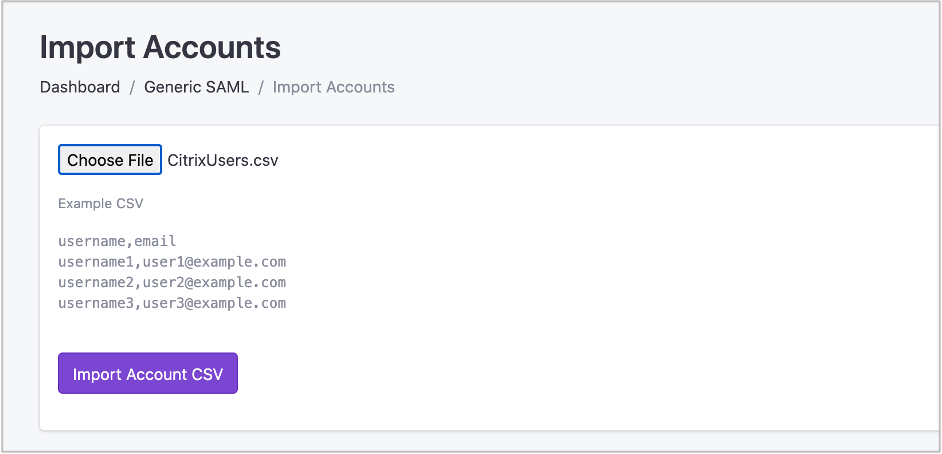
- Click on the Choose File option, and select the account CSV that was created by the exporter
- Click on Import Account CSV.
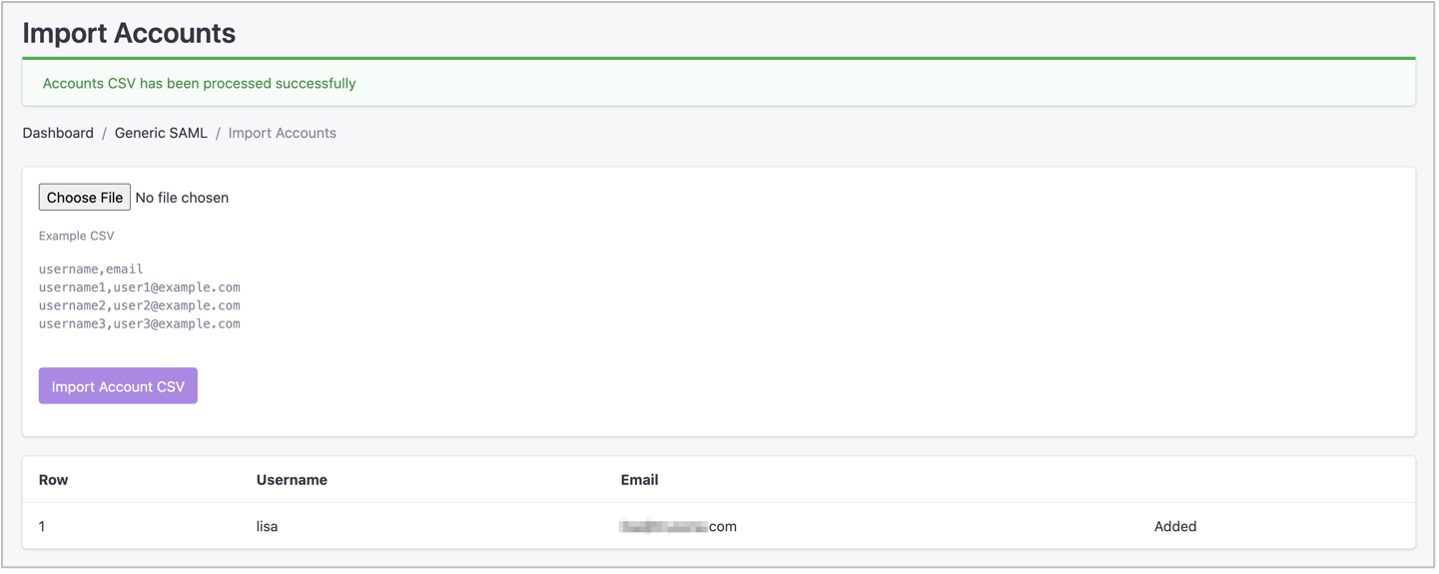
- You will now see a list of the users who were imported, along with a status of Added or Updated.
3.3. Accessing Citrix Workspace with Trusona
Open a private or incognito browser and navigate to your Citrix Workspace URL. You will be prompted to login using Trusona.