1. Getting started
1.1. Login to the dashboard
- Visit the Trusona Dashboard
- Login or create an account
2. Initial Configuration
2.1. Create an Azure Active Directory B2C tenant
Skip this step if you have an existing B2C tenant.
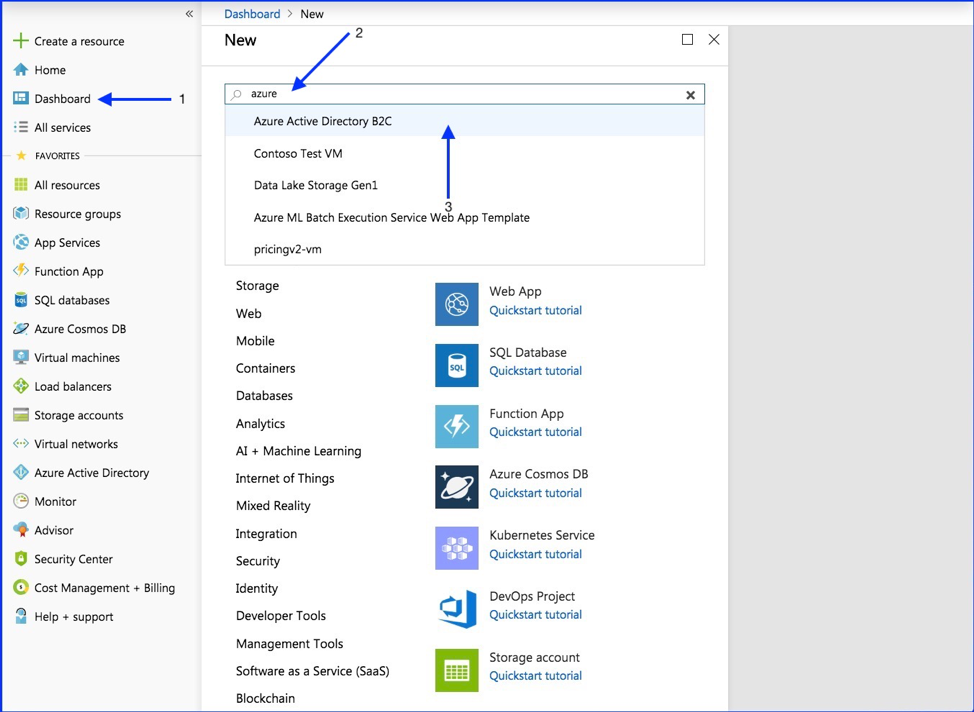
- On the left side select “Dashboard”
- In the search bar type “Azure Active Directory B2C”
- Select “Azure Active Directory B2C” from the dropdown
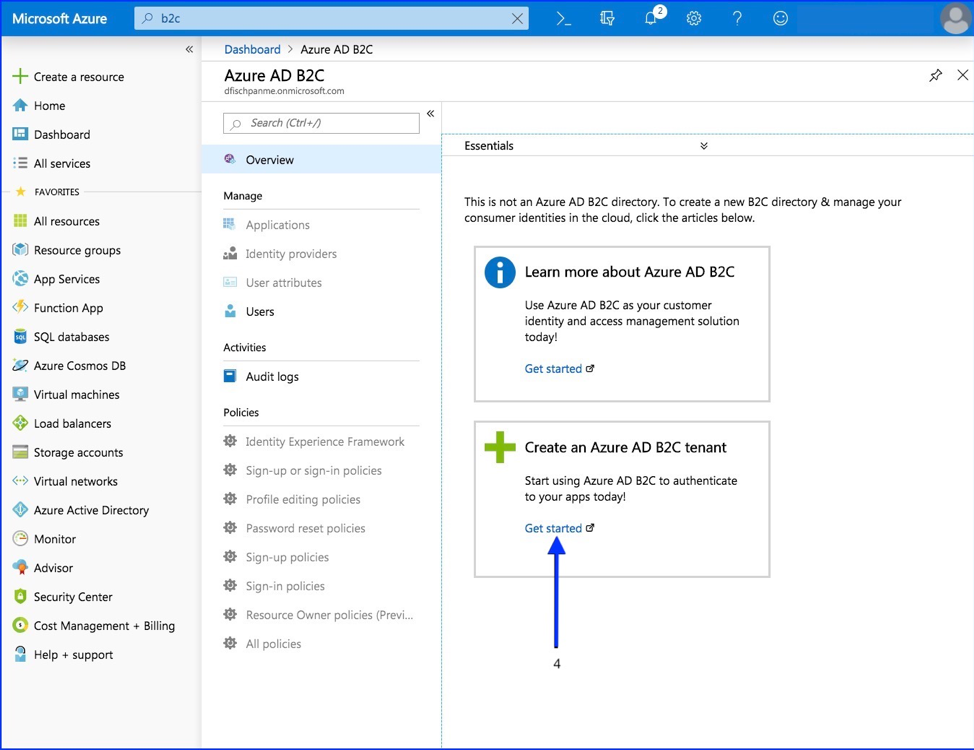
- Select “Get Started”
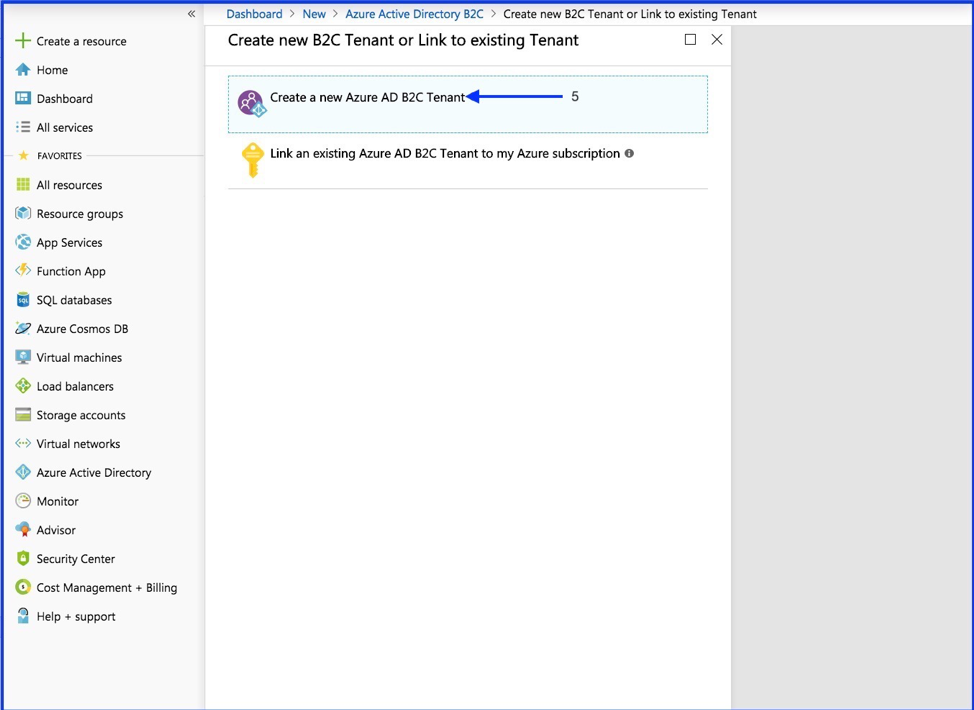
- Select “Create a new Azure AD B2C Tenant”
- Create Organization name and Initial Domain Name
- Select the “Create” button
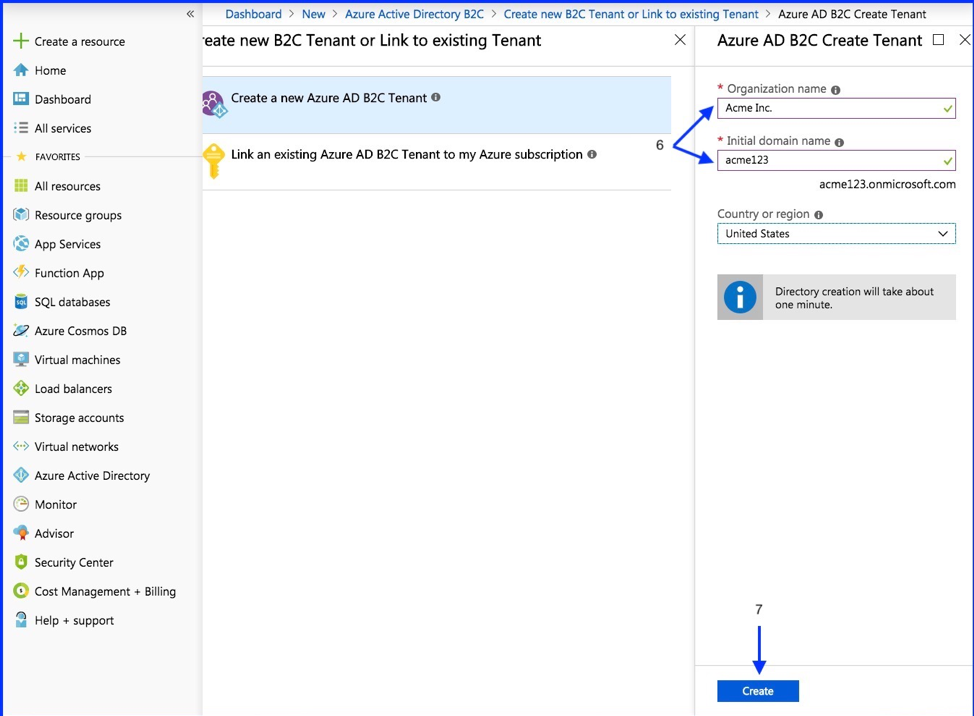
Note: It may take a few minutes for the tenant to be created.
2.2. Create the Trusona integration
Next you’ll create an integration in the Trusona Dashboard that will provide you the values required to finish setting up your sign-up and sign-in rules in Azure.
Head back to the Trusona dashboard.
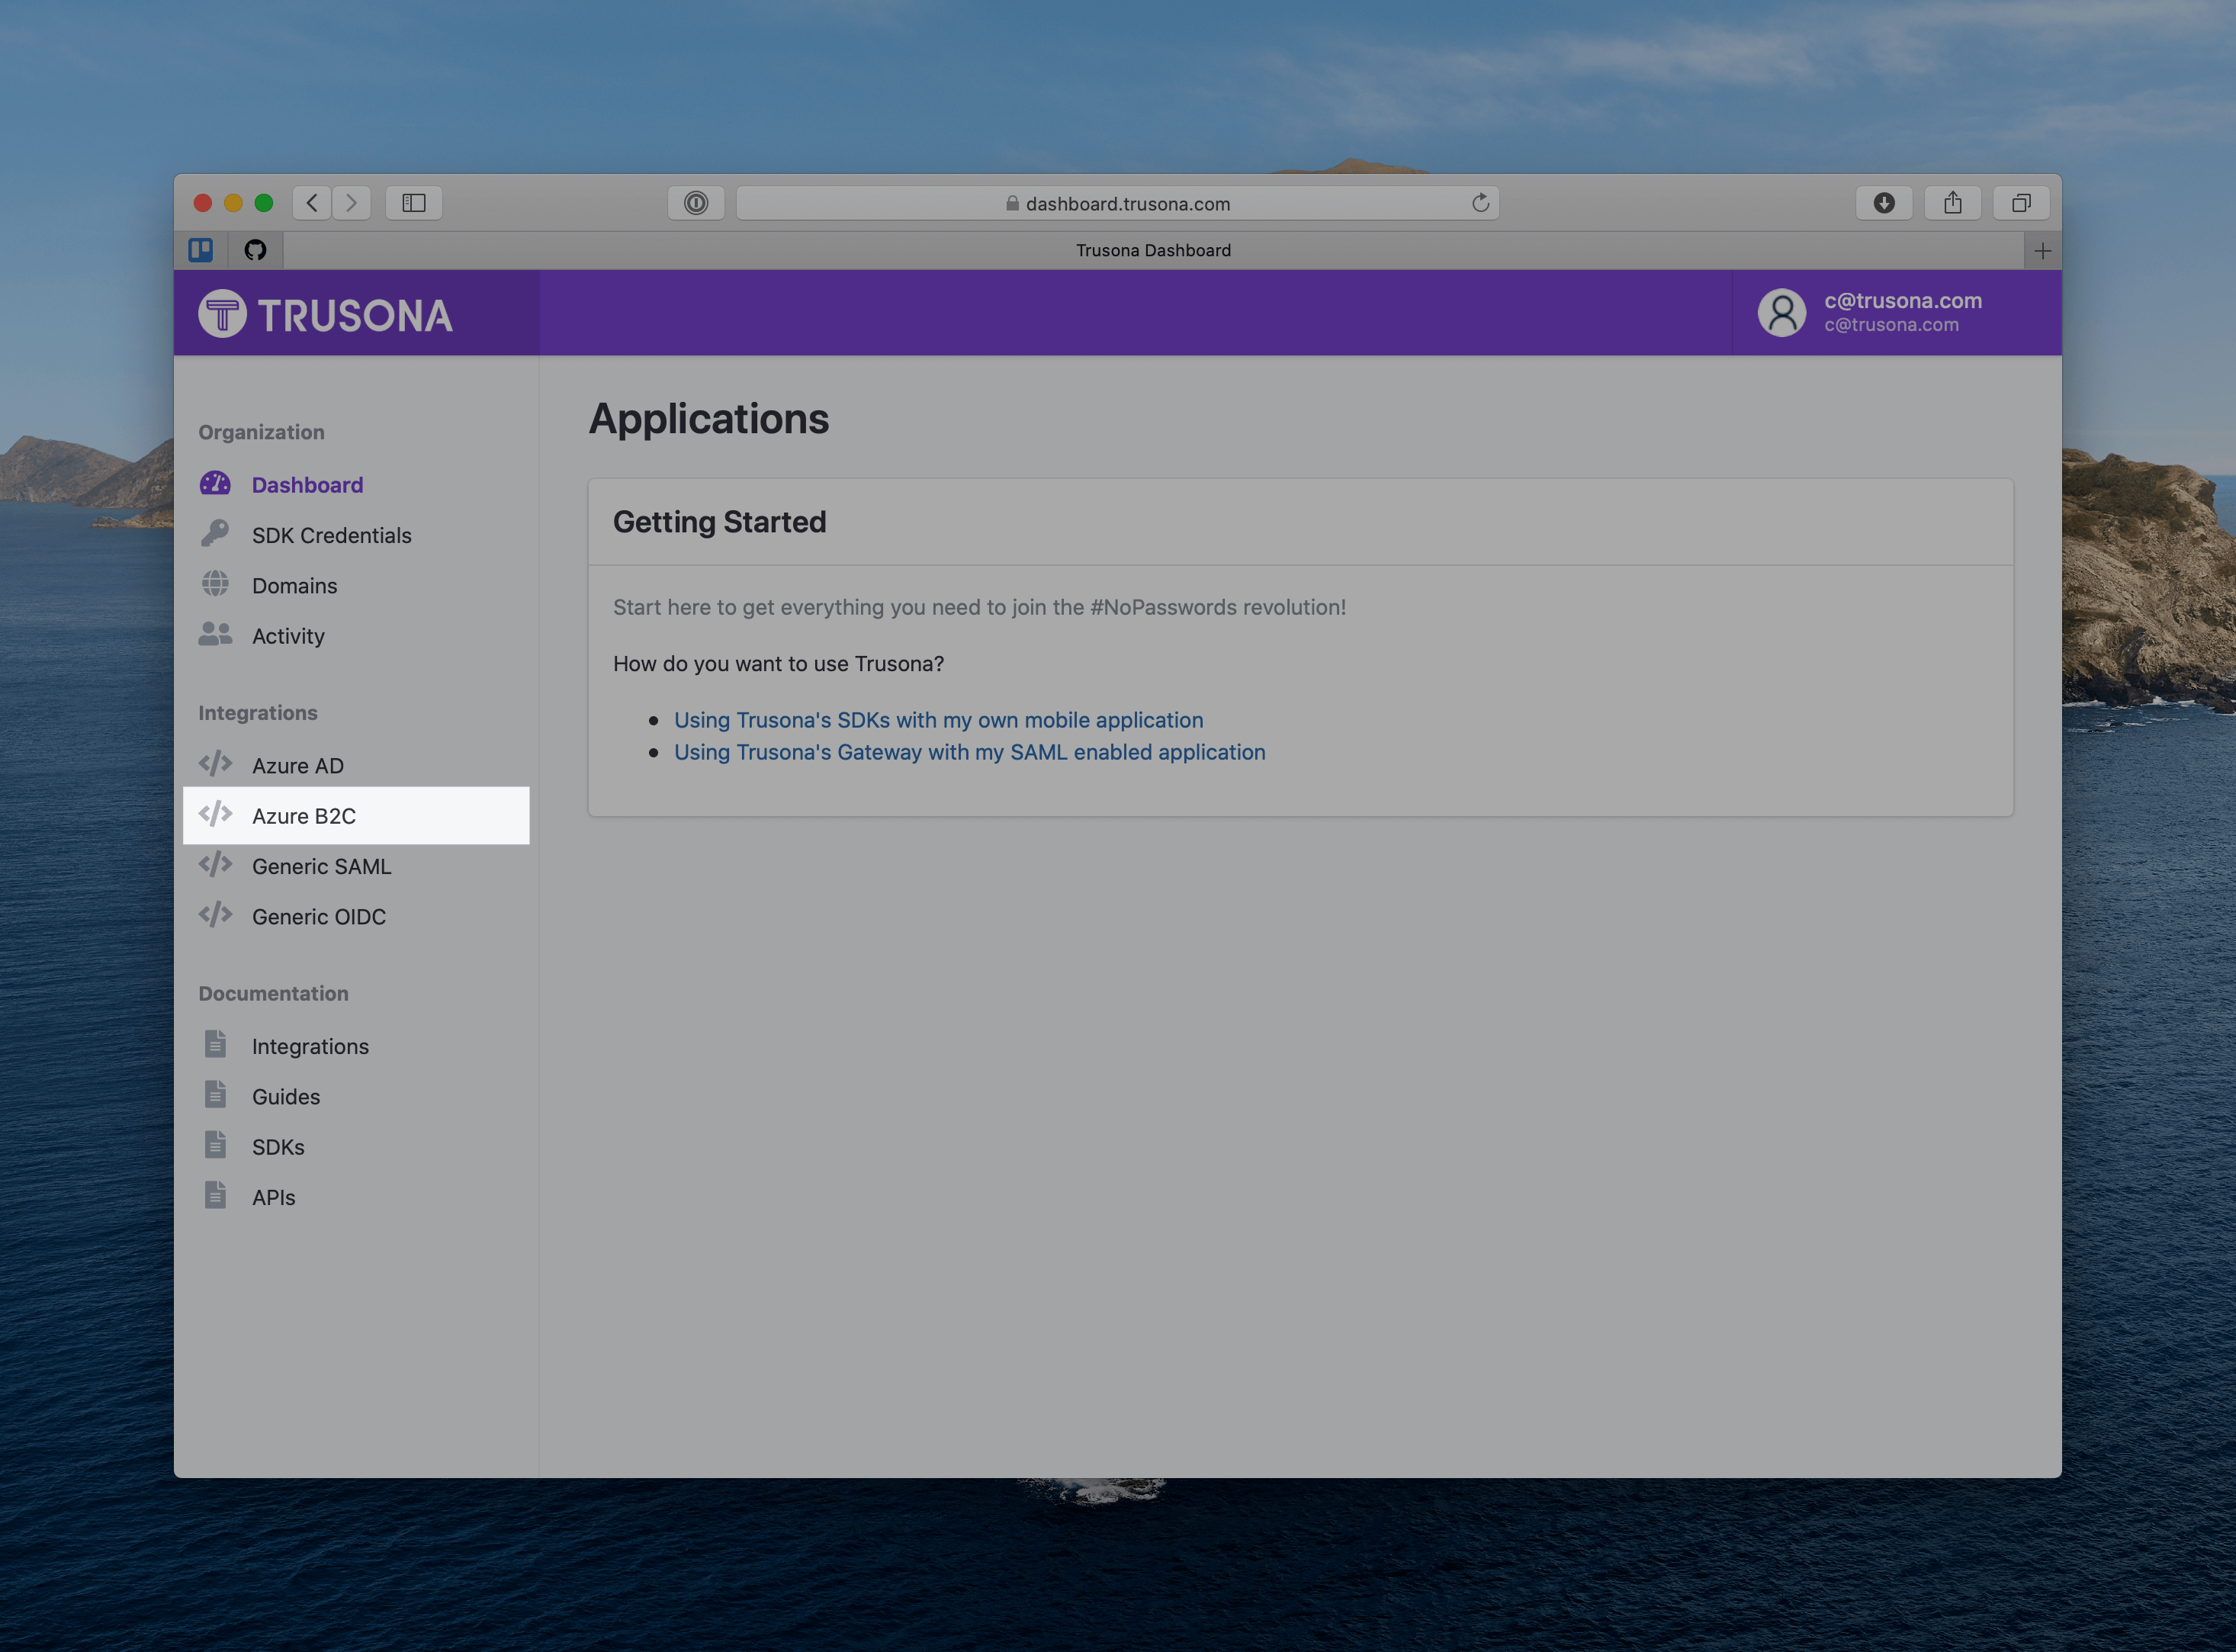
- Navigate to the Azure B2C integrations page in the sidebar
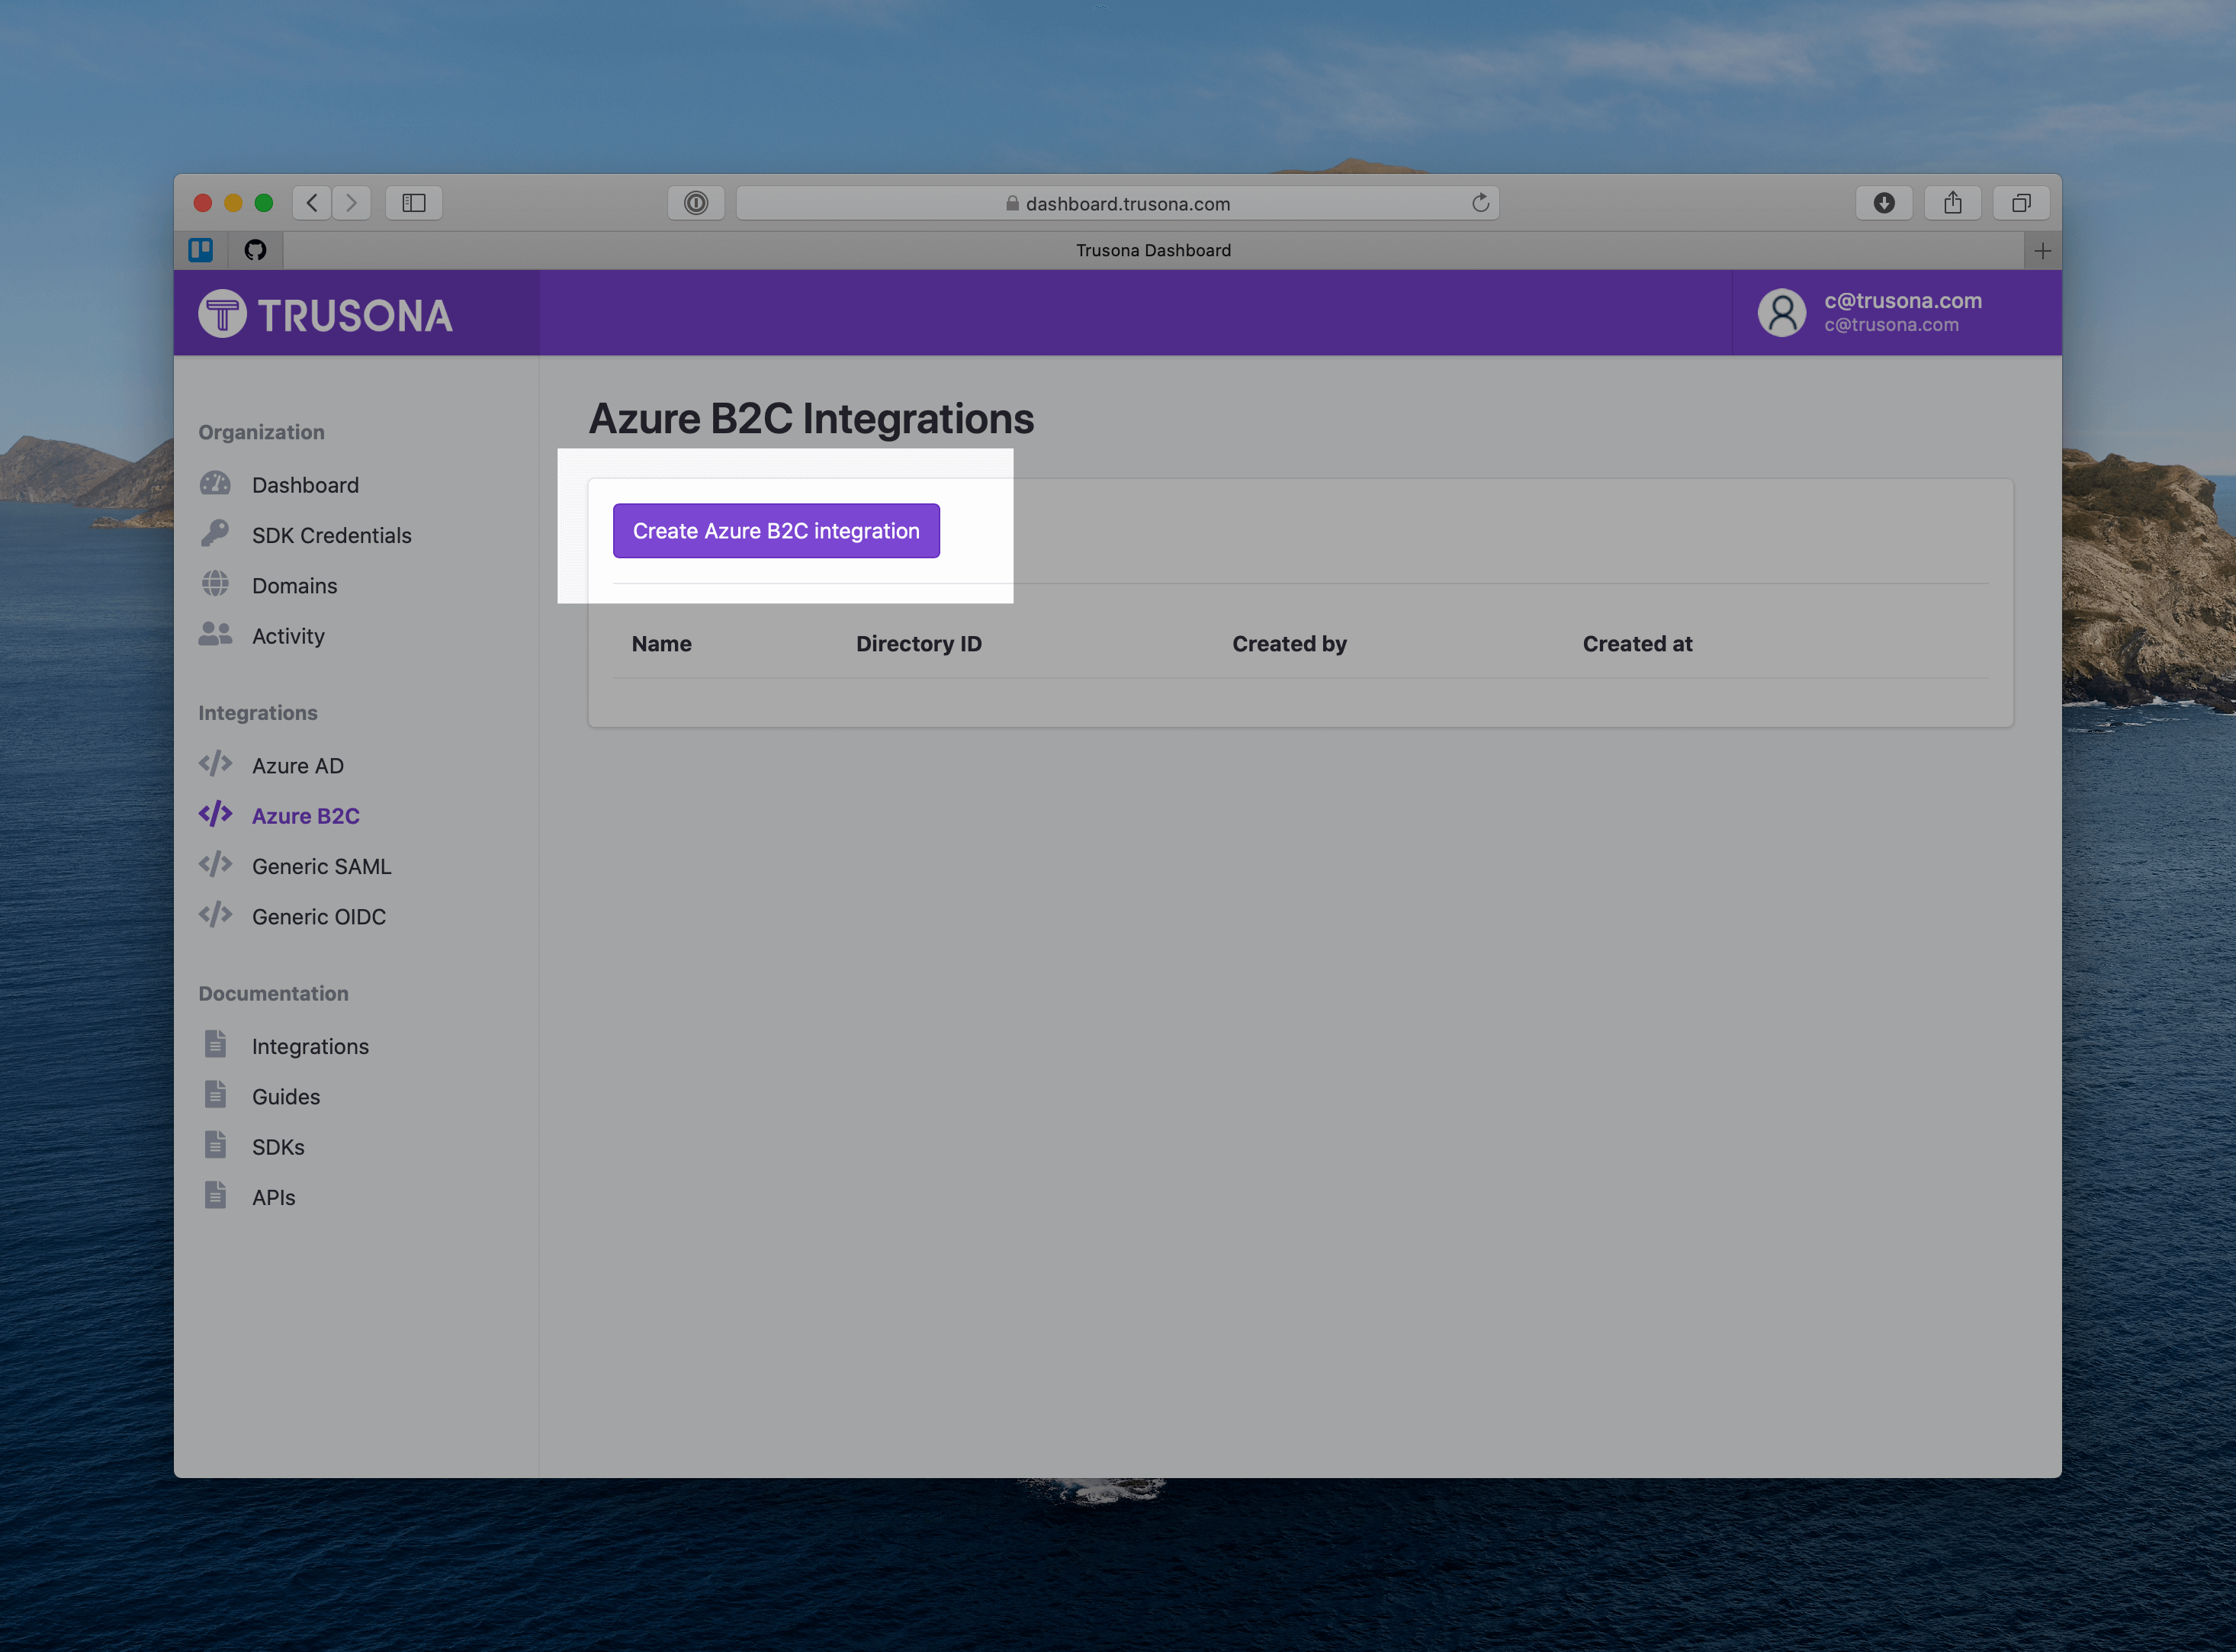
- Click the “Create Azure B2C integration” button
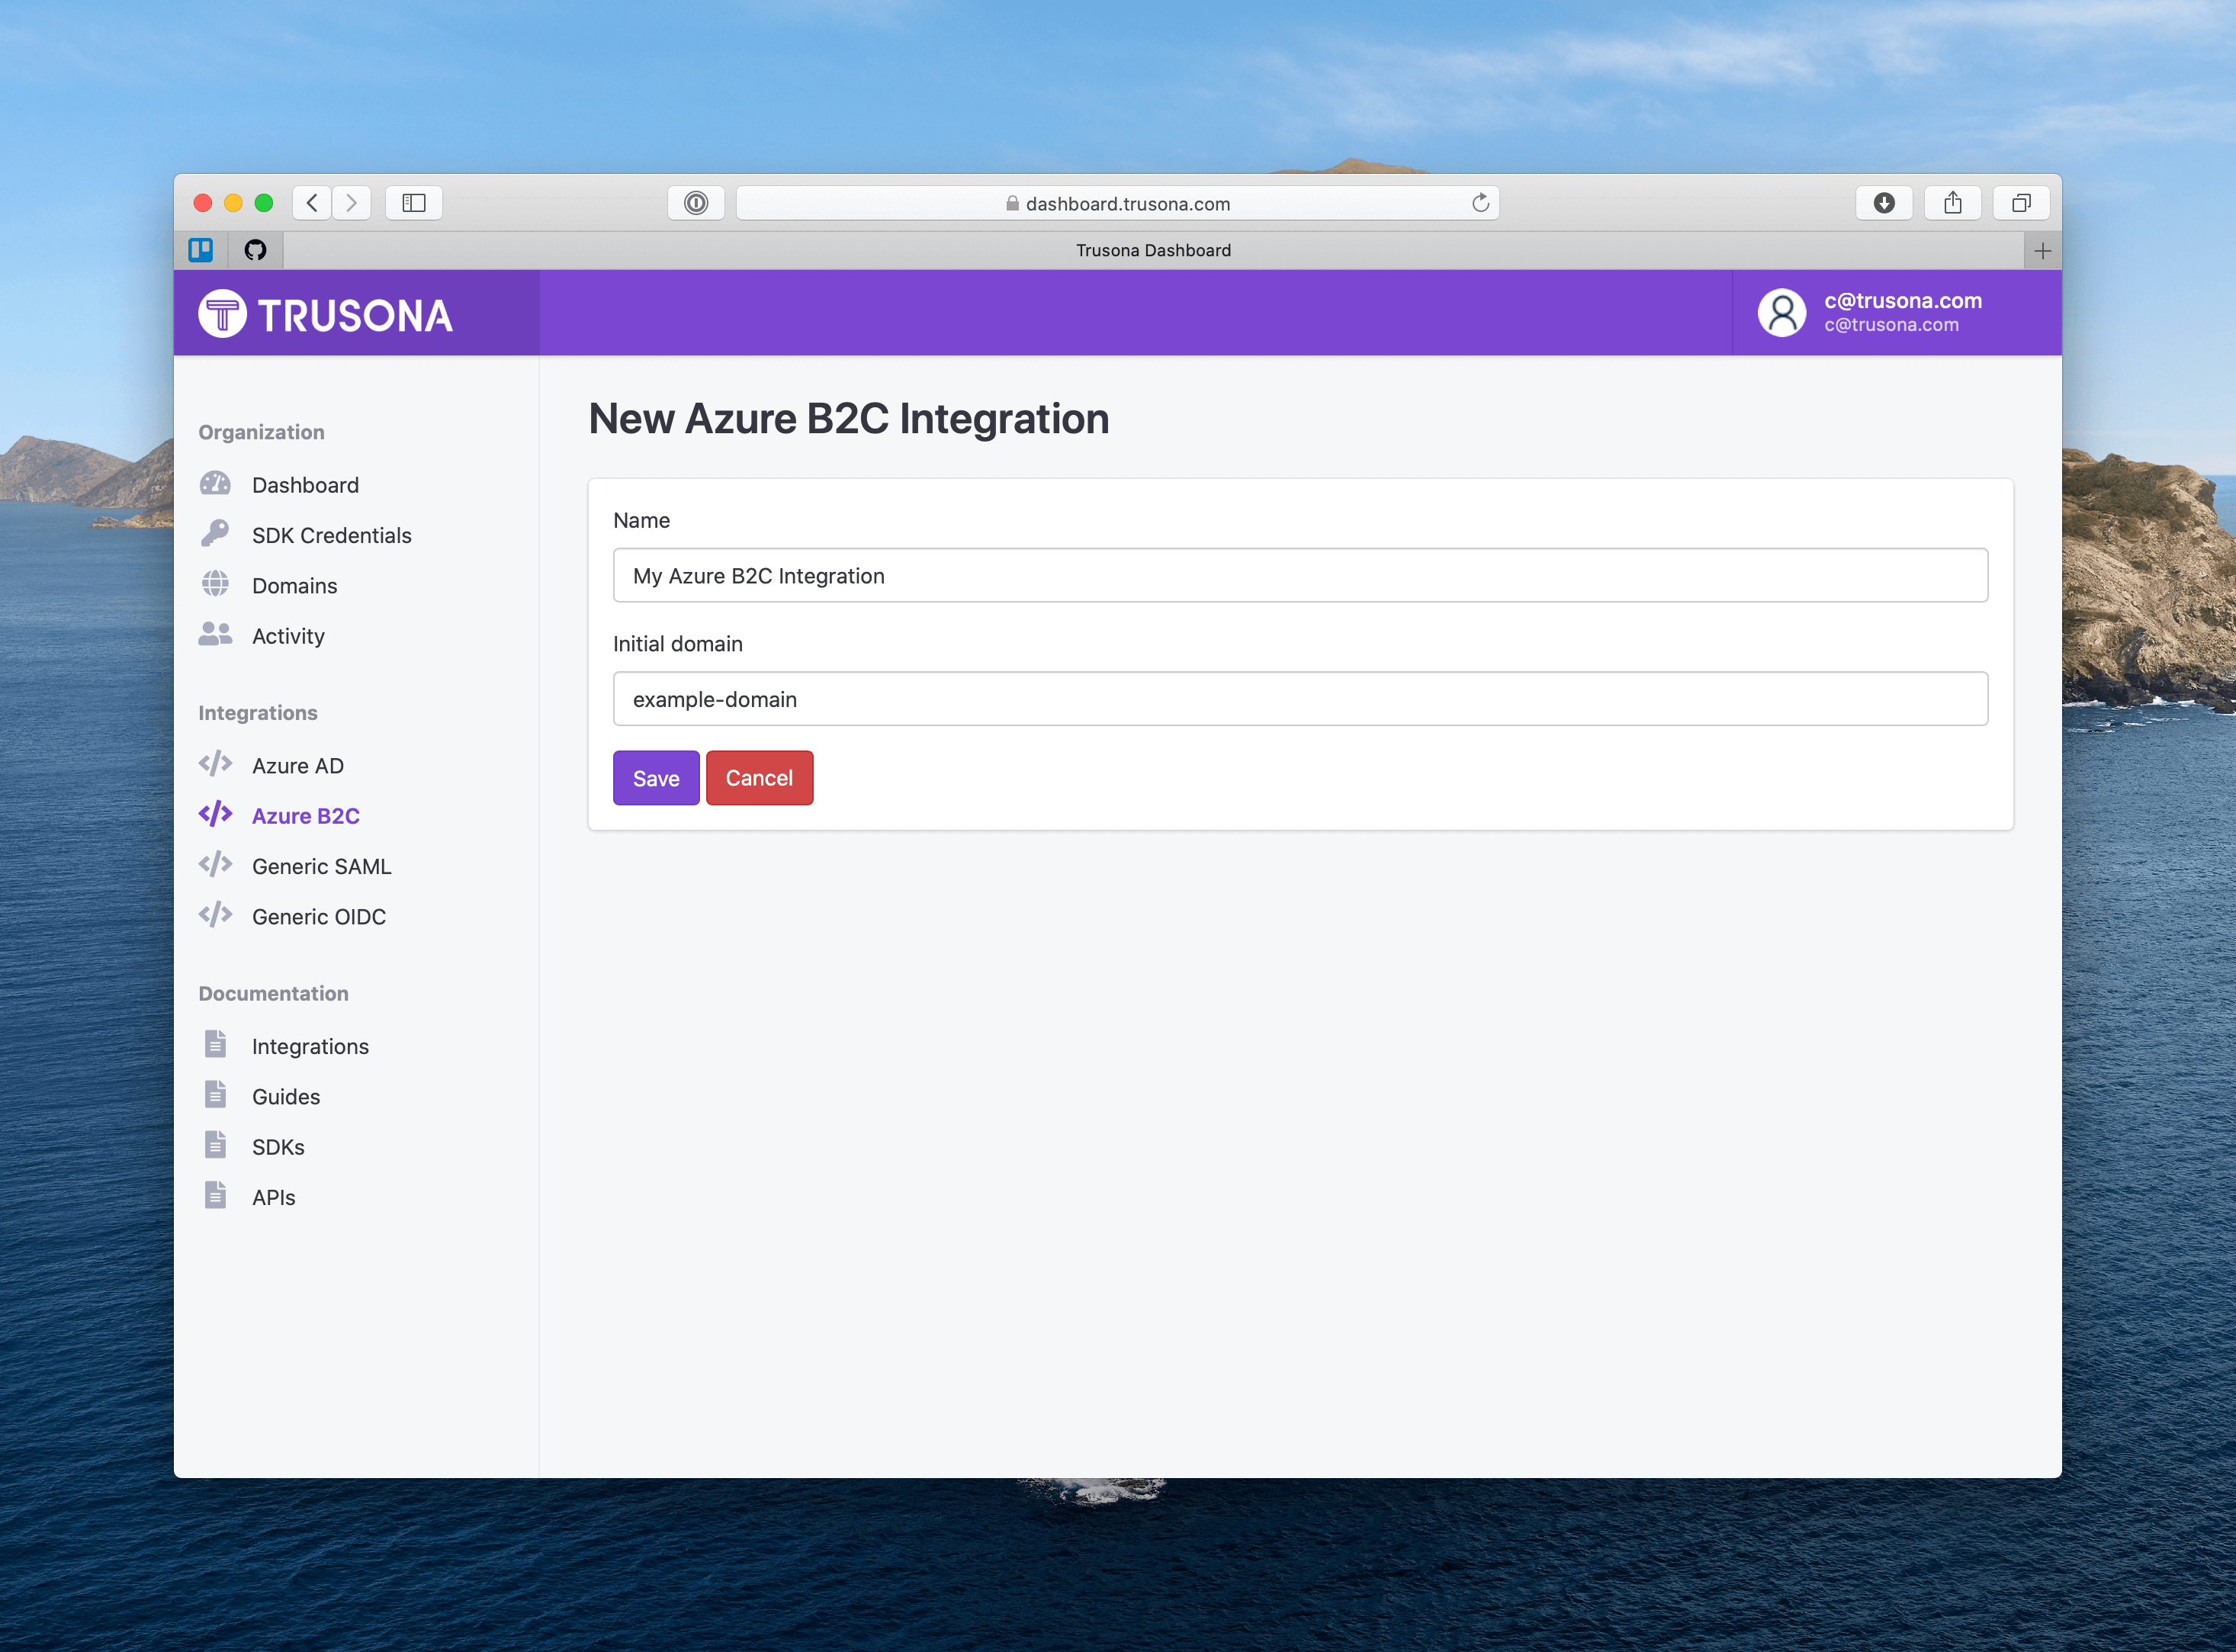
- Give this integration a name
- Enter the “initial domain” for your Azure B2C tenant.
- Click “Save”
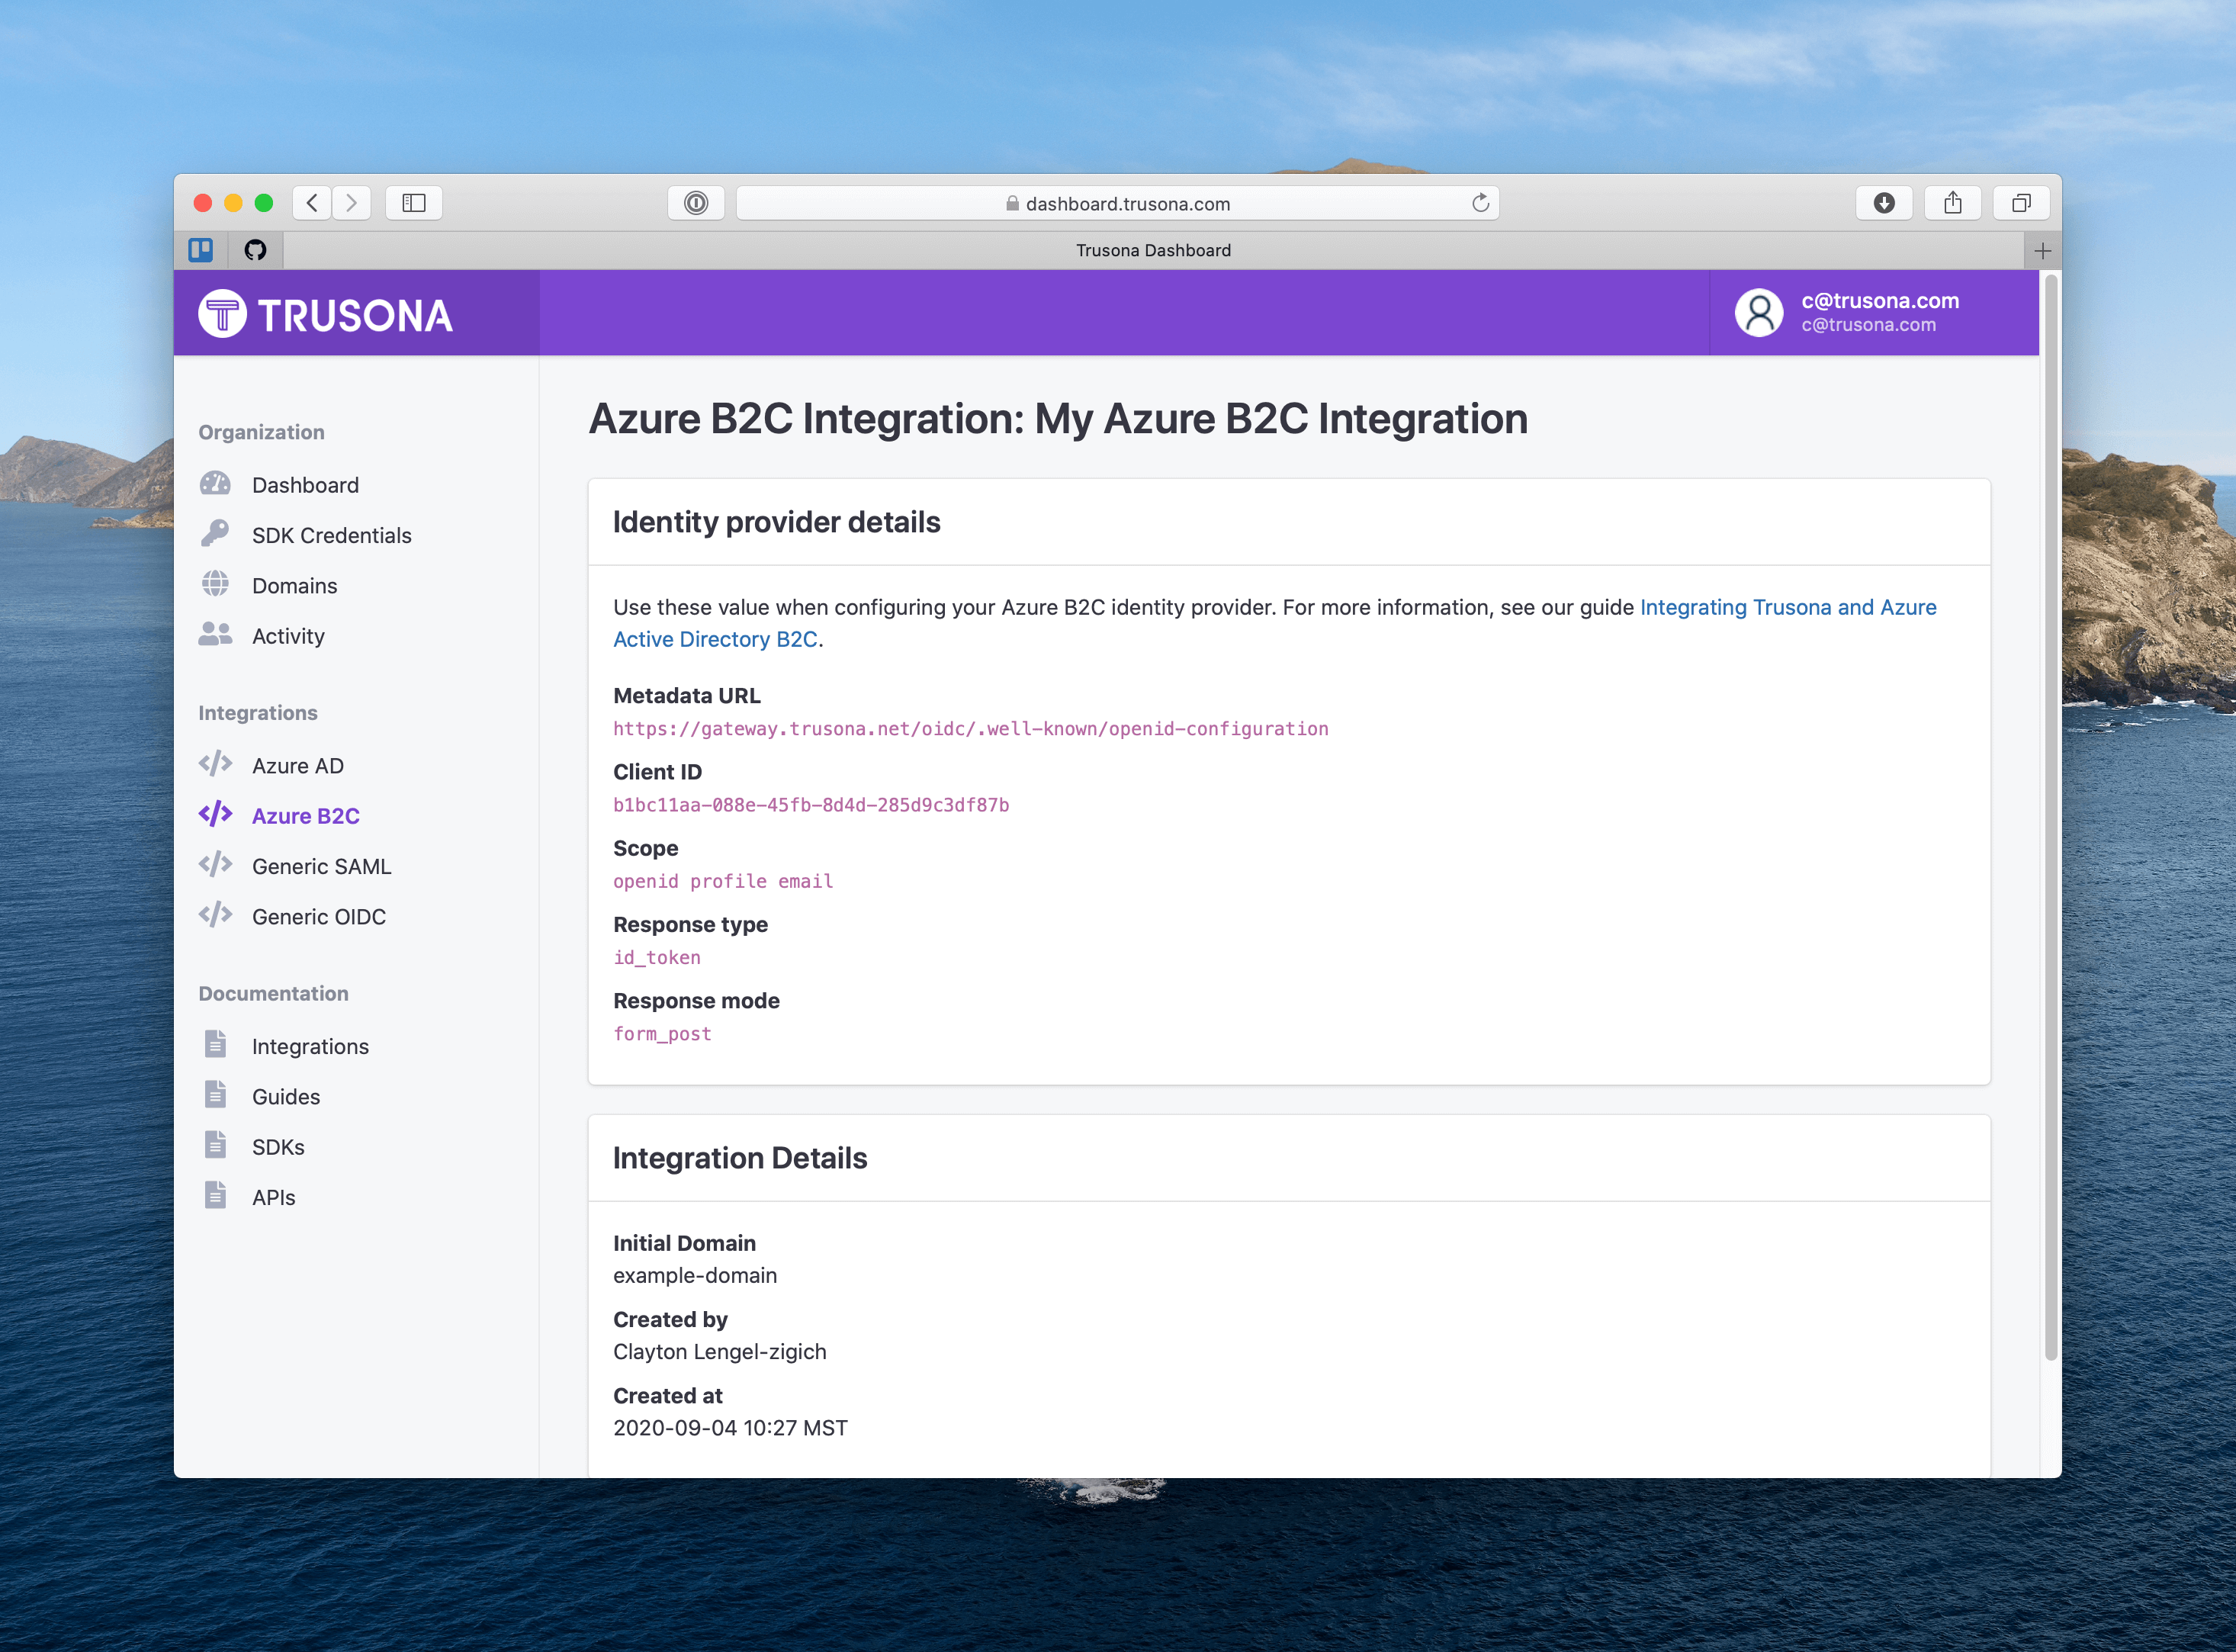
2.2.1. How to find the initial domain
You can find the initial domain in azure by navigating to the Custom Domains area of the azure admin console.
Typically the initial domain is the first part of the hostname before .onmicrosoft.com
For example, given the hostname example-app.onmicrosoft.com the initial domain should be entered into the Trusona Dashboard as example-app.
3. Azure B2C Configuration
3.1. Add New Identity Provider
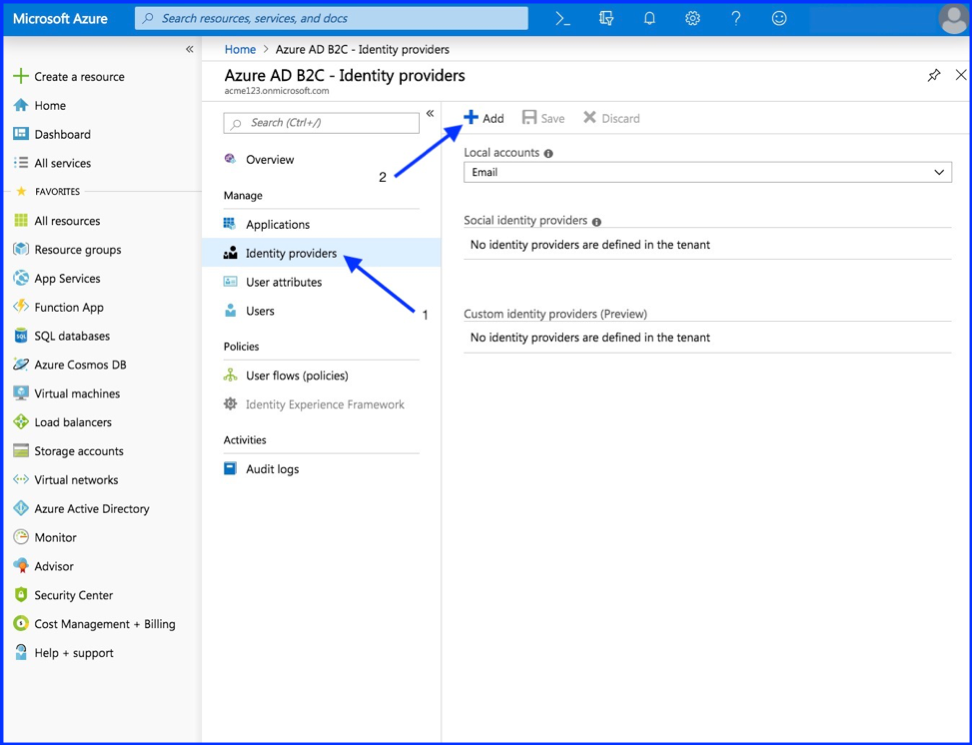
Dashboard > Azure AD B2 – Identity providers
- Select “Identity providers”
- Select “Add”
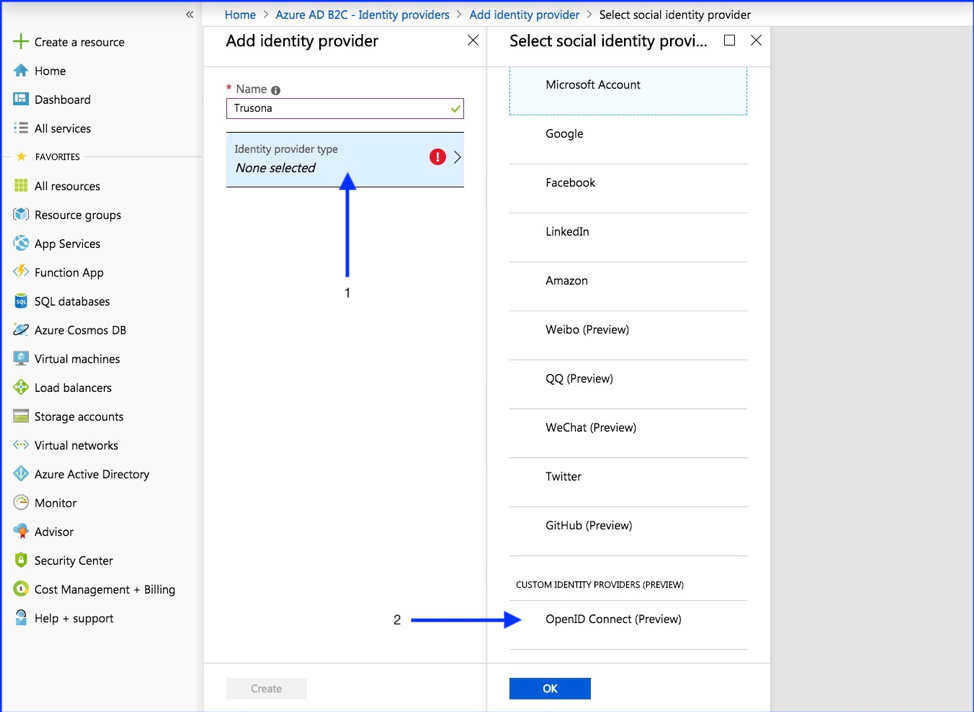
3.2. Configure Identity Provider
- Select “Identity provider type”
- OpenID Connect (Preview)
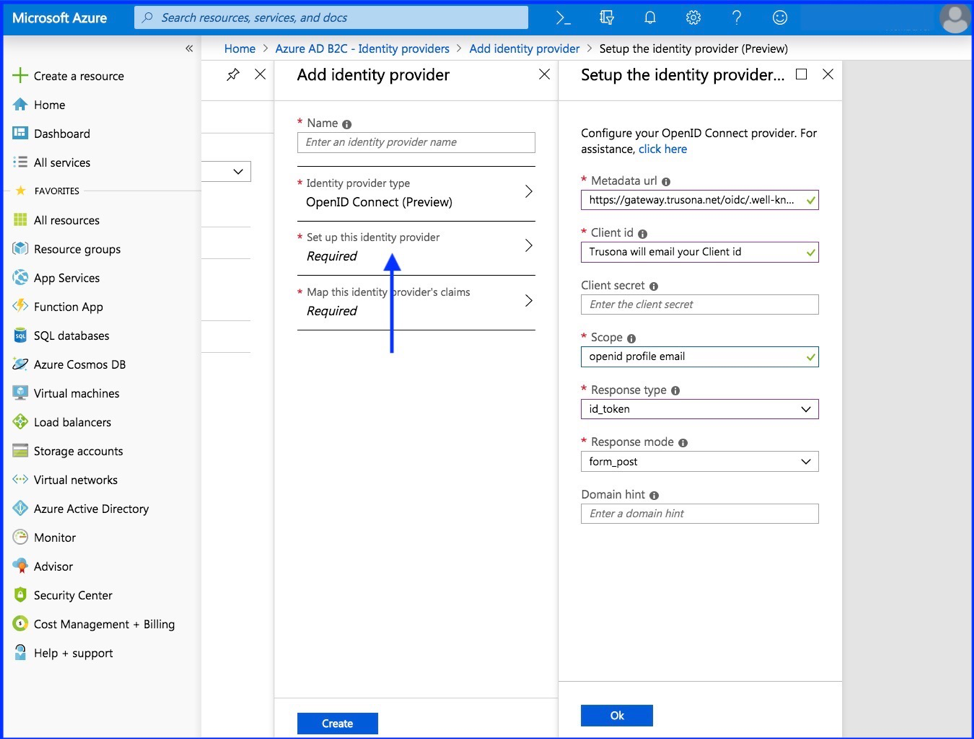
3.3. Set up this Identity Provider
For this step, you’ll need details from the integration you created in the Trusona Dashboard.
| Field | Value |
|---|---|
| Metadata URL | https://gateway.trusona.net/oidc/.well-known/openid-configuration |
| Client ID | Provided in the Dashboard |
| Scope | openid profile email |
| Response type | id_token |
| Response mode | form_post |
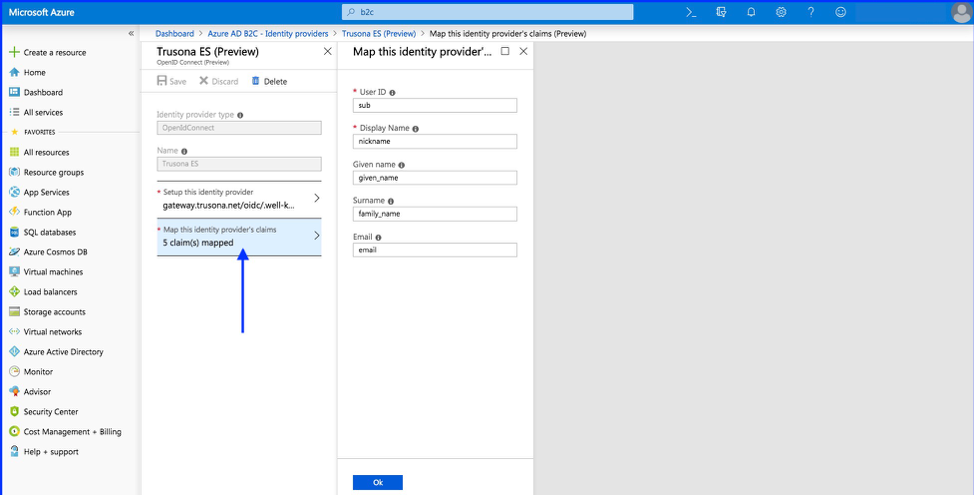
4. Set up claims mapping
Select “Map this identity provider’s claims”
| Field | Value |
|---|---|
| User ID | sub |
| Display name | nickname |
| Given name | given_name |
| Surname | family_name |
| Response mode |
Click Ok to complete the setup for your new OIDC Identity Provider.
5. Create user flow policy
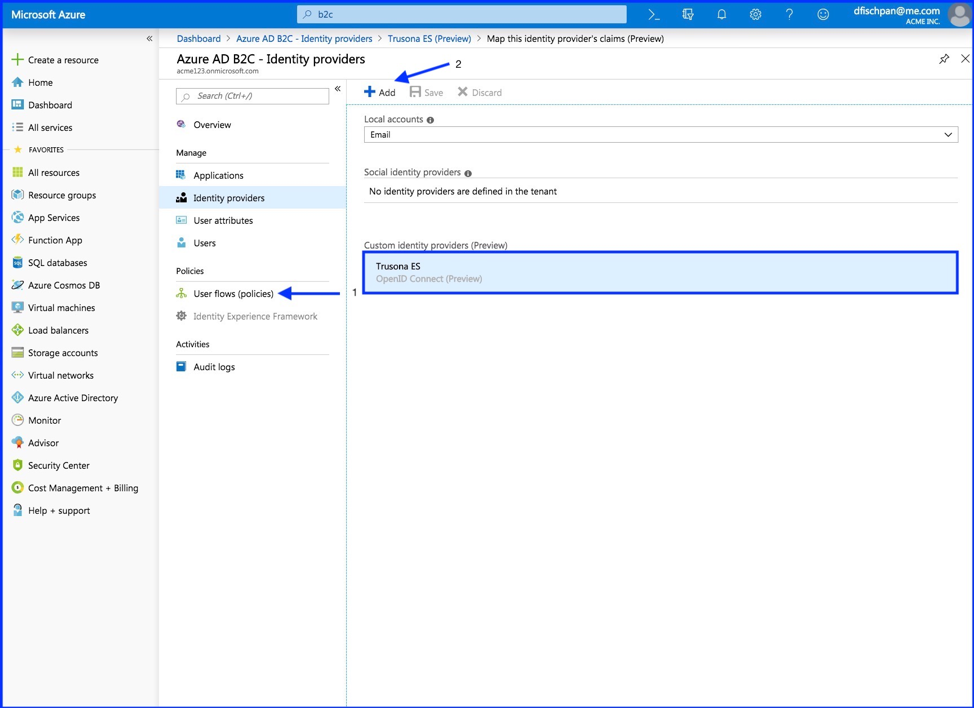
You should now see your new OpenID Connect Identity Provider listed within your B2C Identity Providers.
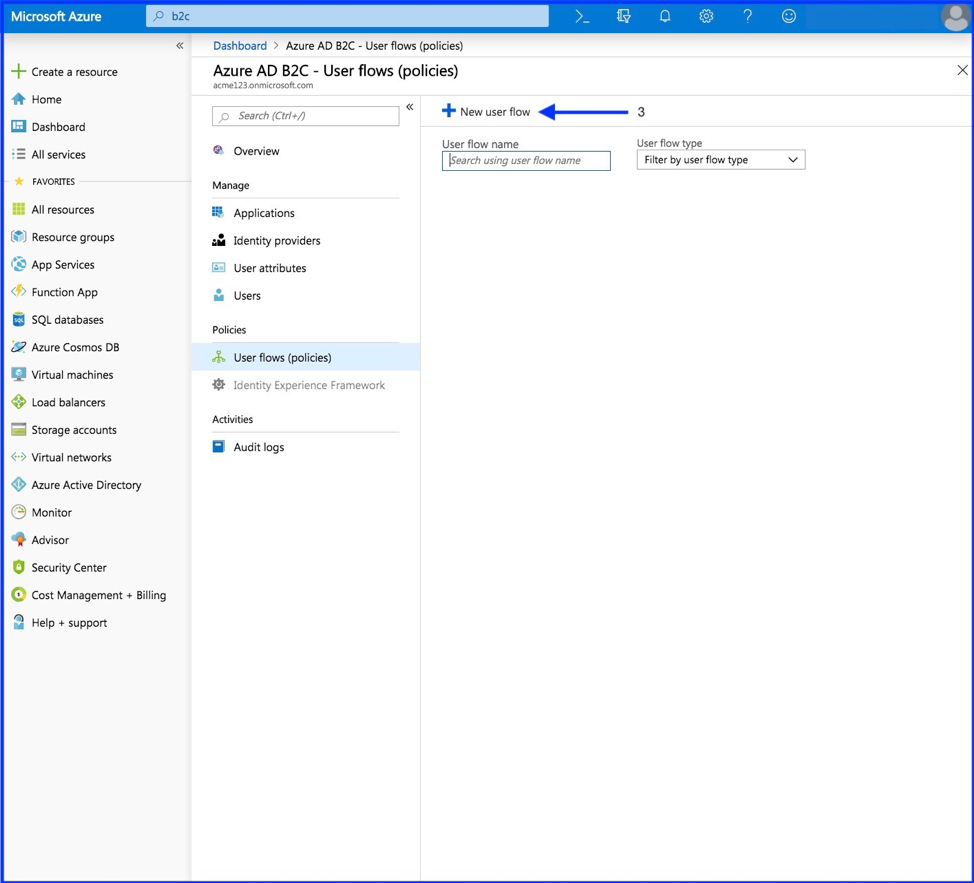
- Select “User flows (policies)”
- Select “Add”
- Select “New user flow”
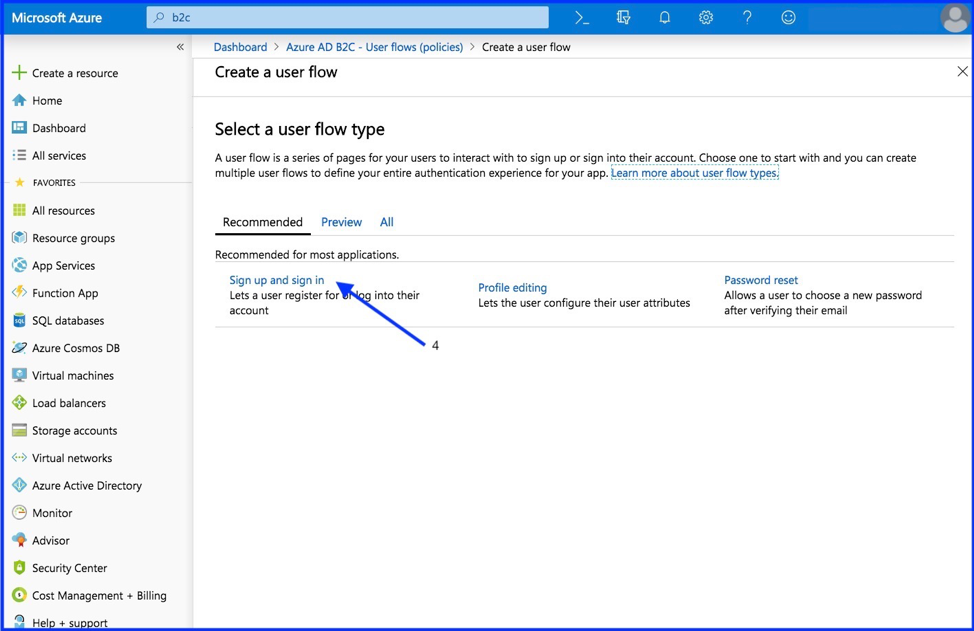
- Select “Sign up and sign in”
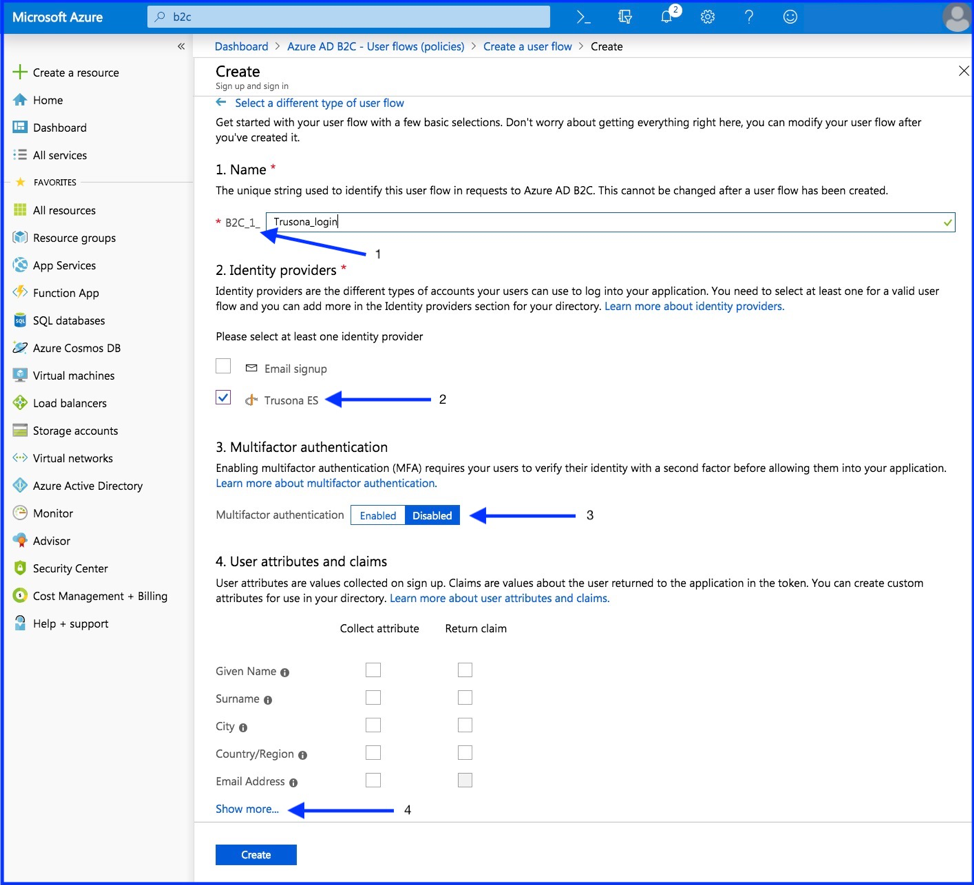
6. Configure Policy
- Name your policy
- Select your new created Trusona Identity Provider.
- Select “Create”
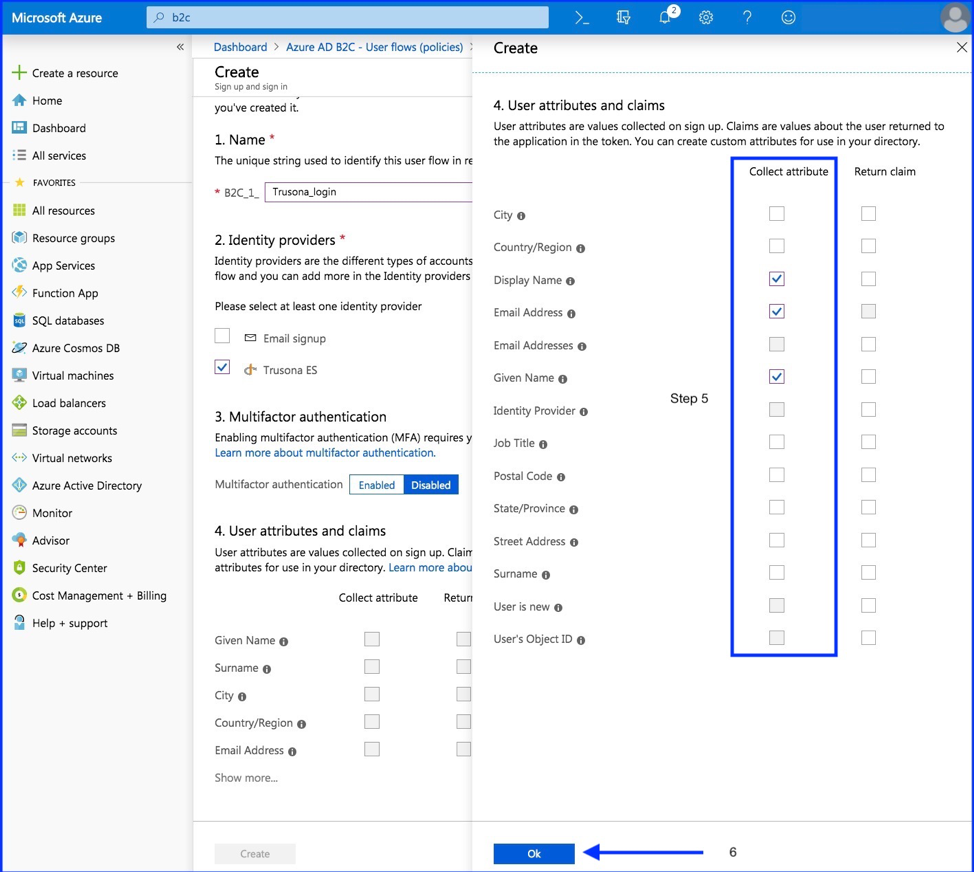
- Show more
- Select at least one attributes that you specified during the setup in “Step 5: Setup this Identity Provider”.
- Select “OK”
As Trusona is inherently multifactor, it’s best to leave multifactor authentication disabled.
7. Test Policy
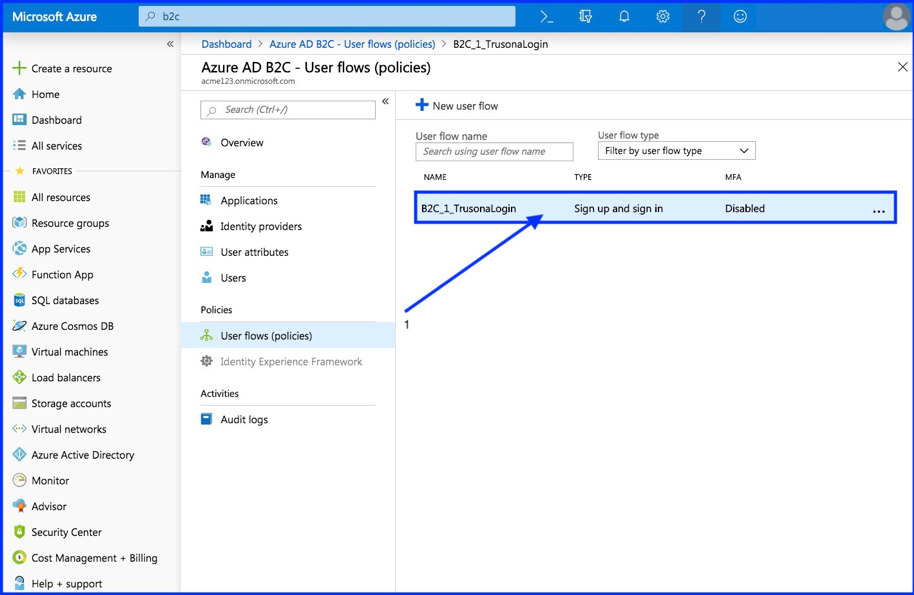
- Select your newly created policy
- Run user flow
- Enter Relying URL
- Run user flow
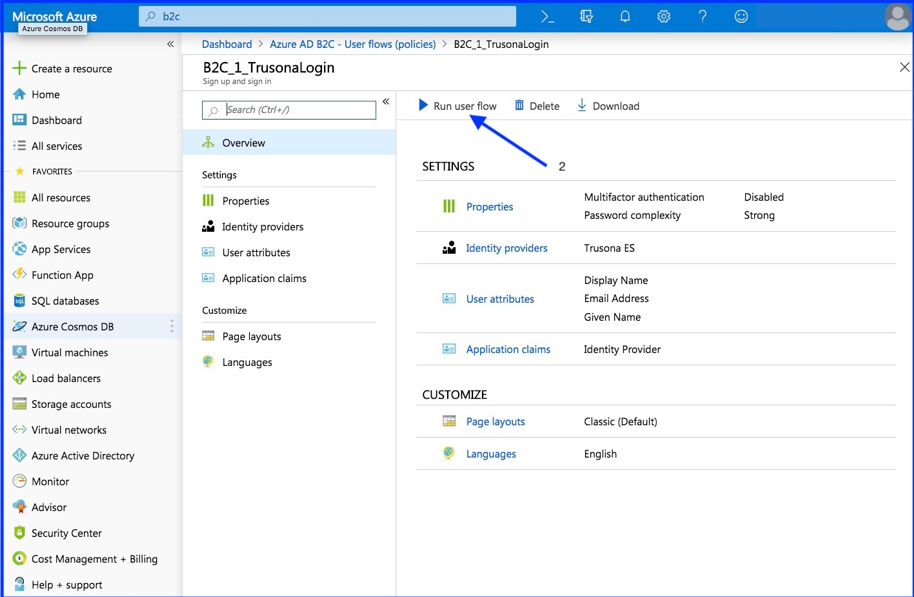
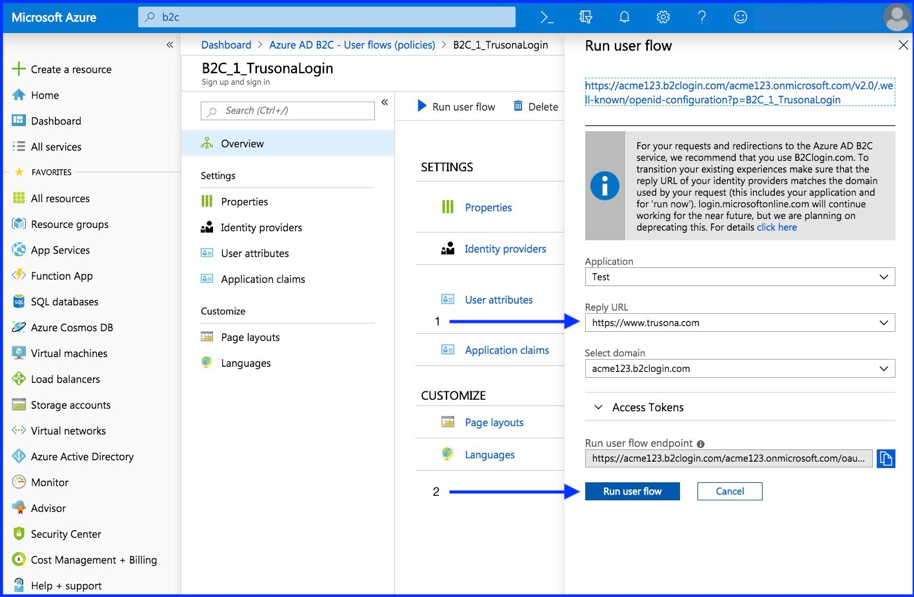
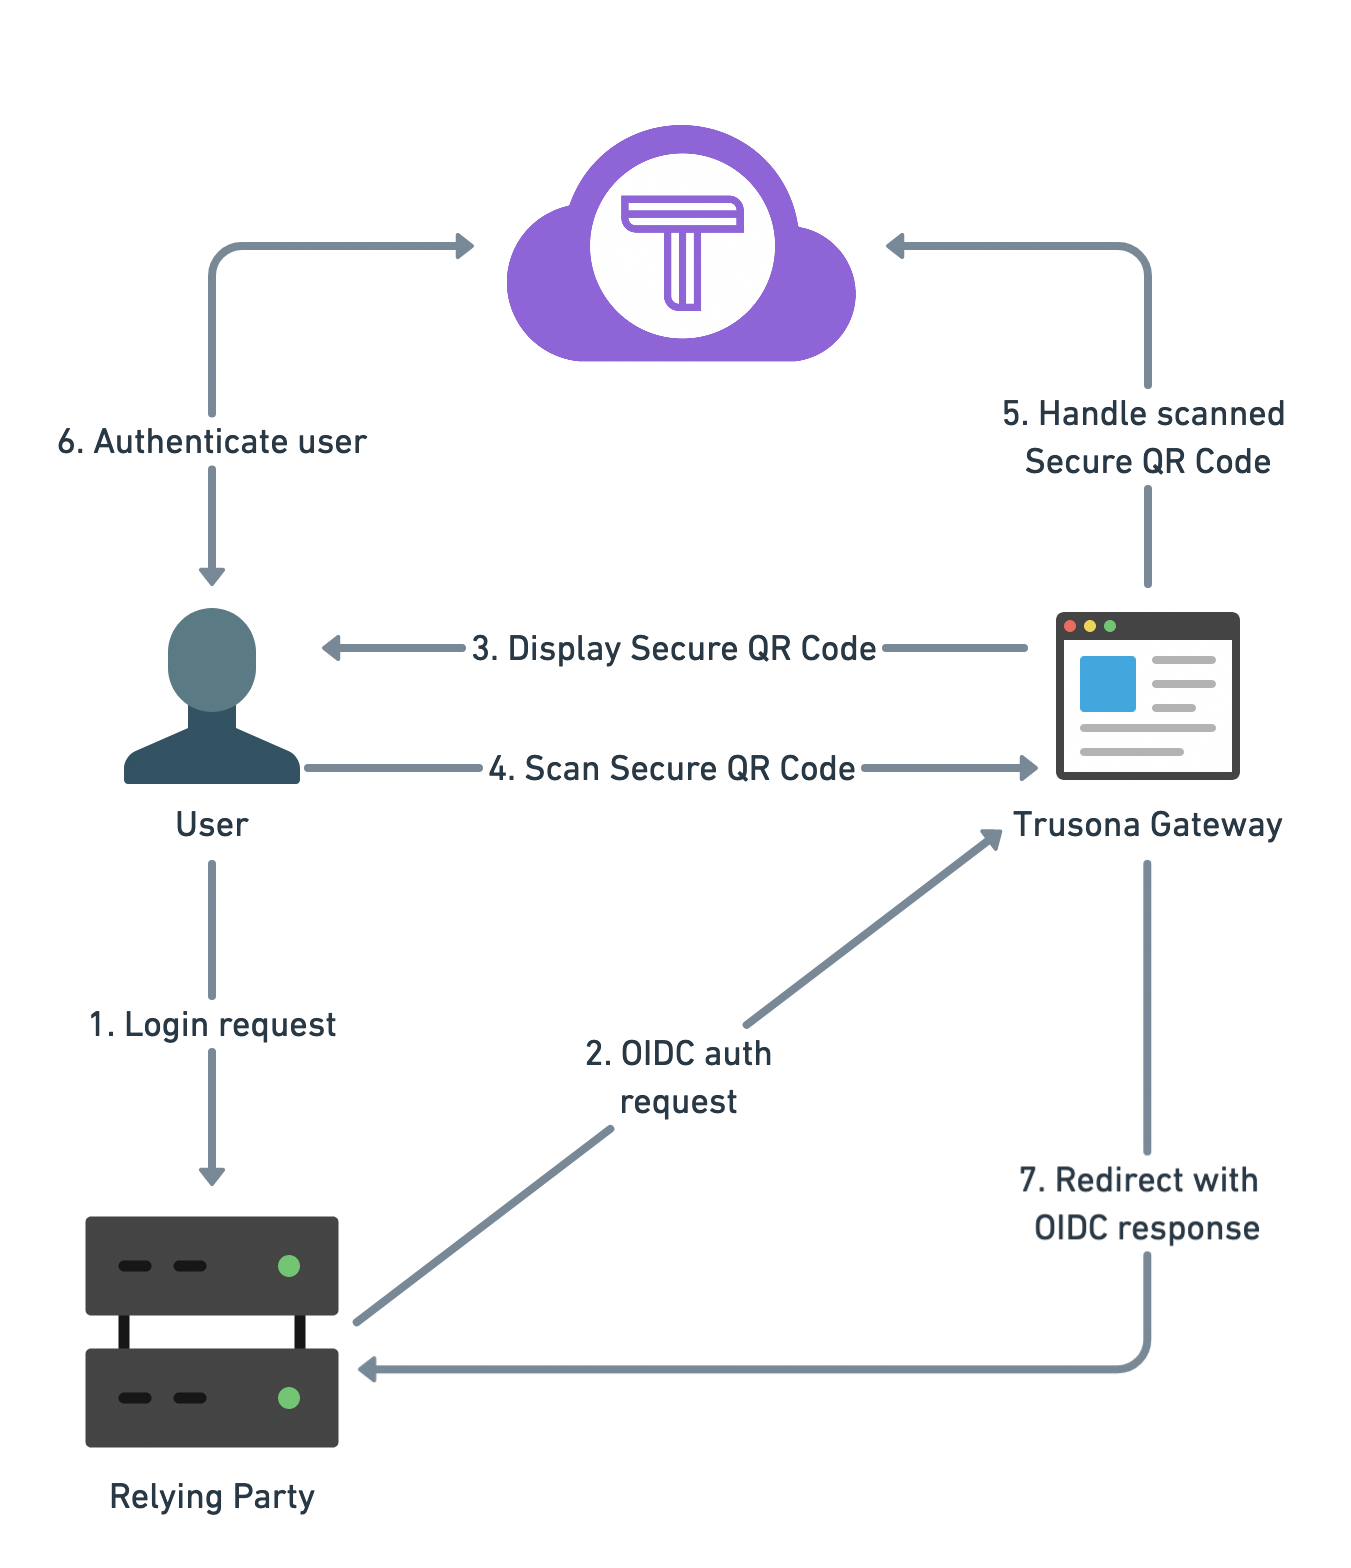
When clicking the Run user flow button, you will be redirected to the Trusona OIDC Gateway. On the Trusona Gateway you can scan the displayed Secure QR code with the Trusona App or with an custom app using the Trusona mobile SDK.
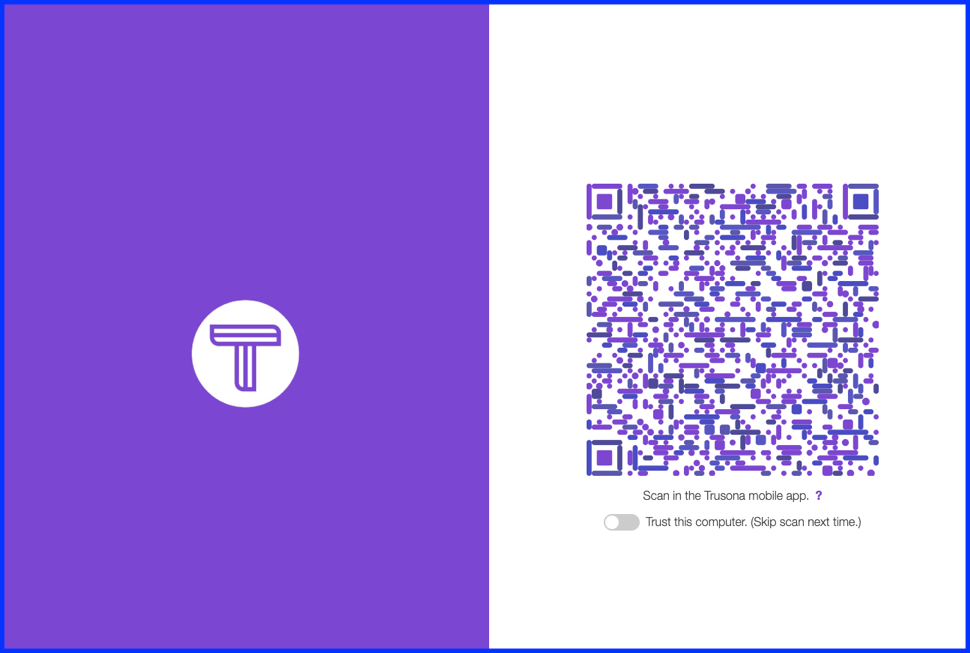
After scanning the Secure QR code, you should be redirected to the Reply URL you defined in the previous step.
8. Architecture
